How to Create a Route Map in PowerPoint: A Step-by-Step Guide
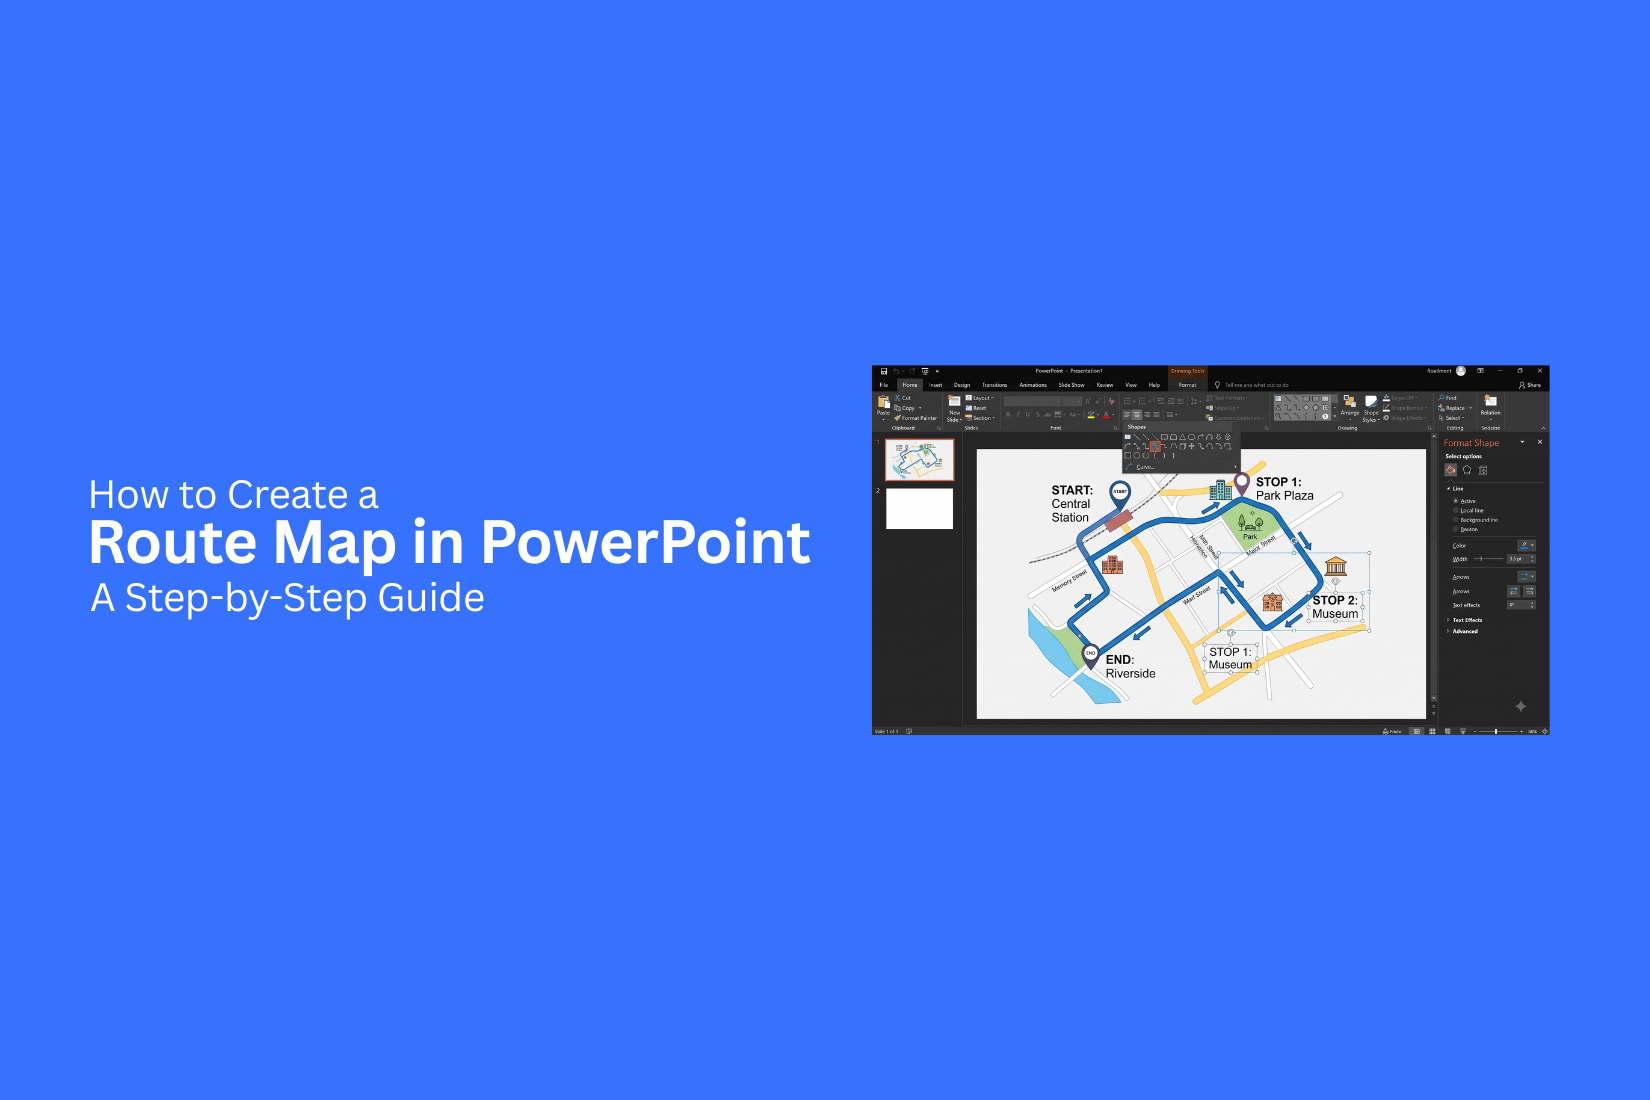
When you need to show travel paths, highlight multiple locations, or guide your audience from one place to another, a route map in PowerPoint can make the information easier to follow. Unlike road maps, which focus on roads and navigation, route maps can show a specific path between selected locations. In this guide, we will explain how to create a route map in PowerPoint using map images, shapes, lines, markers, labels, and arrows. You will also learn how to customize different route map types, avoid common design mistakes, and make your map interactive.
What Is a Route Map in PowerPoint?
A route map in PowerPoint shows the path from one point to another. It can show travel stops, project steps, business goals, or a process. Each point on the map marks a key stage or location. Lines connect the points to show the order or path. A route map can make a long process easier to follow. It gives the audience a clear view of where a journey starts, what happens along the way, and where it ends. You can build one with PowerPoint shapes, lines, icons, and text boxes.
Route Map vs. Road Map
A route map shows a path between specific points. It focuses on the steps or stops along a journey. For example, a sales team can use a route map to show the path from lead generation to a closed deal. A road map usually shows a broader plan. It may cover goals, projects, dates, or future plans. A product team may use a road map to show planned features across several months. The main difference is the focus. A route map shows a path, while a road map shows a plan or direction.
Common Uses of Route Maps in Presentations
Route maps work well for topics that have a clear path or sequence. Common uses include:
• Travel plans: Show cities, stops, and travel routes.
• Project plans: Show major project stages from start to finish.
• Sales processes: Show steps from finding leads to closing deals.
• Customer journeys: Show the stages a customer goes through.
• Business processes: Show how work moves from one step to the next.
• Event plans: Show locations, stops, or activities in order.
• Training programs: Show lessons or stages in a learning path.
• Product launches: Show key launch steps and target dates.
A well-made route map helps the audience see the full path on one slide. It also gives you a simple visual structure for explaining each stage during your presentation.
Why Use a Route Map in a PowerPoint Presentation?
A route map helps turn location data into a clear visual. It shows where a route starts, where it goes, and where it ends. This makes location-based information easier to explain during a presentation.
Show Travel Routes
A route map can show a full travel path from one place to another. Add stops along the route to show the order of a trip. You can use different colors or lines to separate travel paths. Add labels for cities, airports, hotels, or other key stops. This works well for travel plans, tour presentations, and event trips.
Explain Directions
Route maps can make directions easier to follow. A map can show the starting point, key turns, stops, and final destination. Use arrows to guide the audience along the path. Keep labels short and place them near the locations they describe. This helps people follow the route without reading a large block of text.
Highlight Multiple Locations
A single map can show several locations on one slide. This works well for presentations that cover offices, stores, event sites, or project locations. Use markers to point out each place. Give each marker a short label. You can also use different marker styles to group locations by type.
Present Logistics or Delivery Routes
Route maps can help explain how goods or services move between locations. Show warehouses, distribution centers, stores, and delivery points along the route. Arrows can show the direction of movement. Numbered stops can show the delivery order. This gives the audience a quick view of the full route and the key points along it.
Show Business or Market Coverage
A route map can also show where a business operates or serves customers. Mark cities, regions, stores, sales areas, or service locations on the map. Use colors or symbols to separate different markets or service areas. A clear map can help your audience see the areas a business covers without relying on a long list of locations.
How to Create a Route Map in PowerPoint
A route map can show how someone moves from one place to another. It can work for travel plans, delivery routes, business trips, event directions, project steps, or customer journeys. PowerPoint gives you several tools to build a route map. You can combine a map image with lines, arrows, shapes, icons, and text. The key is to keep the route easy to follow.
Step 1: Choose a Map for Your Slide
Start by choosing the map you want to use. Pick a map that covers the full route from the starting point to the final destination. A simple map usually works better than one filled with small details. Roads, cities, and major locations should be easy to see. A busy map can make your route and labels harder to read.
Check the shape of your route before choosing the map. A short city route may need a close-up map. A longer trip may need a wider view that shows several cities or regions. Think about the size of the slide too. A wide route needs enough horizontal space. A route with many turns may need more room for labels and markers.
You can use:
• A map image
• A map screenshot
• A custom map graphic
• A simple map illustration
• A map created from PowerPoint shapes
Choose the option that gives you enough space to show the route clearly.
Step 2: Add the Map to PowerPoint
Open PowerPoint and create a blank slide. A blank layout gives you more control over the map and other objects. Go to Insert > Pictures and add your map image. Select the image and resize it from the corners to keep its proportions.
Place the map in the main part of the slide. Leave space for the title and any extra information. You can crop the map to focus on the area that matters. Select the image, go to Picture Format > Crop, and remove areas that do not support the route. A large map can make the slide feel crowded. A map that is too small can make roads and labels hard to see. Use the available slide space wisely.
Once the map is in place, avoid moving it during the rest of the design process. You can also send it to the back using Arrange > Send to Back. This makes it easier to place lines, markers, and labels on top.
Step 3: Draw the Route
The route is the main part of the map. Use a line, curved line, or freeform shape to show the path. Go to Insert > Shapes and choose a line tool. Follow the roads or path shown on the map. For routes with several turns, use a freeform shape or connect several line segments. Make the route easy to spot. A thin line may disappear against the map. A thicker line gives the route more visual weight.
You can edit the route after drawing it. Select the line and use Shape Format to change its width, color, and style. Keep the route smooth. Avoid sharp jumps that make the reader unsure about the next part of the path. For a route with many sections, break the path into smaller parts. This gives you more control over each turn and makes later edits easier.
Step 4: Add Start and Destination Markers
Your audience should know where the route begins and ends. Add two clear markers to show these points. Use PowerPoint shapes such as circles, pins, or arrows. You can also add icons through Insert > Icons when suitable icons are available. Place the start marker directly on the first point of the route. Do the same for the destination marker.
Use short labels such as:
• Start
• Home
• Office
• Airport
• Hotel
• Final Stop
• Destination
Make the start and destination markers larger than regular stop markers. This creates a clear order between the main points and smaller locations. Keep the labels close to their markers. A long line between a marker and its label can make the map harder to follow.
Step 5: Add Stops and Landmarks
Many routes include several stops along the way. Add these points after the main route is complete. Use small circles, pins, numbers, or icons for each stop. Keep these markers consistent. For example, use the same circle size for every regular stop. Add only landmarks that help explain the route. A travel map may show hotels, stations, restaurants, or attractions. A business route may show offices, client locations, or delivery points. Numbered stops can work well for routes with a clear order. You could use 1, 2, 3, 4 to show the sequence.
Add a short label beside each stop. Long descriptions can take up too much space. Move extra details into a small information panel beside the map if needed. Check the spacing between markers. Several stops placed close together can overlap. Move labels slightly while keeping each marker near its location.
Step 6: Add Direction Arrows
Markers show where places are. Arrows show how the route moves between them. Add arrows along the route to make the travel direction clear. Go to Insert > Shapes and choose an arrow style. Place arrows near turns or between major stops. This helps the reader follow the route without tracing every part of the line. Keep the arrow size consistent. Large arrows can cover map details. Small arrows may be hard to see.
You can also place an arrow at the end of each route section. This works well for routes with several stops. Check every arrow before you finish. Each one should point in the correct direction. A single wrong arrow can make the entire route confusing.
Step 7: Add Route Labels
Labels give the reader more information about the route. They can show place names, stop numbers, distances, travel times, or route sections. Add a text box through Insert > Text Box. Place the label near the related route or marker.
Keep the wording short. For example:
• Stop 1: Main Office
• 5 miles
• 20 min
• Highway 12
• Client Meeting
• Final Destination
Use a clear font and a size that works well on the full slide. Avoid placing text directly over busy parts of the map. You can also use small text boxes with a light fill behind the text. This makes labels easier to read against roads and map details. Keep the same label style across the slide. The title, stop labels, and route details should have a clear visual order.
Step 8: Format the Map
With the main elements in place, adjust the design of the map. Start with the route line. Select it and change the line color, width, and style. Choose a color that stands out from the map background. Next, format the markers. Keep the start, destination, and stop markers visually distinct. The most important points should be easiest to spot.
You can also adjust the map image itself. Use Picture Format to change brightness, contrast, or transparency. A slightly lighter map can help the route stand out. Add a title at the top of the slide. A simple title such as "Chicago Delivery Route" tells the audience what the map shows. Avoid adding too many colors or decorative shapes. Every visual element should help the reader understand the route.
Step 9: Align and Group the Elements
A route map can contain many separate objects. Proper alignment keeps the slide clean. Use PowerPoint's alignment tools to position labels, markers, and route details. Select multiple objects and use Shape Format > Align to line them up. Grouping can also make editing easier. Select related objects, right-click, and choose Group > Group.
For example, you can group a marker with its label. You can also group a route section with its direction arrow. Grouping keeps related objects together as you resize or move them. It also reduces the chance of accidentally shifting one part of the map. Zoom in and inspect areas with several objects. Check for overlapping labels, uneven spacing, or markers that sit too far from the route.
Step 10: Review the Finished Route Map
The final review helps catch small problems before you present the slide. Start at the first marker and follow the route to the destination. Check every line, arrow, stop, and label along the way. Make sure the route follows the correct path. Confirm that all markers sit in the right locations. Check spelling and numbers in every label. Look for objects that overlap. Check whether any text is too small or any route section is hard to see.
Remove details that do not help explain the route. A cleaner map is easier to read. Finally, switch to Slide Show mode and view the map at presentation size. Check whether the route is clear from a distance. A finished route map should answer three basic questions quickly: Where does the route start? Where does it go? Where does it end?
How to Create a Route Map Using PowerPoint Shapes
PowerPoint shapes can help you build a simple route map from scratch. You can draw roads, mark stops, and show the path from one location to another. This method also gives you control over the map style, colors, and layout.
Draw Roads With Lines and Freeform Shapes
Start with a blank PowerPoint slide. Use Insert > Shapes to find the tools you need. Use Line or Curve shapes for simple roads. Click and drag to create straight roads. Use the Curve tool for roads that bend or change direction. Freeform shapes work well for more detailed roads. Click each point along the road to create the path. Double-click the last point to finish the shape. Keep major roads wider than smaller roads. This makes the map easier to read.
Create Custom Route Lines
A route line shows the main path between two or more locations. Use the Curve or Freeform tool to draw your route. Select the line and open the Shape Format tab. Adjust the line color and weight so the route stands out from the roads. A thicker route line works well for the main path. Use a thinner line for smaller roads. This creates a clear visual difference between the route and the map background.
Add Location Pins
Location pins help readers find key stops on the route. You can create a pin with shapes such as Oval, Teardrop, or Freeform. Place a small circle or icon at each stop. Add a short label beside it. Keep labels close to their locations so readers can match each label with the correct point. Use the same pin style across the map. You can use different colors to separate starting points, stops, and the final destination.
Add Direction Arrows
Arrows show the direction of travel. Select Insert > Shapes and choose an arrow shape or a line with an arrowhead. Place arrows along the route at key turns. Keep them large enough to see without covering the route line. Use only a few arrows. Too many can make the map look crowded and harder to follow.
Customize Colors and Line Styles
Colors help separate roads, routes, and locations. Pick a simple color set that keeps each map element easy to identify. Use a light color for background roads and a stronger color for the main route. Give location pins a separate color so they stand out. You can also change line weight, dash style, and transparency from the Shape Format options. Keep these settings consistent across the map. A clean route map should make the path clear at a glance. Remove extra shapes and details that do not help the reader follow the route.
How to Create a Route Map Using Google Maps
Google Maps can help you create a clear route map for your PowerPoint presentation. You can use it to find the path between two places, capture the map, and add it to your slide. PowerPoint then gives you more control over labels, markers, and other design details.
Find Your Starting Point and Destination
Open Google Maps and enter your starting point in the search box. Add your destination next. Check the locations to make sure they are correct. Click the Directions button to view the route between the two places. Google Maps may show more than one route. Pick the route that best fits your presentation.
Generate the Route
Review the route shown on the map. Check the roads, turns, and key places along the path. Choose the travel option that matches your needs, such as driving, walking, or public transit. Adjust the route if needed. A simple route is often easier for your audience to follow. Zoom in or out until the full route fits well on your screen.
Capture the Map
Use a screenshot tool to capture the map. Include the full route and enough nearby area to show where the route starts and ends. Keep the map free from extra information that does not support your message. A clean screenshot will make the PowerPoint slide easier to read. Save the screenshot as an image file on your computer.
Insert the Map Into PowerPoint
Open your PowerPoint presentation and go to the slide where you want the route map. Select Insert > Pictures > This Device. Find the map screenshot and add it to the slide. Resize the image from a corner so the map keeps its original shape. Place it where your audience can see the route clearly. Leave enough space around the map for your title, labels, or other slide content.
Add Your Own Route Markers and Labels
PowerPoint lets you add custom markers and labels on top of the map. Use Shapes to create circles, pins, arrows, or other markers. Add text boxes to name key locations. You can also use arrows to show the direction of travel. Keep the labels short and easy to read. Use the same style for each marker and label. This creates a clear visual path without covering too much of the map.
How to Make a Route Map Interactive in PowerPoint
An interactive route map lets viewers move through different points on your route. PowerPoint has simple tools for this. You can use hyperlinks, buttons, and animations to make the map easier to use.
Add a Map Hyperlink
Start by adding a hyperlink to the map. Select the map image or shape. Go to Insert > Link. Add the web address or another slide in the presentation. A link to another slide works well for a presentation with several route details. Each link can take viewers to a slide with more information about a location.
Link Location Markers
Add markers for key stops along the route. Use circles, pins, or other simple shapes. Select a marker and add a link to it. The link can open another slide with details about that stop. You can add text, images, or notes on the linked slide. This lets viewers select a location and view more information.
Add Navigation Buttons
Navigation buttons help viewers move through the map. Add simple shapes for buttons such as Next, Back, Home, or Route Details.
Select a shape and use Insert > Link to connect it to another slide. Keep the buttons in the same spot on each slide. This makes the map easier to use.
Animate the Route
Animations can show the route in stages. Select the route line or each part of the path. Open the Animations tab and choose an effect. Use simple effects such as Appear, Wipe, or Fade. Set the animation to start On Click or After Previous. A short animation can show how the route moves from one stop to the next.
How to Customize Your Route Map Design
A route map should make the path easy to follow. Good design helps the audience see the start point, stops, and final destination without extra effort. PowerPoint gives you simple ways to adjust colors, markers, icons, text, and map details.
Choose a Clear Route Color
Use a route color that stands out from the map background. A bright line can work well on a map with soft colors. Darker lines may work better on a light map. Keep the route color consistent across the slide. Use the same color for the full path. This helps the audience follow the route from start to finish. Avoid using too many route colors. Multiple colors can make the map harder to read.
Customize Location Markers
Location markers help show key points along the route. Use them for places such as the starting point, stops, and final destination. You can change the marker shape, size, and color in PowerPoint. Use different marker styles for different types of locations. For example, a circle can mark regular stops, while a star can mark the final destination. Keep the markers large enough to see. Small markers can get lost on a detailed map.
Add Icons and Landmarks
Icons can give more meaning to important locations. A hotel icon can mark a place to stay. A food icon can show a restaurant. A camera icon can mark a tourist spot. PowerPoint includes icons and shapes that you can add to your map. Use only icons that support the route story. Landmarks can also help the audience understand the area. Add a few major landmarks near the route. Too many icons can make the map look crowded.
Improve Text Readability
Labels should be easy to read at a glance. Use a clear font and a size that works well on the full slide. Place text close to its related marker. Keep enough space between labels so they do not overlap. A simple text box with a solid or lightly transparent fill can help text stand out from the map. Use bold text for key locations and smaller text for minor stops.
Remove Unnecessary Map Details
A detailed map can contain more information than your audience needs. Roads, street names, business names, and other details may distract from the route. Remove or hide details that do not support your main message. Keep the route, key locations, and useful landmarks. A cleaner map gives the route more visual space. It also helps the audience focus on where the journey starts, where it goes, and where it ends.
Route Map Examples for PowerPoint
A route map can show more than a trip from one place to another. It can explain movement, steps, locations, or plans. PowerPoint gives you many ways to use route maps for work, school, travel, and events.
Travel and Tourism Route
A travel route map can show a full trip from start to finish. Add cities, landmarks, hotels, or other stops along the path. Use numbers or short labels for each stop. Add small icons for places such as airports, hotels, beaches, or museums. A clear route helps viewers see the trip at a glance.
Road Trip Route
A road trip map can show the roads and stops in a planned journey. Mark the starting point, key stops, and final destination. Add short notes near each stop. You can also show the distance or travel time between locations. Keep the labels short so the map stays easy to read.
Delivery Route
A delivery route map can show the order of stops for drivers or delivery teams. Start with the main warehouse or office. Then connect each delivery point in order. Use numbered markers for each stop. Different icons can show stores, homes, offices, or pickup points. This format works well for route plans and team briefings.
Event Directions
An event route map can help guests reach a venue. Show nearby roads, parking areas, entrances, and key landmarks. Use arrows to guide visitors from major roads to the event location. Keep the map simple. Add only the details that guests need.
Sales Territory Route
A sales route map can show the areas or locations assigned to a sales team. Mark customer locations, sales offices, or planned visits. Use different colors for each sales area. Add numbers to show the visit order. This makes it easier to review daily or weekly sales routes.
Business Expansion Route
A business expansion map can show planned growth across cities, regions, or countries. Start with the current business location. Then show new markets or office locations. Use arrows to show the planned growth path. Add labels for each location and a short note about its role. This format works well for business plans and strategy presentations.
Project or Process Journey
A route map does not have to show a physical trip. It can also show the path of a project or process. Start with the first stage and connect each step to the next. Use icons or short labels for tasks, reviews, approvals, and final delivery. This creates a visual path that helps the audience follow the project from start to finish.
Route Map Design Tips
A route map should help people follow a path with little effort. A clean layout makes the route easy to spot. Use these tips to create a map that looks clear and works well in a PowerPoint presentation.
Keep the Map Simple
Remove details that do not help the viewer follow the route. Too many roads, labels, colors, or shapes can make the map hard to read. Show only the areas and points that support your message. A simple map also gives more space to the route itself.
Make the Route the Main Focus
The route should stand out from the rest of the map. Use a clear line with enough width and a strong color. Keep the background less noticeable. Add arrows or direction markers to show the path. The viewer should spot the route before other map details.
Use Consistent Icons
Use the same icon style across the map. A location marker, stop icon, or destination icon should have a similar look and size. Keep the number of icon types small. Too many styles can make the map feel busy. A simple icon system also helps viewers understand the map faster.
Label Important Locations
Add labels to key stops, cities, landmarks, or destinations. Keep each label short and easy to read. Place labels close to their locations without covering the route. Use the same font style and size for similar types of locations.
Use High-Quality Map Images
Start with a clear map image. A low-quality image can look blurry after you resize it in PowerPoint. Choose an image with enough detail for your slide size. Check the map at full-screen view before adding other design elements.
Make the Map Readable From a Distance
A route map may look clear on your computer but become hard to read on a large screen. Use large labels, clear lines, and strong contrast. Keep key details away from crowded areas. Leave enough space around the route and labels. Test the slide from a distance to see if the main path and locations are easy to spot.
Common Route Map Mistakes to Avoid
A route map should help people understand a path with little effort. Small design mistakes can make the map hard to read. Keep the layout simple and make the route clear from the start.
Adding Too Much Map Detail
Too much detail can make a route map look crowded. Extra roads, landmarks, and text can distract from the main path. Show only the map details that help explain the route. Remove items that do not support the main message. A clean map is easier to read on a slide.
Using Too Many Colors
Too many colors can make the map confusing. Each color should have a clear purpose. Use one main color for the route. Add one or two other colors for key points or labels. Keep the rest of the map more neutral so the route stands out.
Making the Route Hard to Follow
A route should be easy to trace from the starting point to the final location. A messy line or unclear direction can cause confusion. Use a clear route line with enough space around it. Add arrows to show movement. Mark the start and end points with simple icons or labels.
Using Small Labels
Small labels are hard to read, especially during a presentation. This problem gets worse on large screens. Use a clear font and a readable size. Keep labels short. Place them close to the locations they describe without covering the route.
Adding Too Many Locations
A map with too many locations can lose its main purpose. The audience may not know which points matter most. Add only the locations needed to explain the route. Group nearby stops when possible. Highlight the most important locations with a simple marker.
Using Low-Quality Images
A blurry map can make the whole slide look poor. Low-quality images also make roads, labels, and landmarks harder to read. Use a clear map image with enough resolution for your slide size. Check the image at full-screen view before presenting. Make sure text and key map details stay sharp.
Final Notes
A route map can turn a complex path into a clear visual story. PowerPoint gives you the tools to build route maps with map images, shapes, lines, markers, arrows, icons, and labels. You can use these maps for travel plans, delivery routes, business locations, event directions, sales areas, and project steps.
Keep the design simple and make the route easy to trace. Mark the start, key stops, and destination clearly. Use readable labels, consistent icons, and a route color that stands out from the map. Remove details that do not support the main message. Review the full slide before presenting it to make sure the path, locations, and directions are clear from a distance.
FAQs
What is a route map in PowerPoint?
A route map in PowerPoint shows a path between two or more locations. It can include lines, arrows, markers, labels, and icons to show the route and key stops.
How do I create a route map in PowerPoint?
Add a map image to a blank slide. Then use PowerPoint shapes to draw the route. Add markers for the start, stops, and destination. Finish with labels and direction arrows.
Can I create a route map without a map image?
Yes. You can build a simple route map from scratch with PowerPoint lines, curves, freeform shapes, markers, icons, and text boxes.
Can I use Google Maps to create a route map for PowerPoint?
Yes. You can create a route in Google Maps, capture the map as an image, and add it to PowerPoint. You can then add your own markers, labels, and arrows.
How do I show directions on a PowerPoint route map?
Use arrows along the route to show the direction of travel. Place arrows near turns or between major stops. Make sure every arrow points in the correct direction.
How do I mark stops on a route map?
Use circles, pins, numbers, or icons to mark stops. Keep the same marker style for regular stops. Use different markers for the start and final destination.
Can I make a route map interactive in PowerPoint?
Yes. You can add hyperlinks, navigation buttons, and animations. Links can take viewers to another slide with more details about a location.
How can I make a route map easier to read?
Use a clear route line, short labels, consistent markers, and a simple color set. Remove map details that do not support the route. Make sure text and markers are large enough for a presentation screen.
What are common route map mistakes in PowerPoint?
Common mistakes include adding too much map detail, using too many colors, making labels too small, adding too many locations, and using low-quality map images. These issues can make the route hard to follow.


You may also be interested in ...

How To Create An Eye-Catching Portfolio
If you’re looking to create an eye-catching portfolio, this post will come in handy. In this article, you can find the easies...
23 Jun, 2024

How To Easily Create An Infographic
Infographics are the perfect way to make a presentation that will impact an audience, but their design and composition might...
08 Jun, 2024

PowerPoint Template Tips & Tricks You Ne...
PowerPoint seems to be an unknown world for many people, especially those who have been assigned to create a presentation out...
08 Jun, 2024