How to Crop a Picture Quickly and Easily in Google Slides

Cropping images in Google Slides can feel confusing, especially if you want your presentation to look neat and professional. Many users spend more time adjusting pictures than creating content, which slows down their workflow.
Luckily, Google Slides makes cropping simple and quick. With just a few clicks, you can adjust your images to fit perfectly on any slide. This not only saves time but also gives your slides a polished, organized appearance that grabs attention and makes your message clear.
2 Easy Methods to Crop an Image in Google Slides
Learning to crop images in Google Slides is simple and quick. Below, we will show two easy methods to adjust your pictures perfectly. Follow along to see each step clearly.
Method 1: Crop the Image by Double-Click and Drag
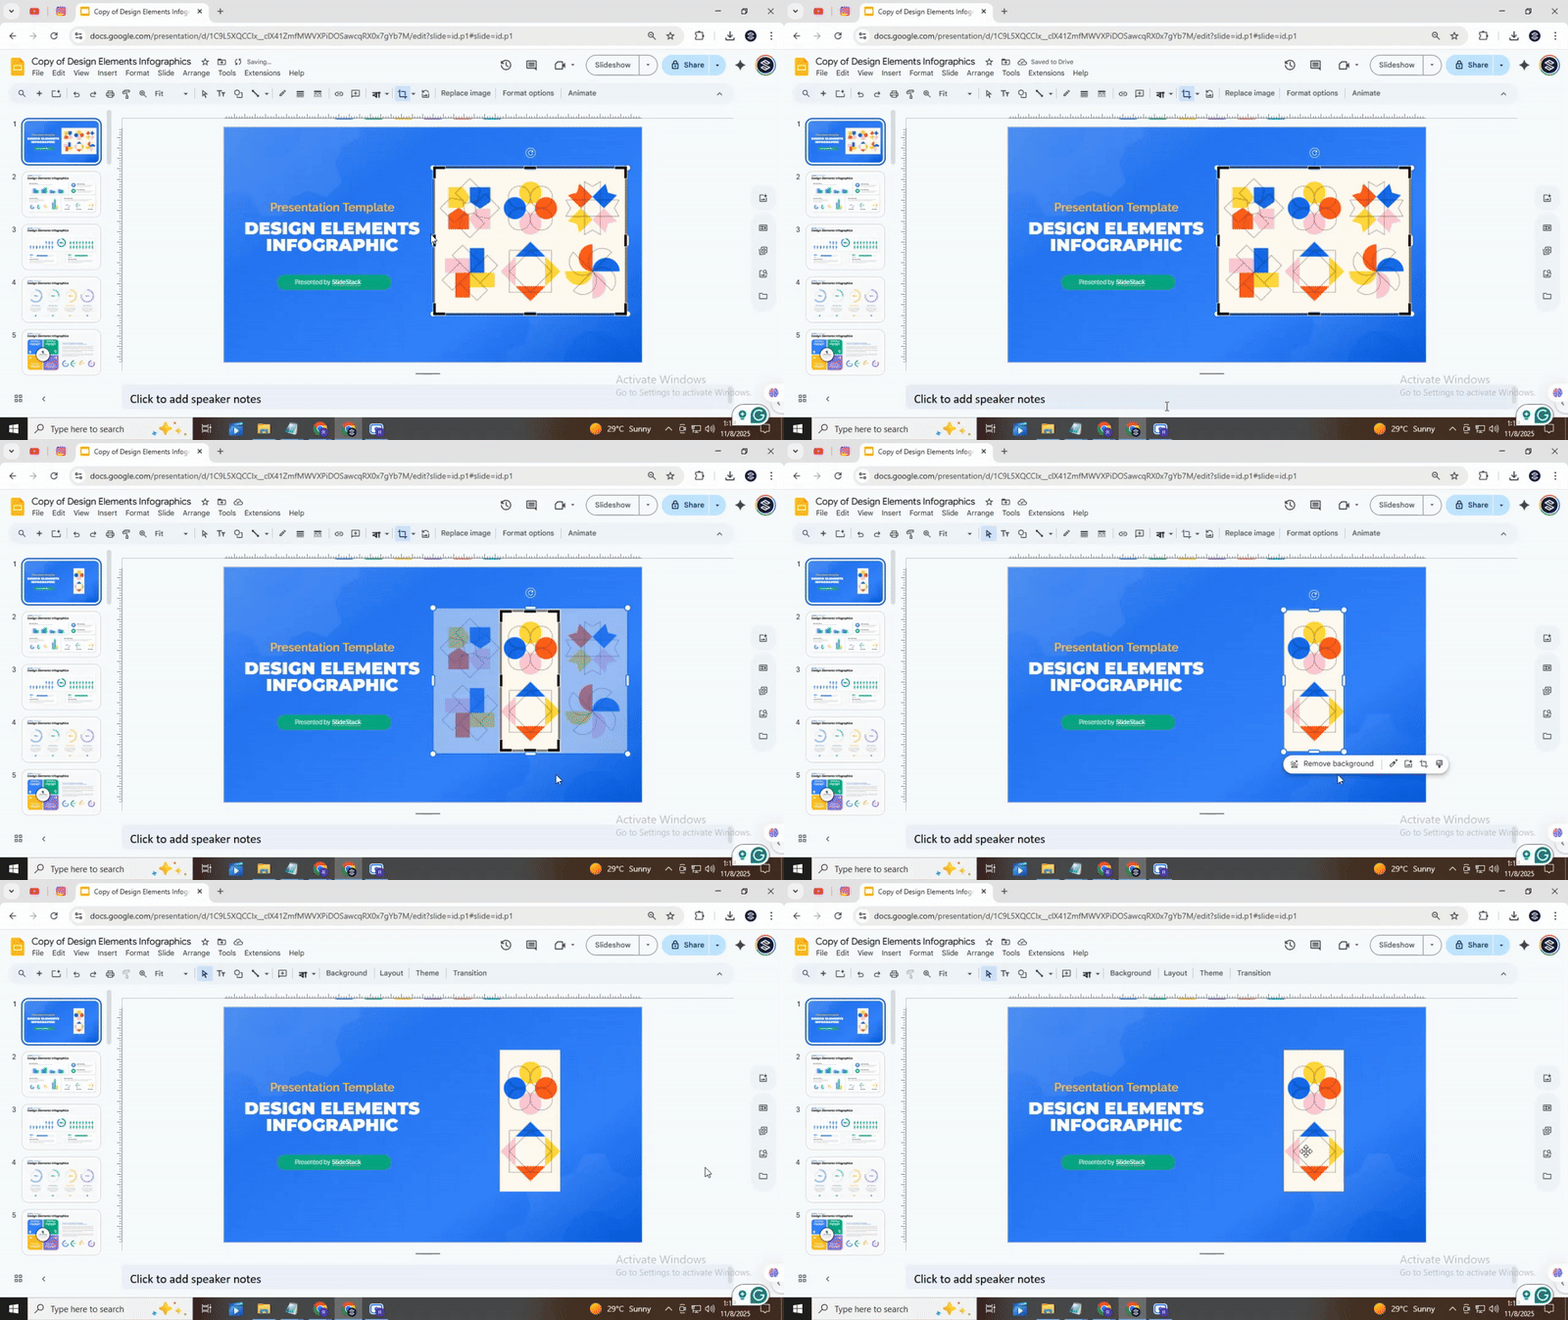
Start by selecting the image you want to crop. Click on it so that a border with small handles appears around the edges. This confirms the image is active and ready for editing.

Next, double-click directly on the image to enter crop mode. You will notice the handles change, showing that you can now adjust the visible area of the image.

To crop, click and drag any of the corner or side handles. Pulling the handles inward trims the edges, while dragging outward restores parts of the image that were previously hidden.

If you want to maintain the image’s proportions, hold down the Shift key while dragging a corner handle. This keeps the width and height proportional, preventing the image from stretching or squashing.

Finally, click outside the image or press Enter to apply the crop. The image now shows only the section you selected. You can double-click again at any time to make further adjustments.
Read also: How to Bring an Image Forward in Google Slides (Simple Guide)
Method 2: Creative Cropping with Shapes
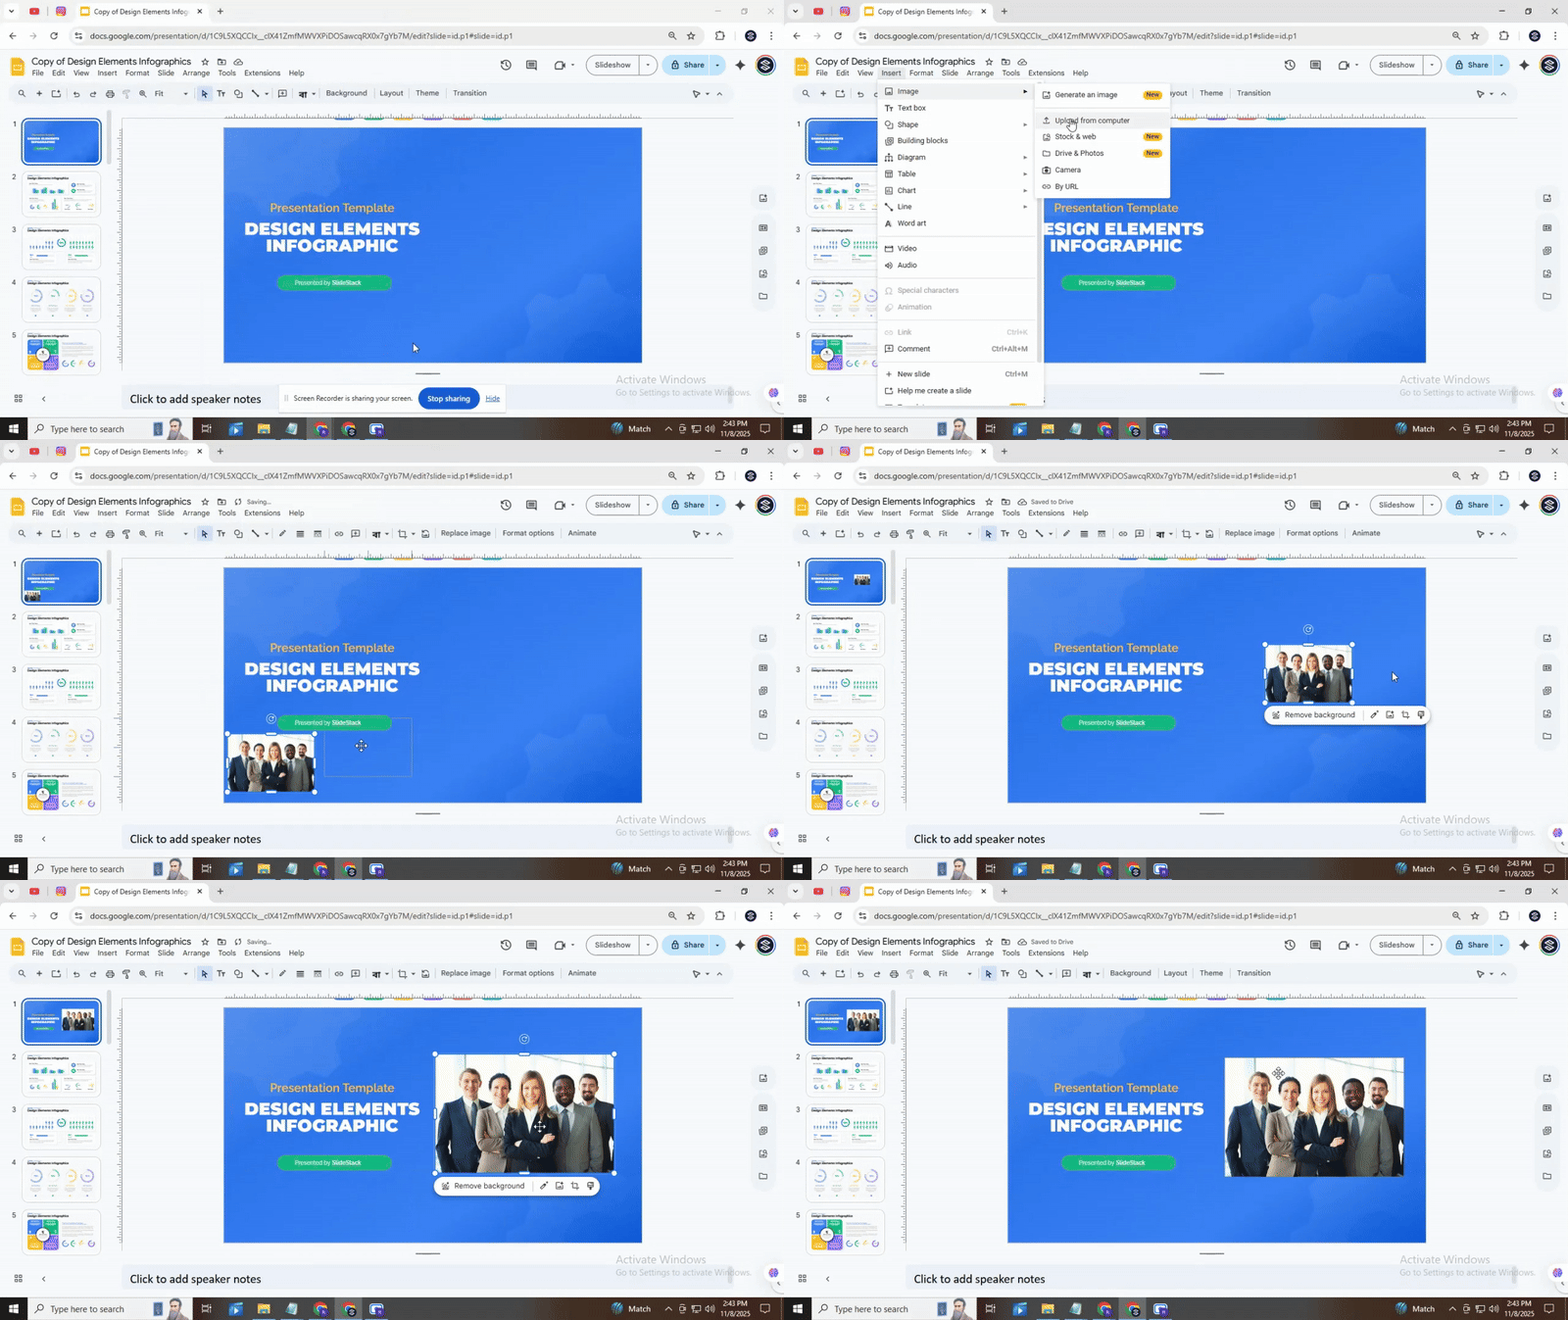
1. Insert Your Image
Start by placing your image on the slide. Click “Insert” from the top menu, then select “Image” and choose where to upload it from. Once your image appears, you can move it around to find the best spot on your slide.

2. Pick a Shape
Next, select the shape you want your image to take. Click the small arrow next to the crop icon and choose “Shape.” A menu will appear with circles, triangles, stars, and more. Here comes the magic! Pick a shape that suits your design. You can always try a few before deciding.

3. Position the Image
Now, move your image inside the shape. Click and drag to adjust the portion that shows. You can also resize the image slightly so important parts fit nicely within the shape. (It’s like framing a picture in a unique way.)

4. Apply the Mask
Once your image is aligned, click to crop it into the shape. The shape becomes the frame, and the rest of the image disappears. Don’t worry, your original image is still there if you want to adjust it later.

5. Refine and Adjust
After masking, you can make small changes. Rotate the shape slightly for a playful tilt or resize it to fit your layout. Experiment with different shapes on multiple images to create a visually dynamic slide.

Creative cropping is an easy way to make your slides stand out. By combining shapes, positioning, and subtle adjustments, you can turn ordinary images into engaging visuals. Give yourself permission to experiment and see how different shapes change the feel of your presentation.
Read also: How to Make an Image Circular in Google Slides: Step-by-Step Tutorial
Conclusion:
Using the double-click method or shapes makes adjusting images quick and simple. Dragging handles or trying different shapes can change how your slides look and feel. These small steps help your presentation appear polished while keeping your focus on your message. Try these techniques to make your slides sharper and more engaging with minimal effort.
FAQs:
Can I edit pictures in Google Slides without messing up the originals?
Yes. Google Slides lets you edit a copy of your picture, so the original file stays safe. You can adjust size, crop, or mask without changing the original image saved on your computer.
Are there specific sizes I can crop to in Google Slides?
You can crop pictures to any size you want, but Slides also offers preset shapes like circles, squares, and triangles. These make it easier to fit your image into a certain design.
Can I undo the crop if I don’t like it?
Yes. Right after cropping, press “Undo” or use Ctrl+Z (Cmd+Z on Mac) to revert the change. You can also re-crop the image anytime to adjust it again.
Is there a limit to how many pictures I can crop on one slide?
No strict limit exists. You can crop as many pictures as you want, but too many images may slow down Slides. It’s best to keep your slide simple for smooth editing.
What are the masking options available in Google Slides?
Masking lets you change the shape of an image. You can pick shapes like circles, stars, arrows, or custom shapes to fit your design.
How do you freehand crop a picture in Google Slides?
Google Slides doesn’t support true freehand cropping. You can use shapes as masks to create a custom outline that fits your image instead
You may also be interested in ...
How To Create An Eye-Catching Portfolio
If you’re looking to create an eye-catching portfolio, this post will come in handy. In this article, you can find the easies...
23 Jun, 2024
How To Easily Create An Infographic
Infographics are the perfect way to make a presentation that will impact an audience, but their design and composition might...
08 Jun, 2024
PowerPoint Template Tips & Tricks You Ne...
PowerPoint seems to be an unknown world for many people, especially those who have been assigned to create a presentation out...
08 Jun, 2024


