How to Arrange and Align Objects in Google Slides: Tips and Tricks
Creating a polished slide can be frustrating when text boxes, images, or shapes don’t line up properly. Messy layouts make your presentation look unprofessional and distract your audience from the main message.
Fortunately, Google Slides offers simple tools to help you arrange and align objects with precision. By using built-in features like guides, grids, and alignment options, you can quickly organize elements on your slides without guessing or trial-and-error.
With the right techniques, your slides will look clean, professional, and visually appealing. This guide will walk you through step-by-step methods to align text, position objects, and make your presentations more organized and engaging.
Why Text Alignment Matters in Google Slides
Have you ever driven on a road that zig-zags all over the place? It feels messy, confusing, and a little stressful. Now think about a straight road. Smooth, predictable, easy to follow. Slide design works the same way. When your elements are aligned, your slides feel like that straight road, calm, clear, and easy to navigate.
Alignment in your slides helps in several ways:
• Clarity: Viewers can quickly understand your message without distraction.
• Focus: Important points stand out, guiding the eye naturally.
• Balance: Everything feels organized and comfortable to look at.
• Professional look: Your slides look polished and well-thought-out.
No matter if you’re giving a school project or a business presentation, good alignment makes your slides easier to read and more enjoyable for your audience. It’s a simple step that makes a big difference in how your work is received.
Arranging an Object
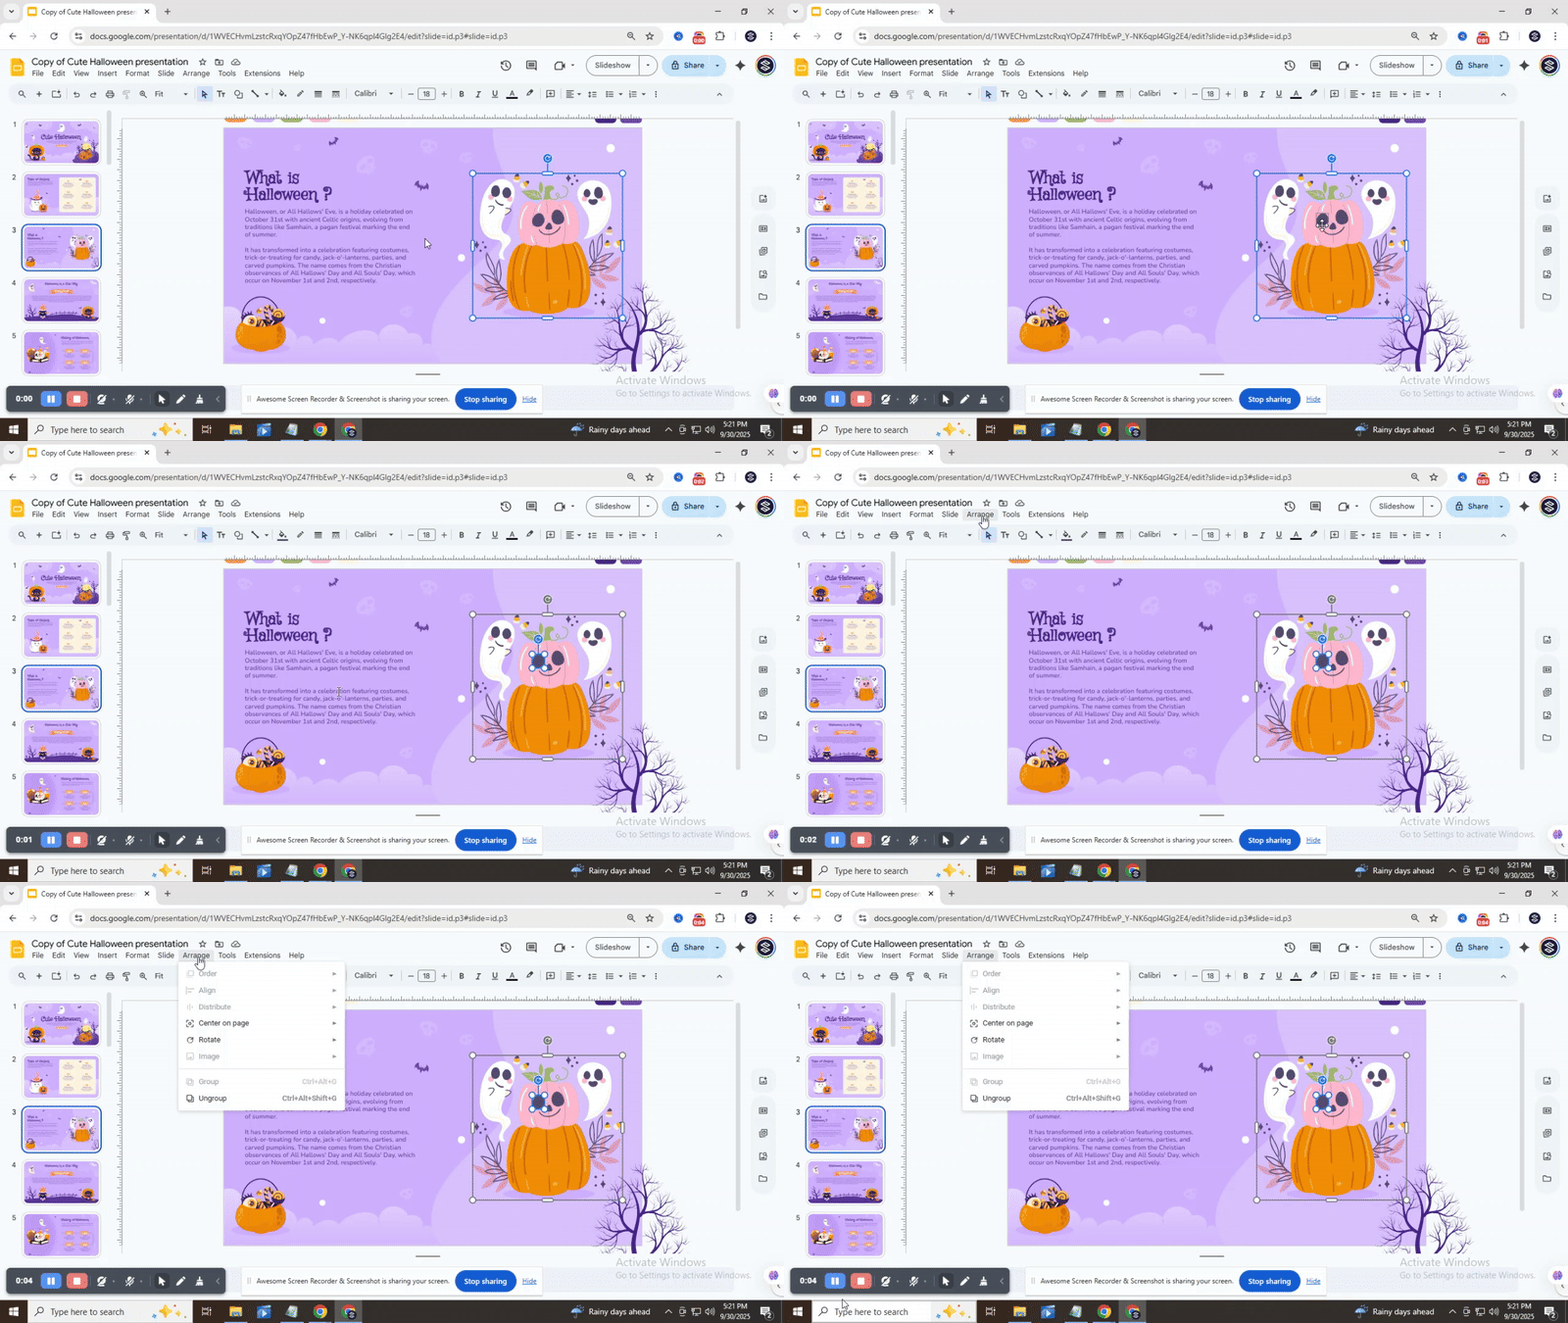
To arrange an object, start by selecting it on your slide or workspace. You can find the arrangement tools in the main menu, usually under Arrange. This menu helps you control the position, order, and rotation of objects.
Arrange Menu
The Arrange menu contains several options that let you change how objects are layered and positioned. These options work on shapes, images, text boxes, and other elements.
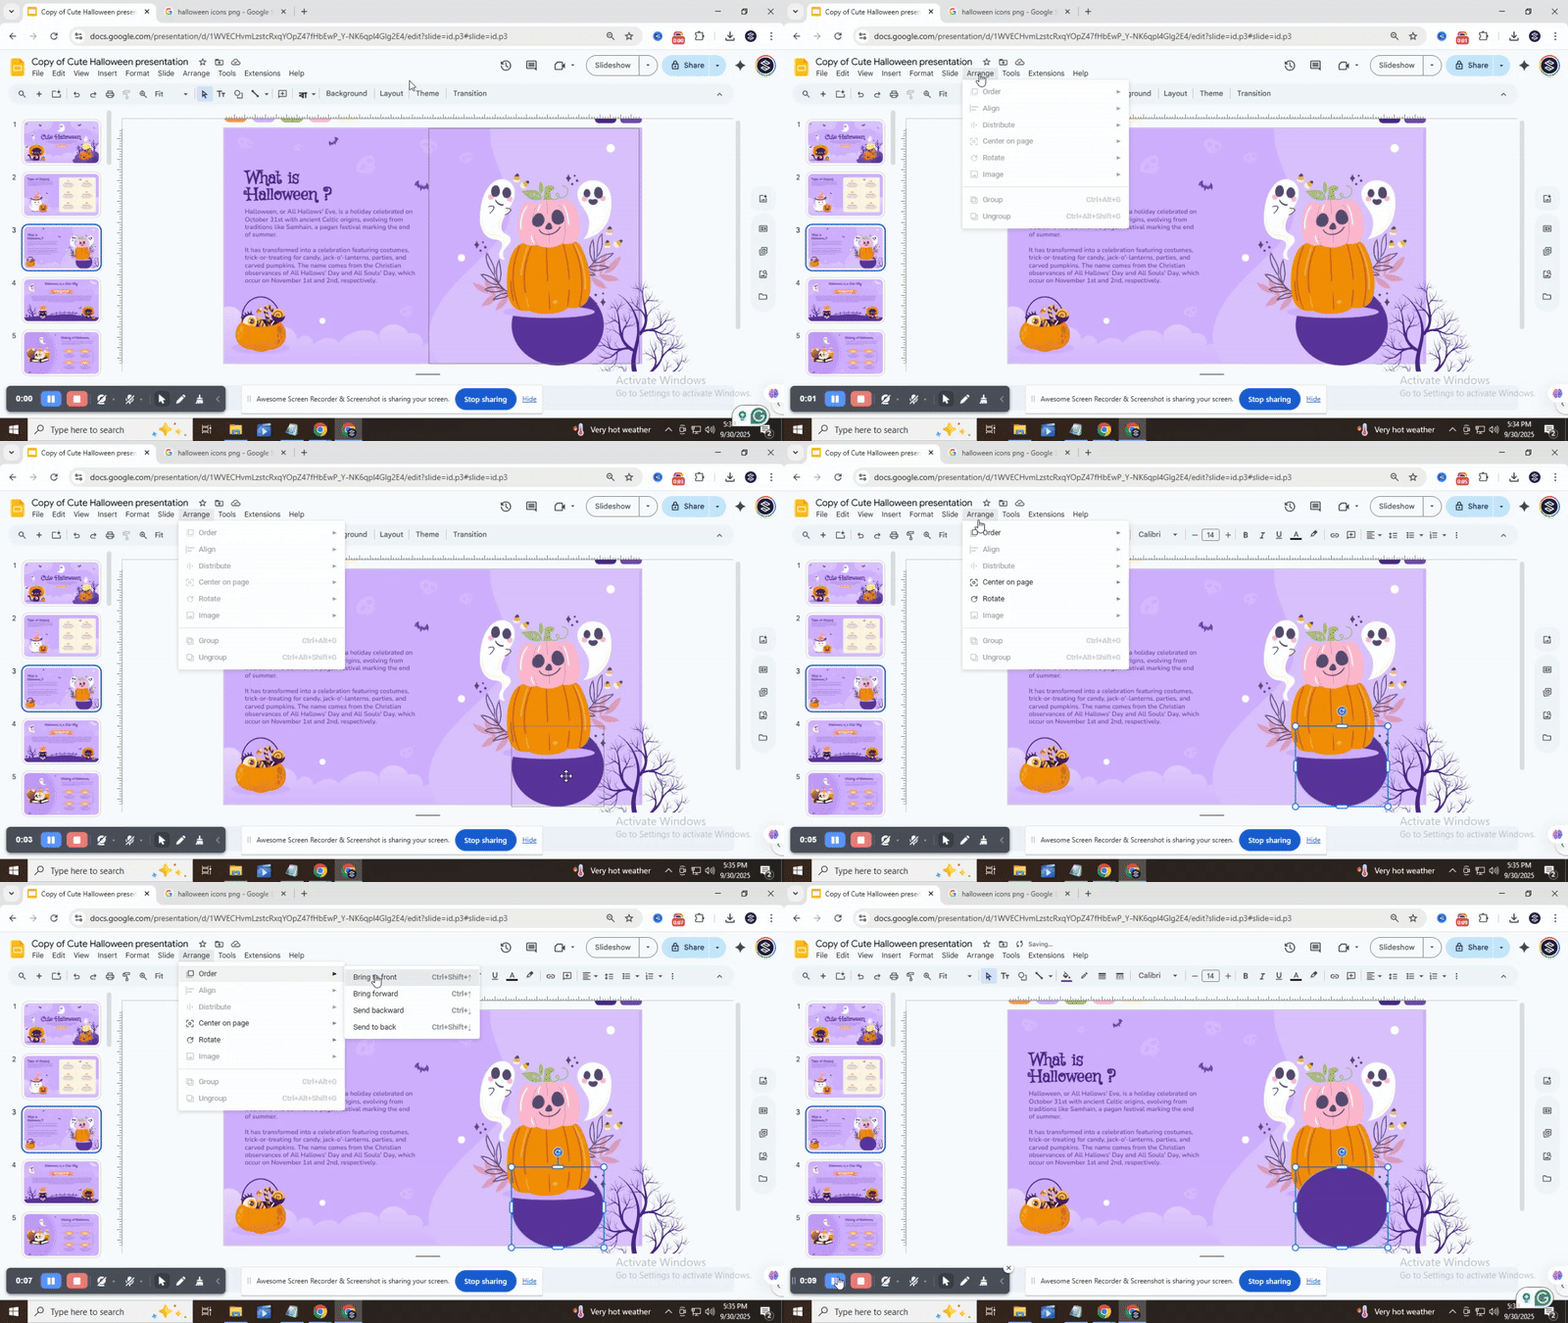
1. Order
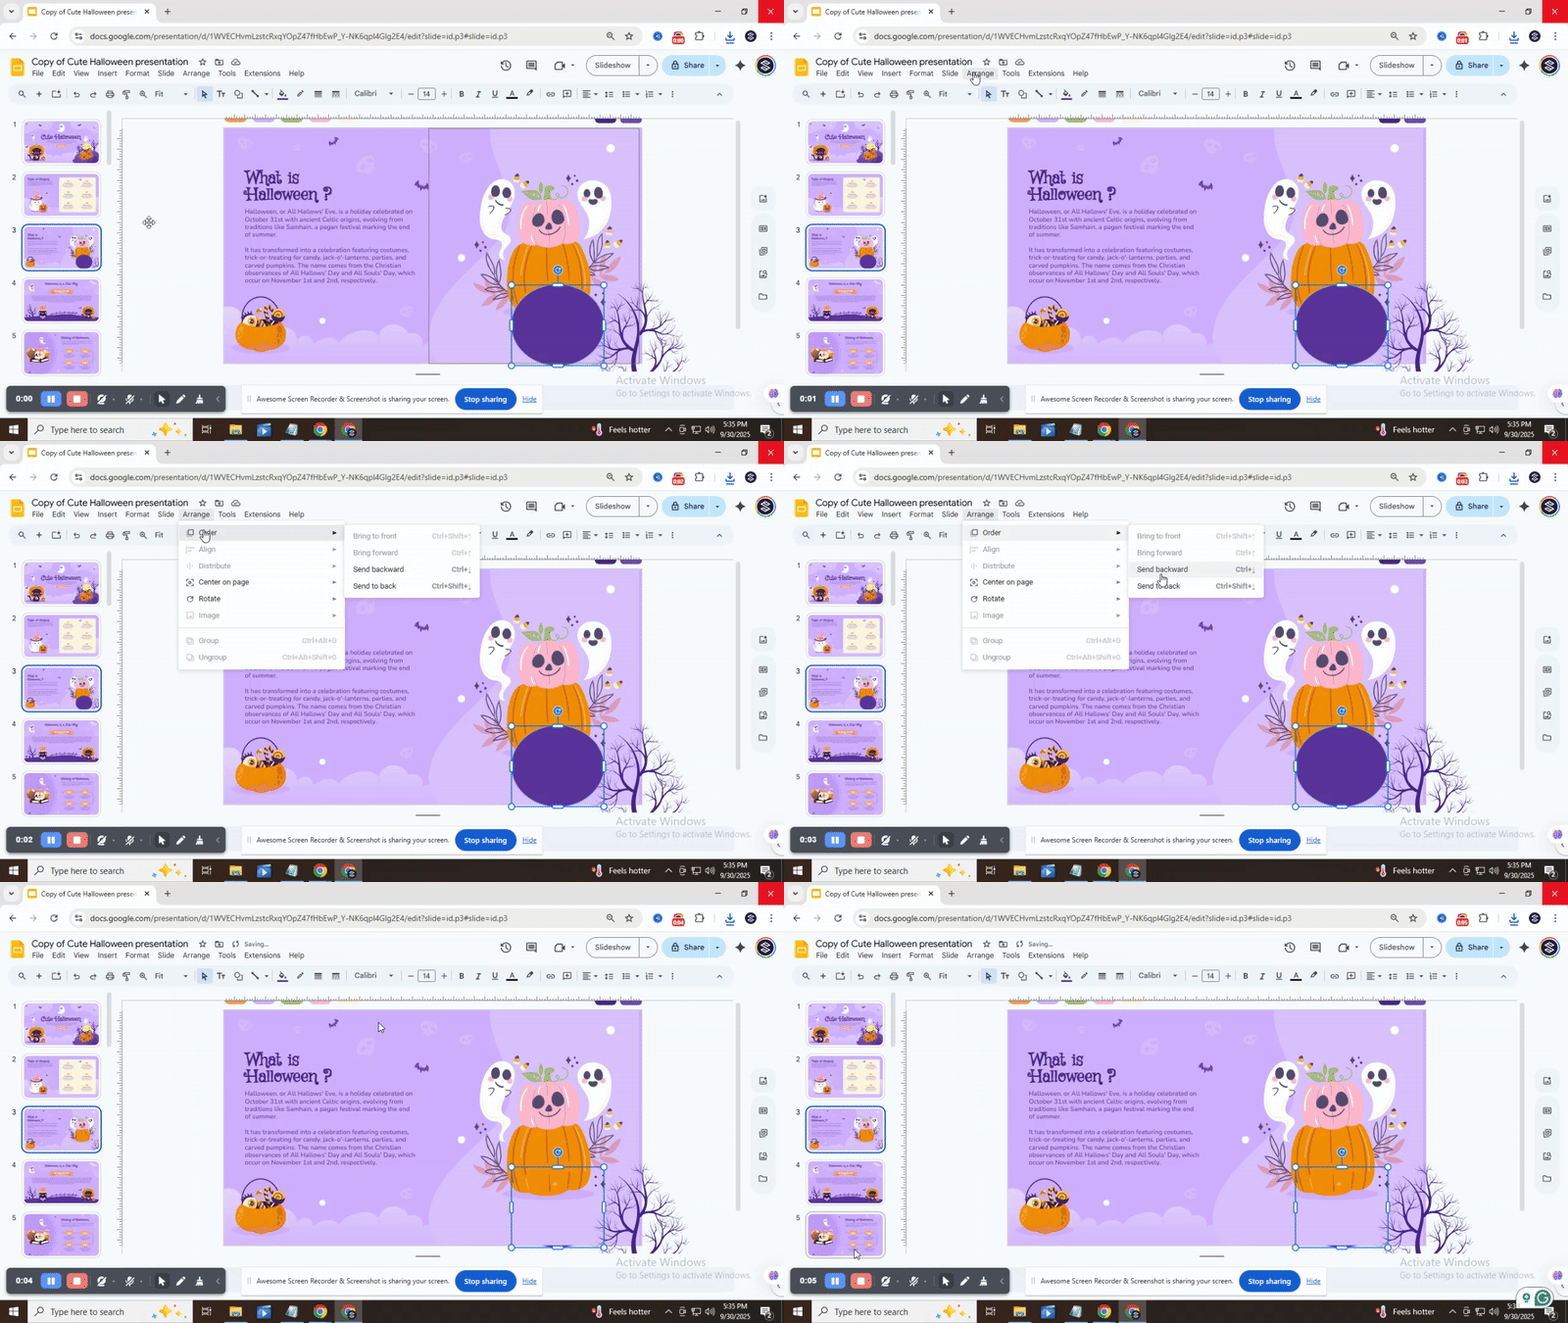
This option lets you change which object appears on top or behind others.
• Example: If a circle is covering a square, use Order → Bring Forward to move the square above the circle.
• Visual cue: “Bring Forward option”
2. Send to Back / Bring to Front
Use these options to move an object completely behind or in front of all others.
• Example: Place a background image behind all text using Send to Back.
• Visual cue: “Send to Back option” and “Bring to Front option”
3. Center
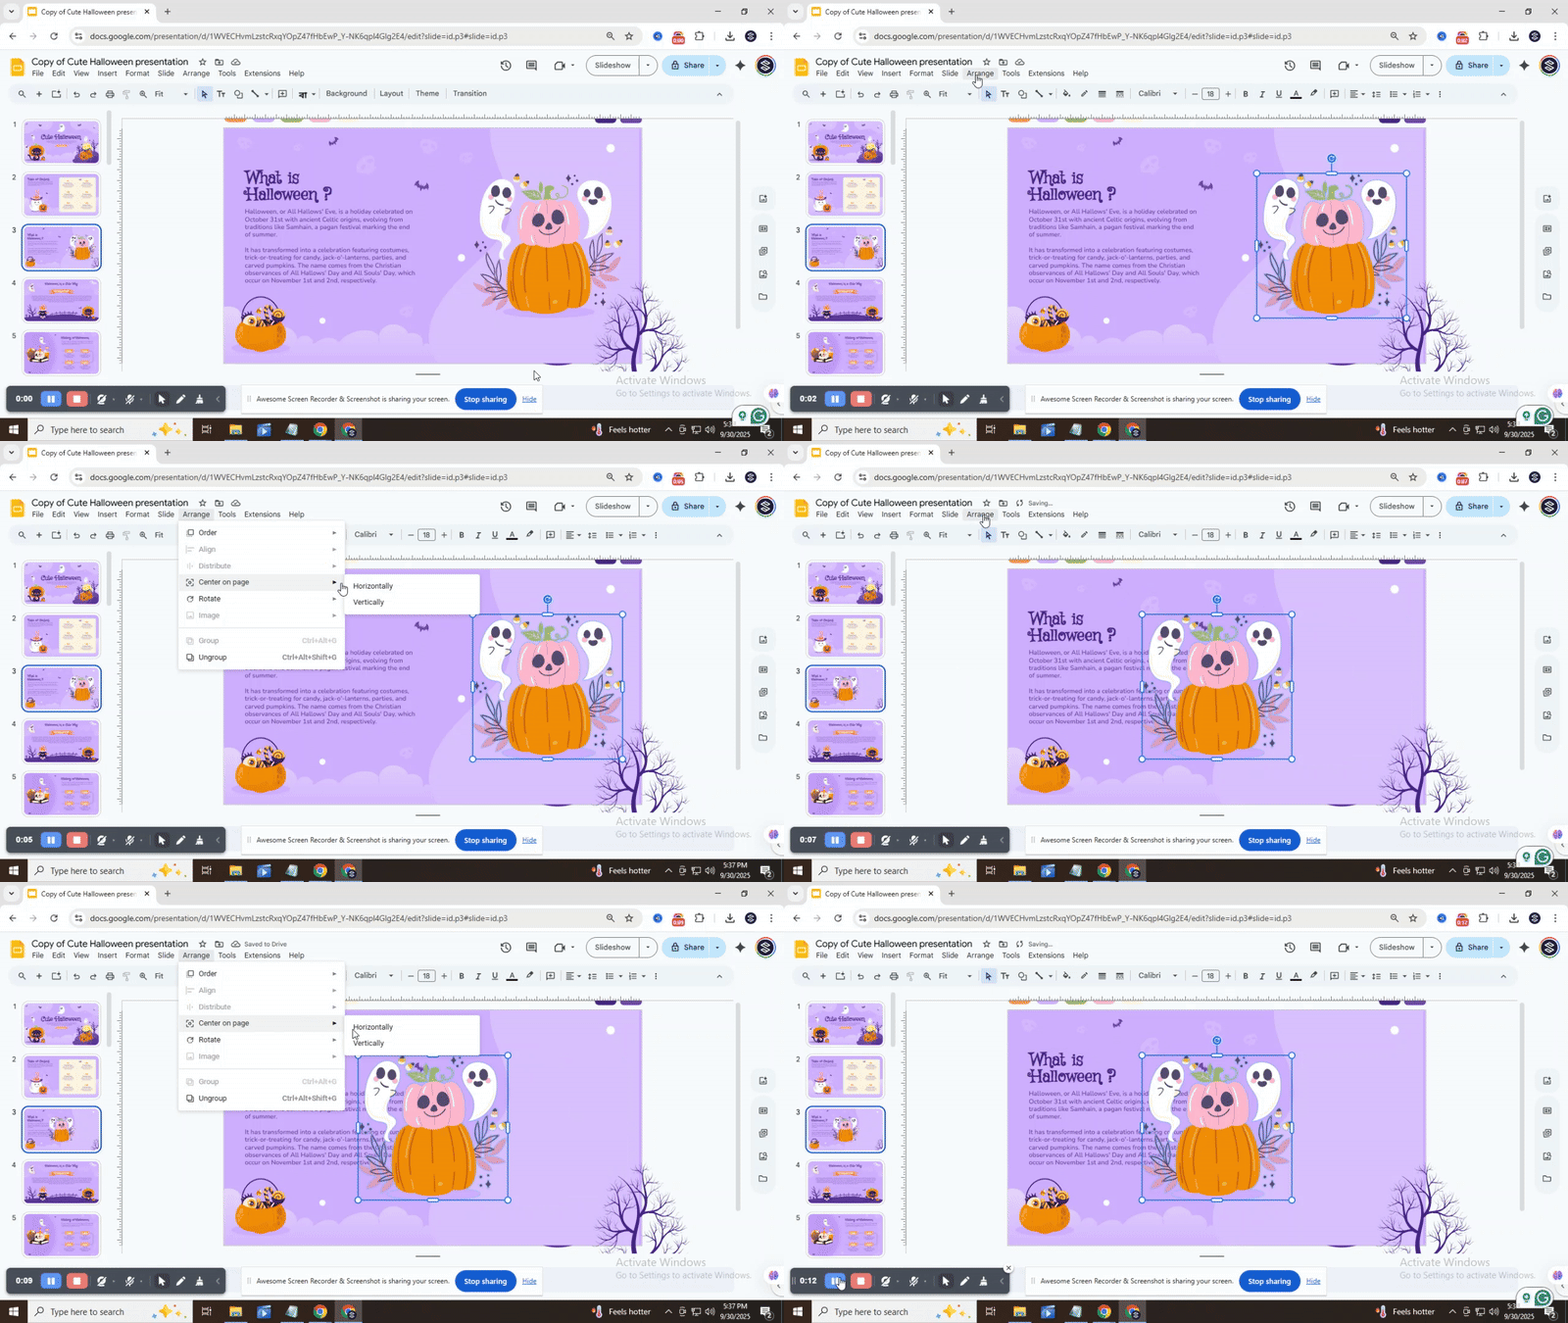
This feature aligns your object horizontally, vertically, or both on the slide.
• Example: Center a logo in the middle of a slide using Center → Horizontally and Vertically.
• Visual cue: “Center option”
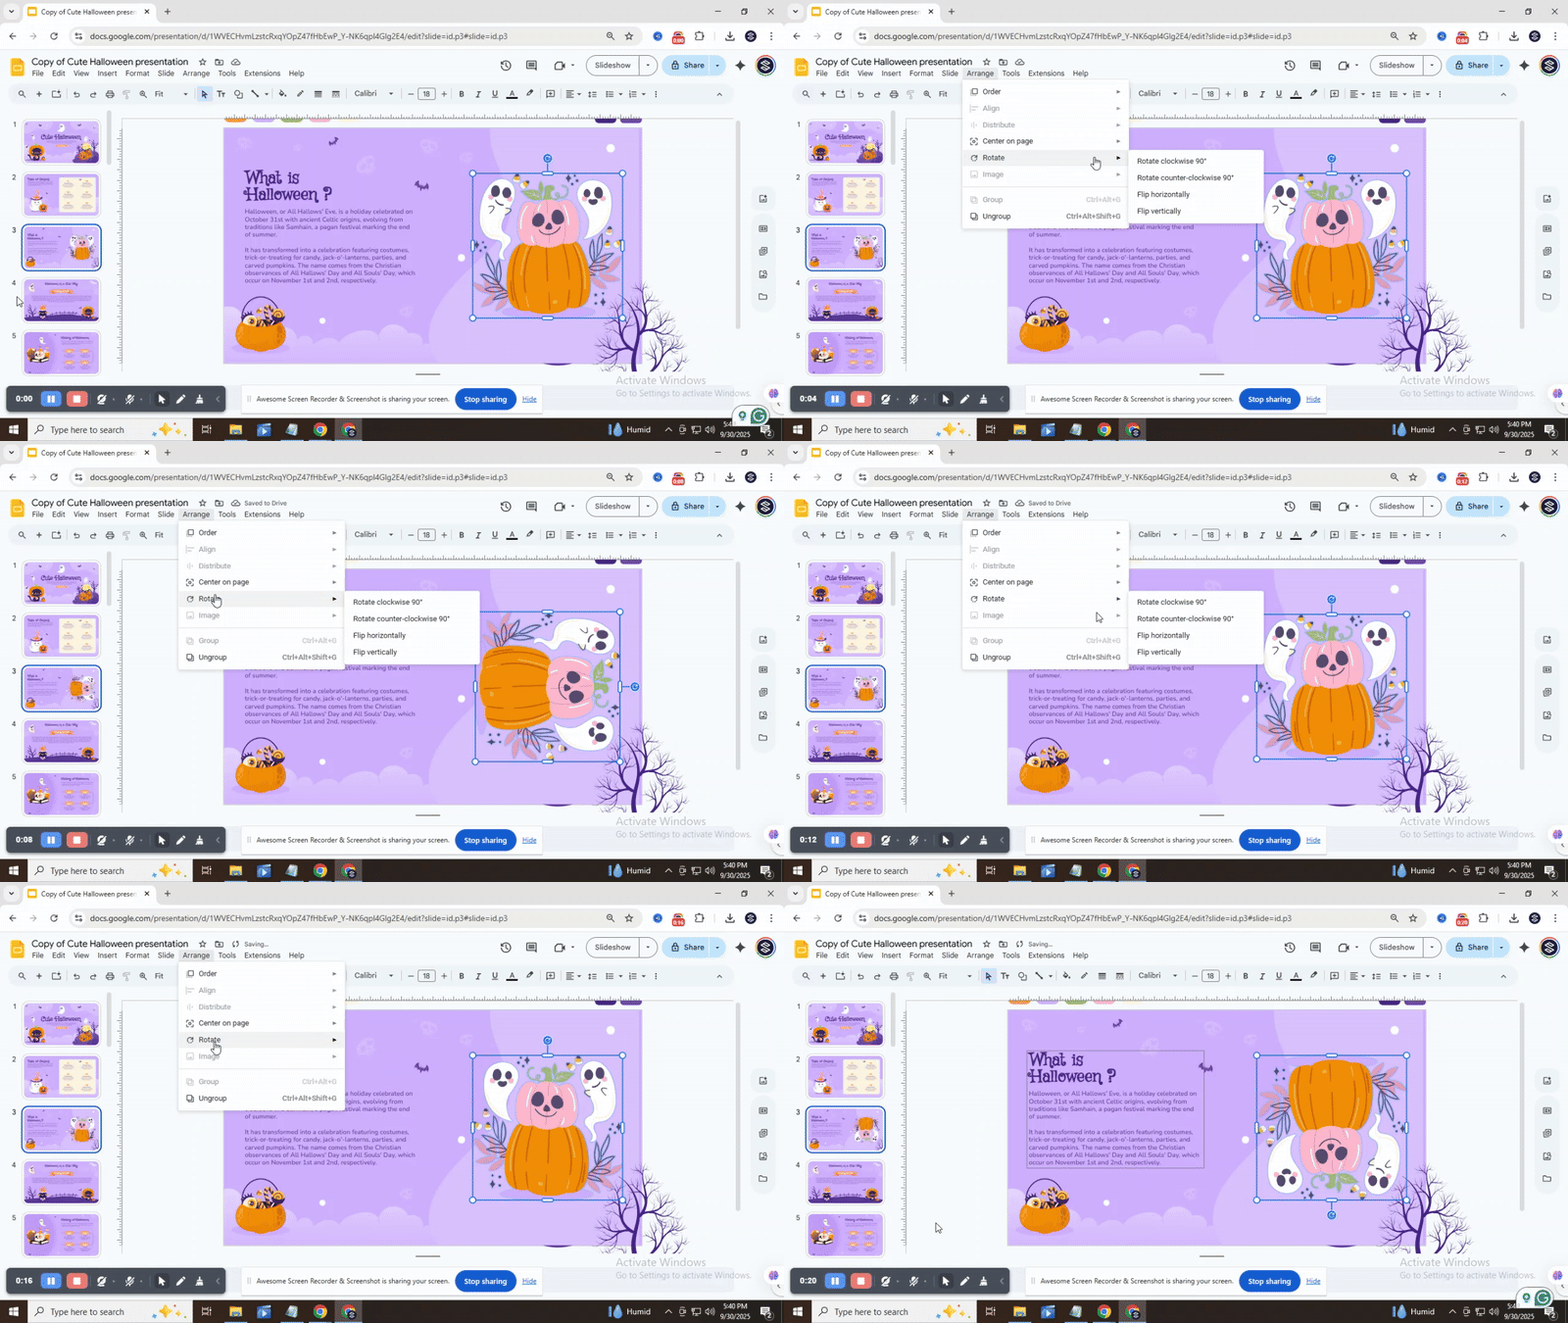
4. Rotate
Rotate lets you turn an object to a specific angle or flip it.
• Example: Rotate a text box 90 degrees to create a vertical heading using Rotate → 90°.
• Visual cue: “Rotate option”
Arranging Multiple Objects at the Same Time
Easily align and organize several objects in Google Slides with just a few clicks.
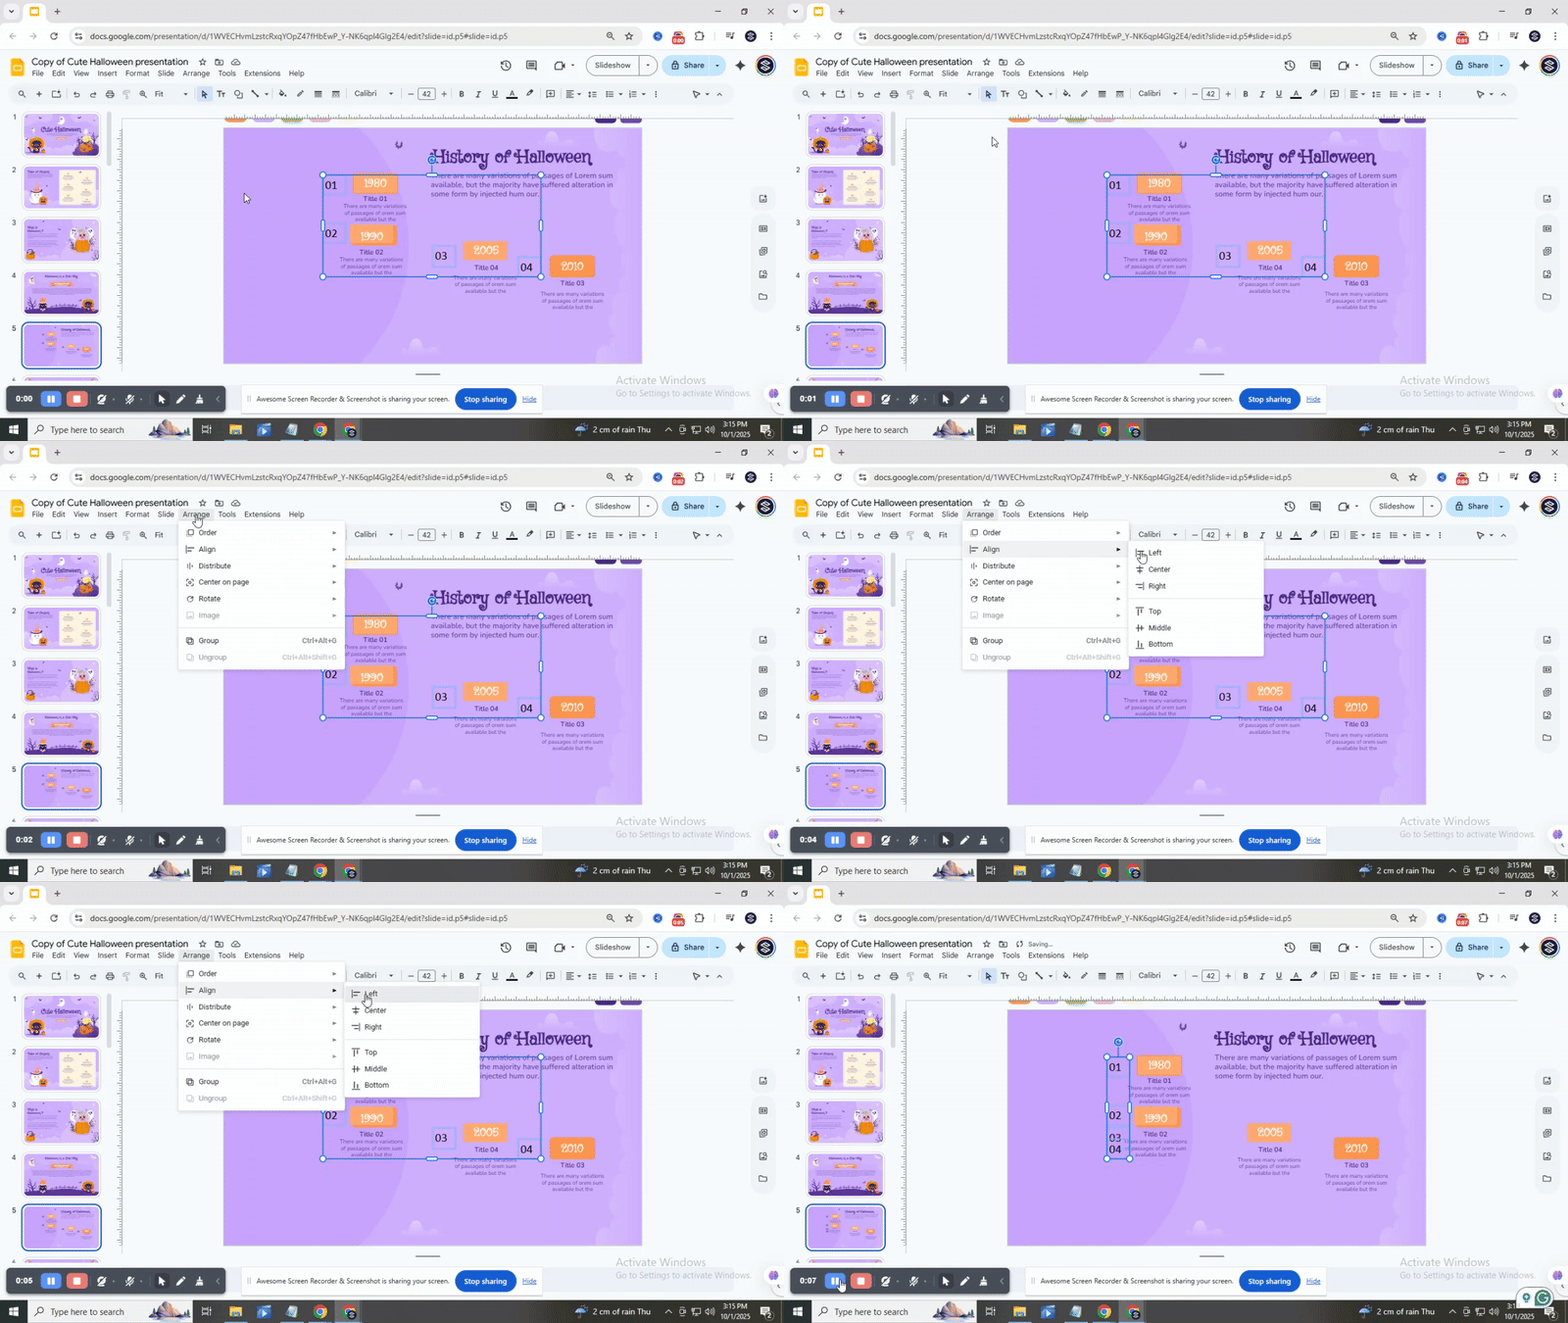
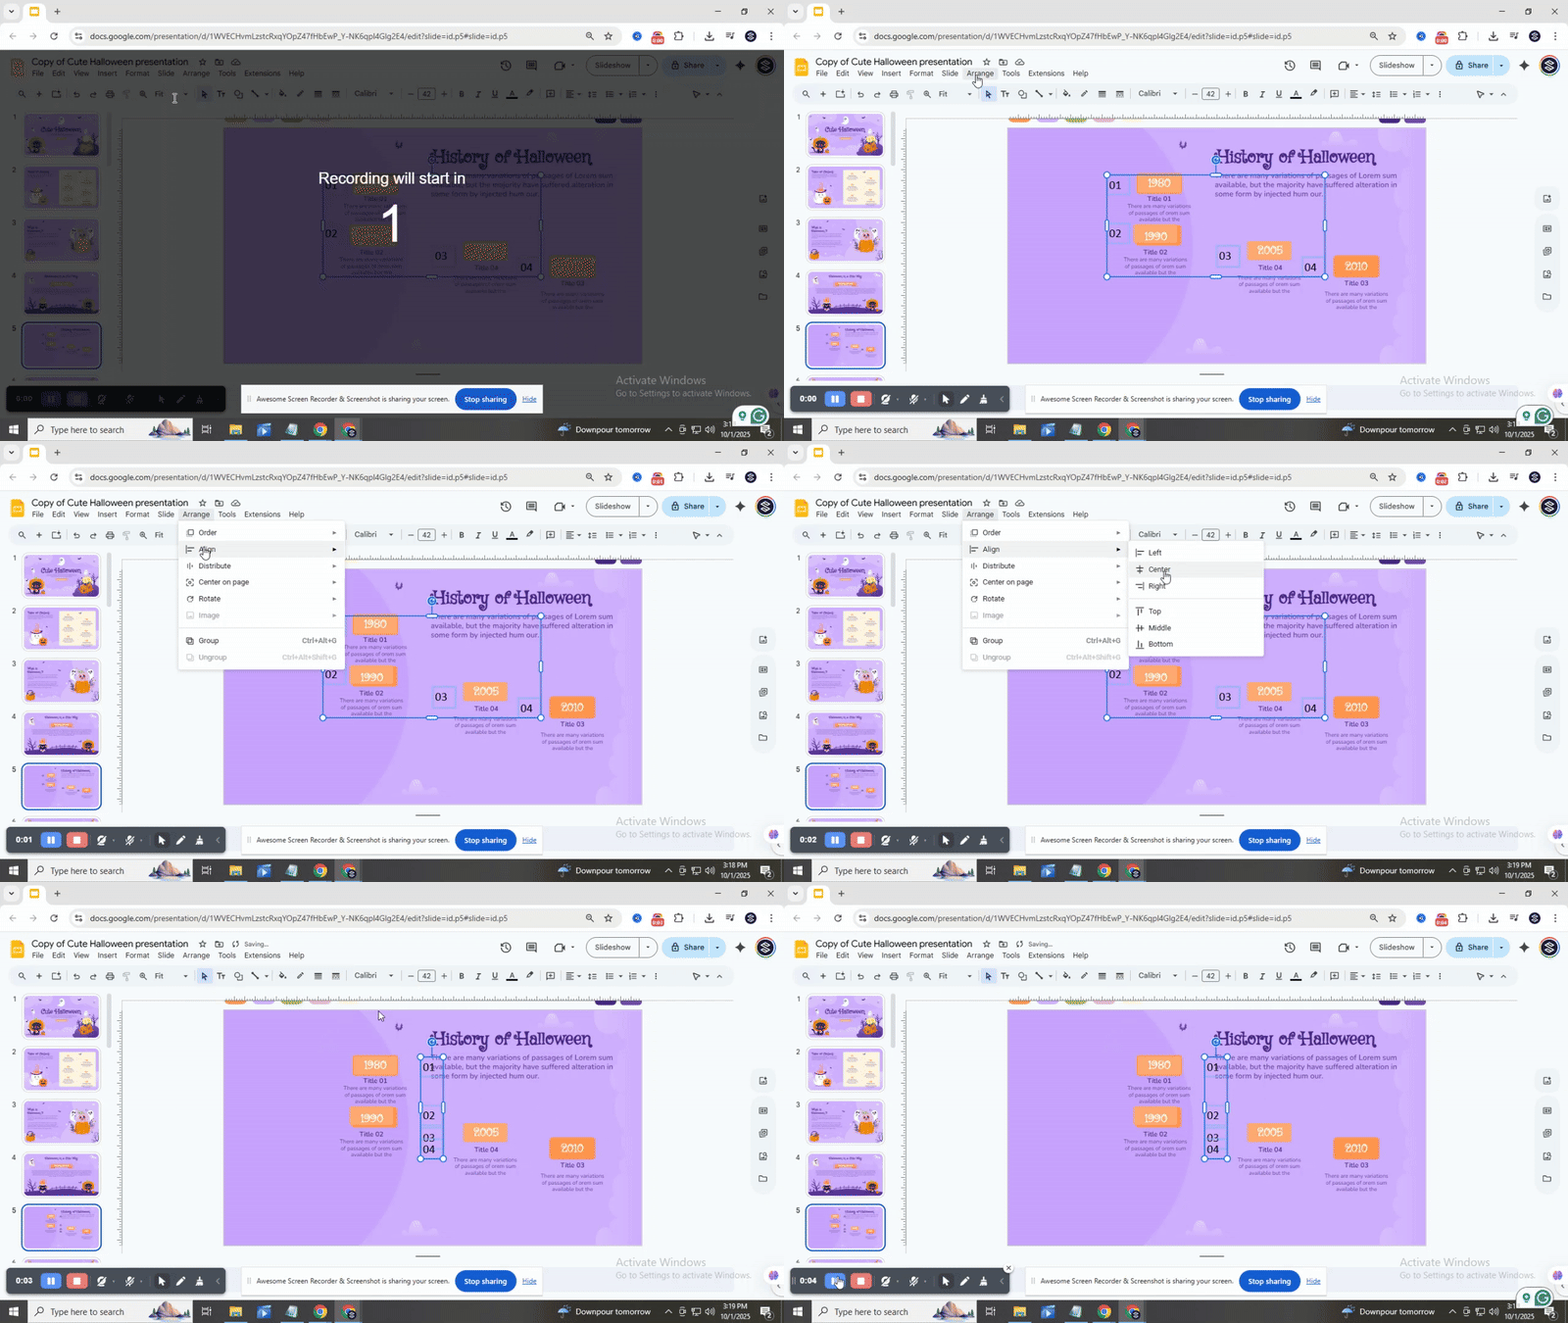
Start by opening your presentation. Click on the slide where you want to work. Look for the objects you want to arrange. You can move them, align them, or group them once they are selected.
To select more than one object, hold the Shift key. Click on each object you want to include. You will see all the objects highlighted. Now, any changes you make will apply to all selected objects.
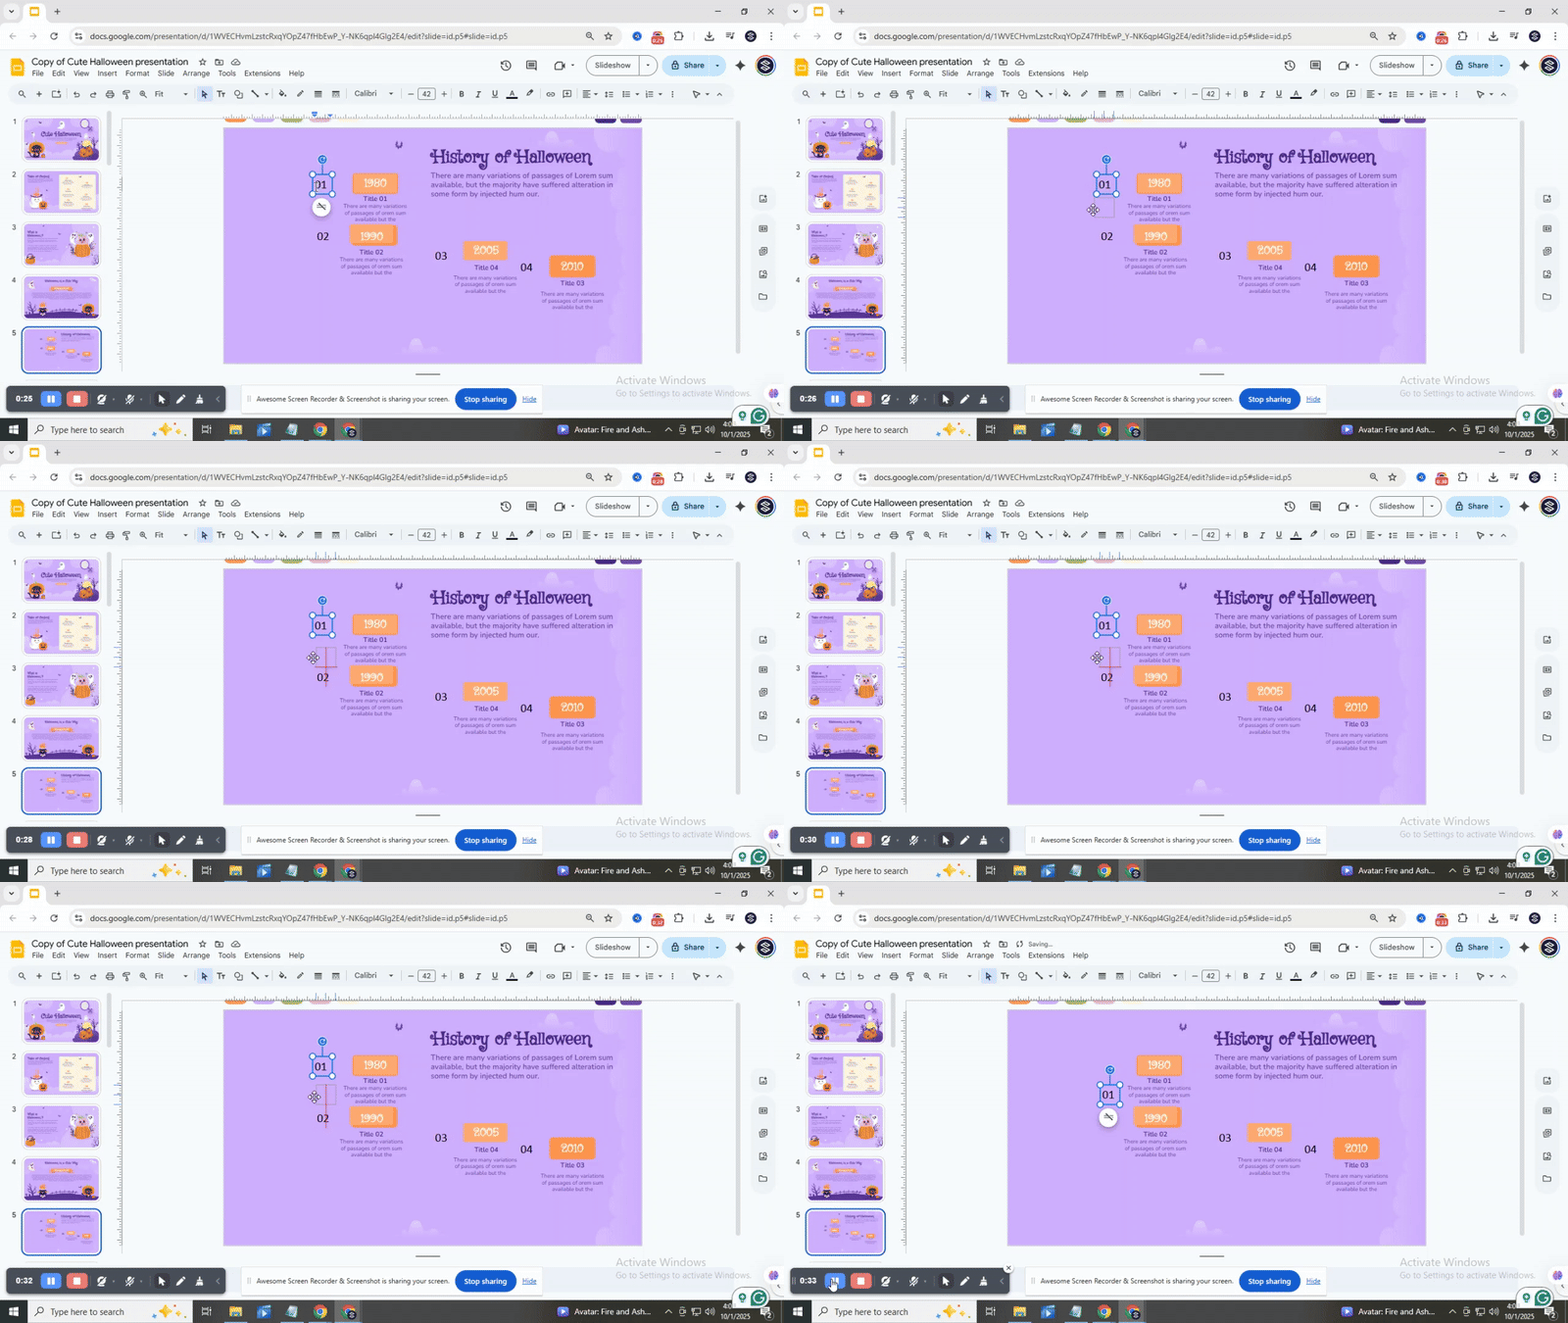
The Align option helps you line up objects neatly.
• Align Left: Moves all selected objects to the left edge of the first object.
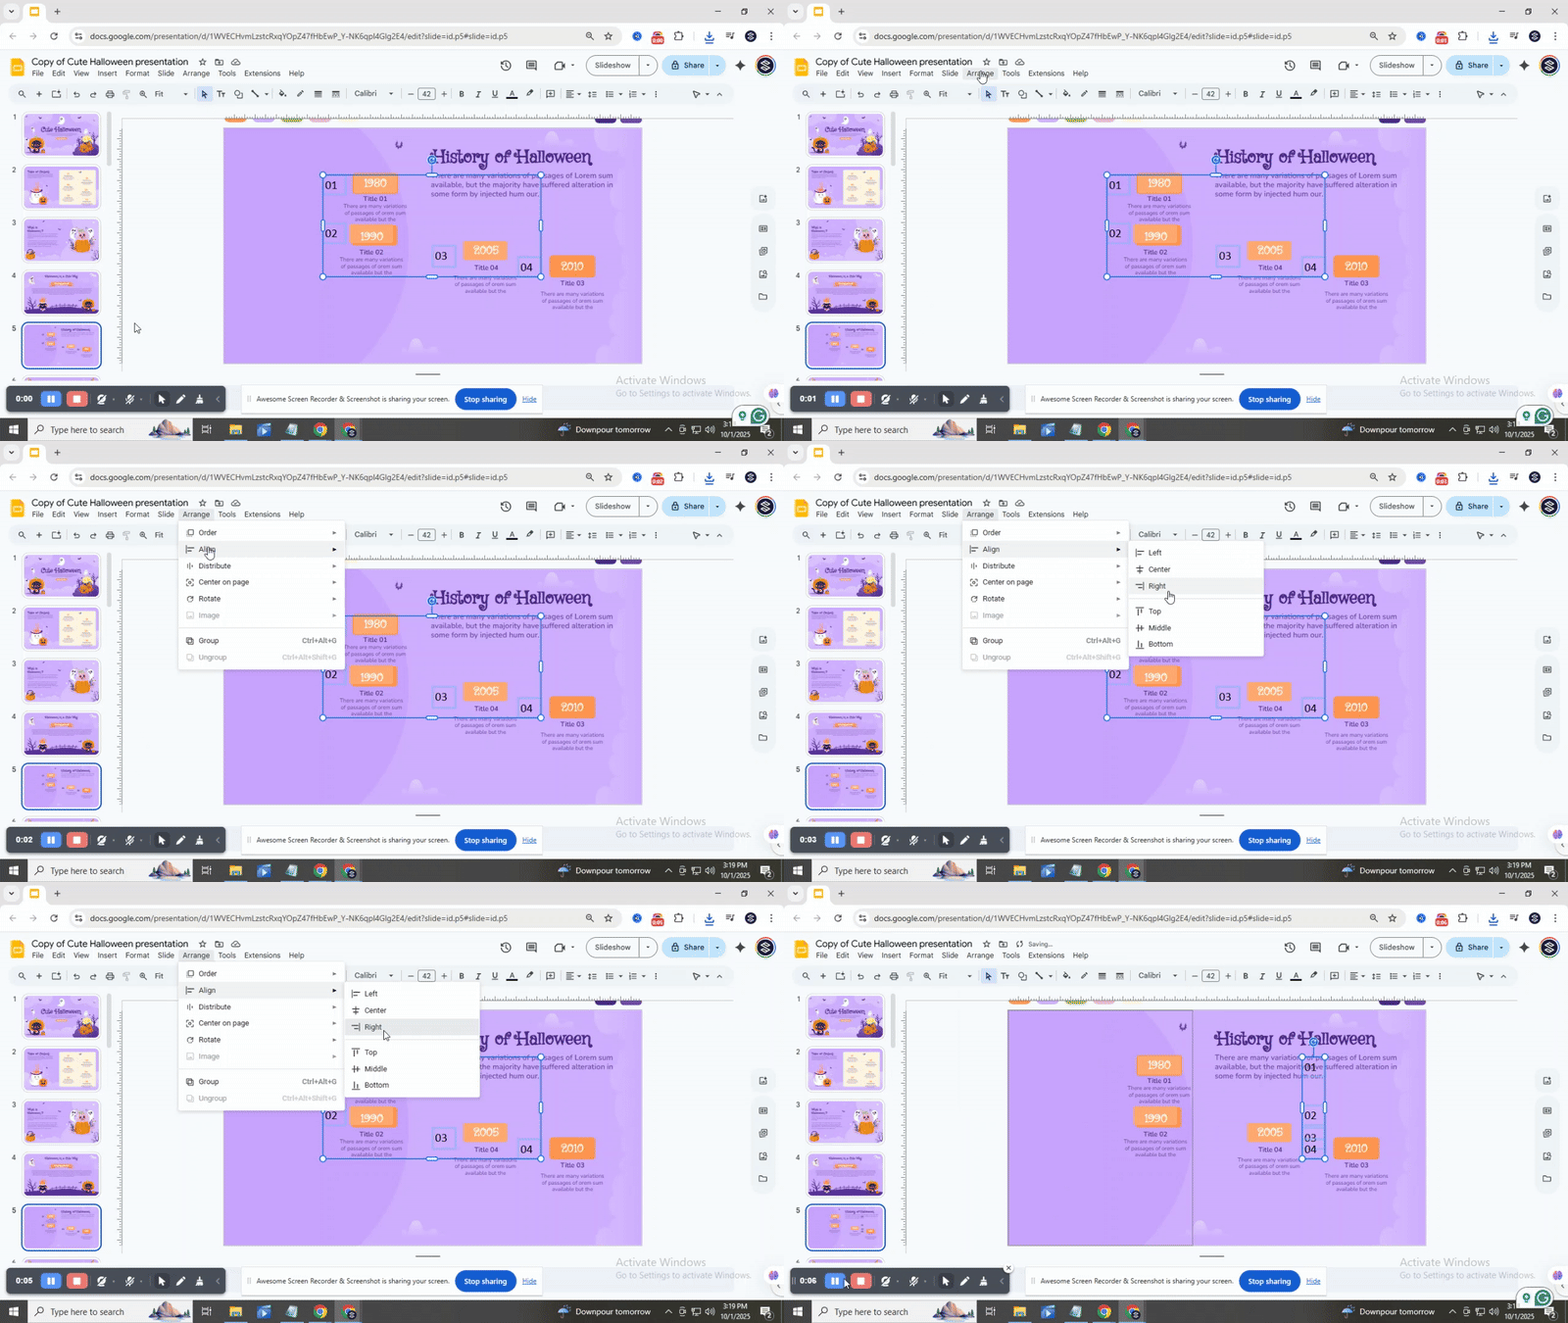
• Align Right: Moves all selected objects to the right edge of the first object.
• Align Center: Centers all objects along the middle line.
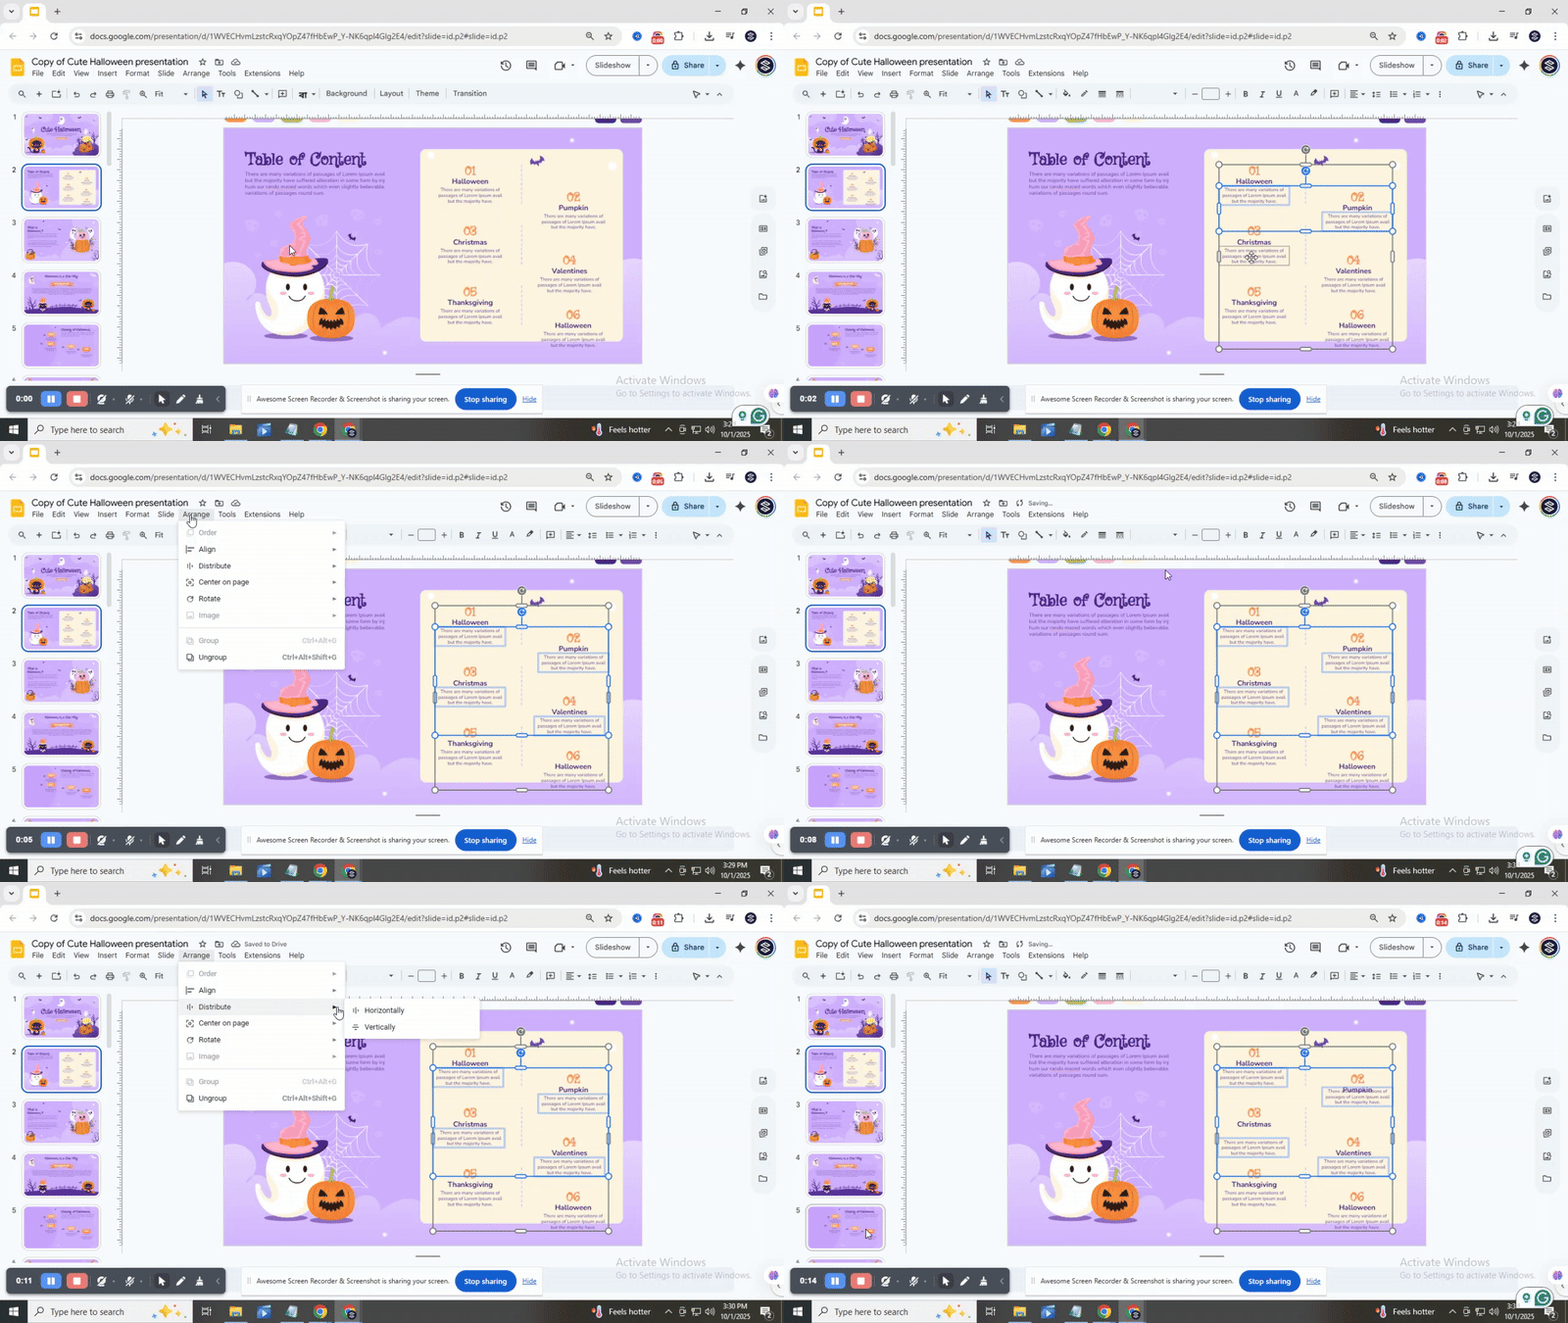
The Distribute option spaces objects evenly.
• Distribute Horizontally: Adds equal space between objects from left to right.
• Distribute Vertically: Adds equal space from top to bottom.
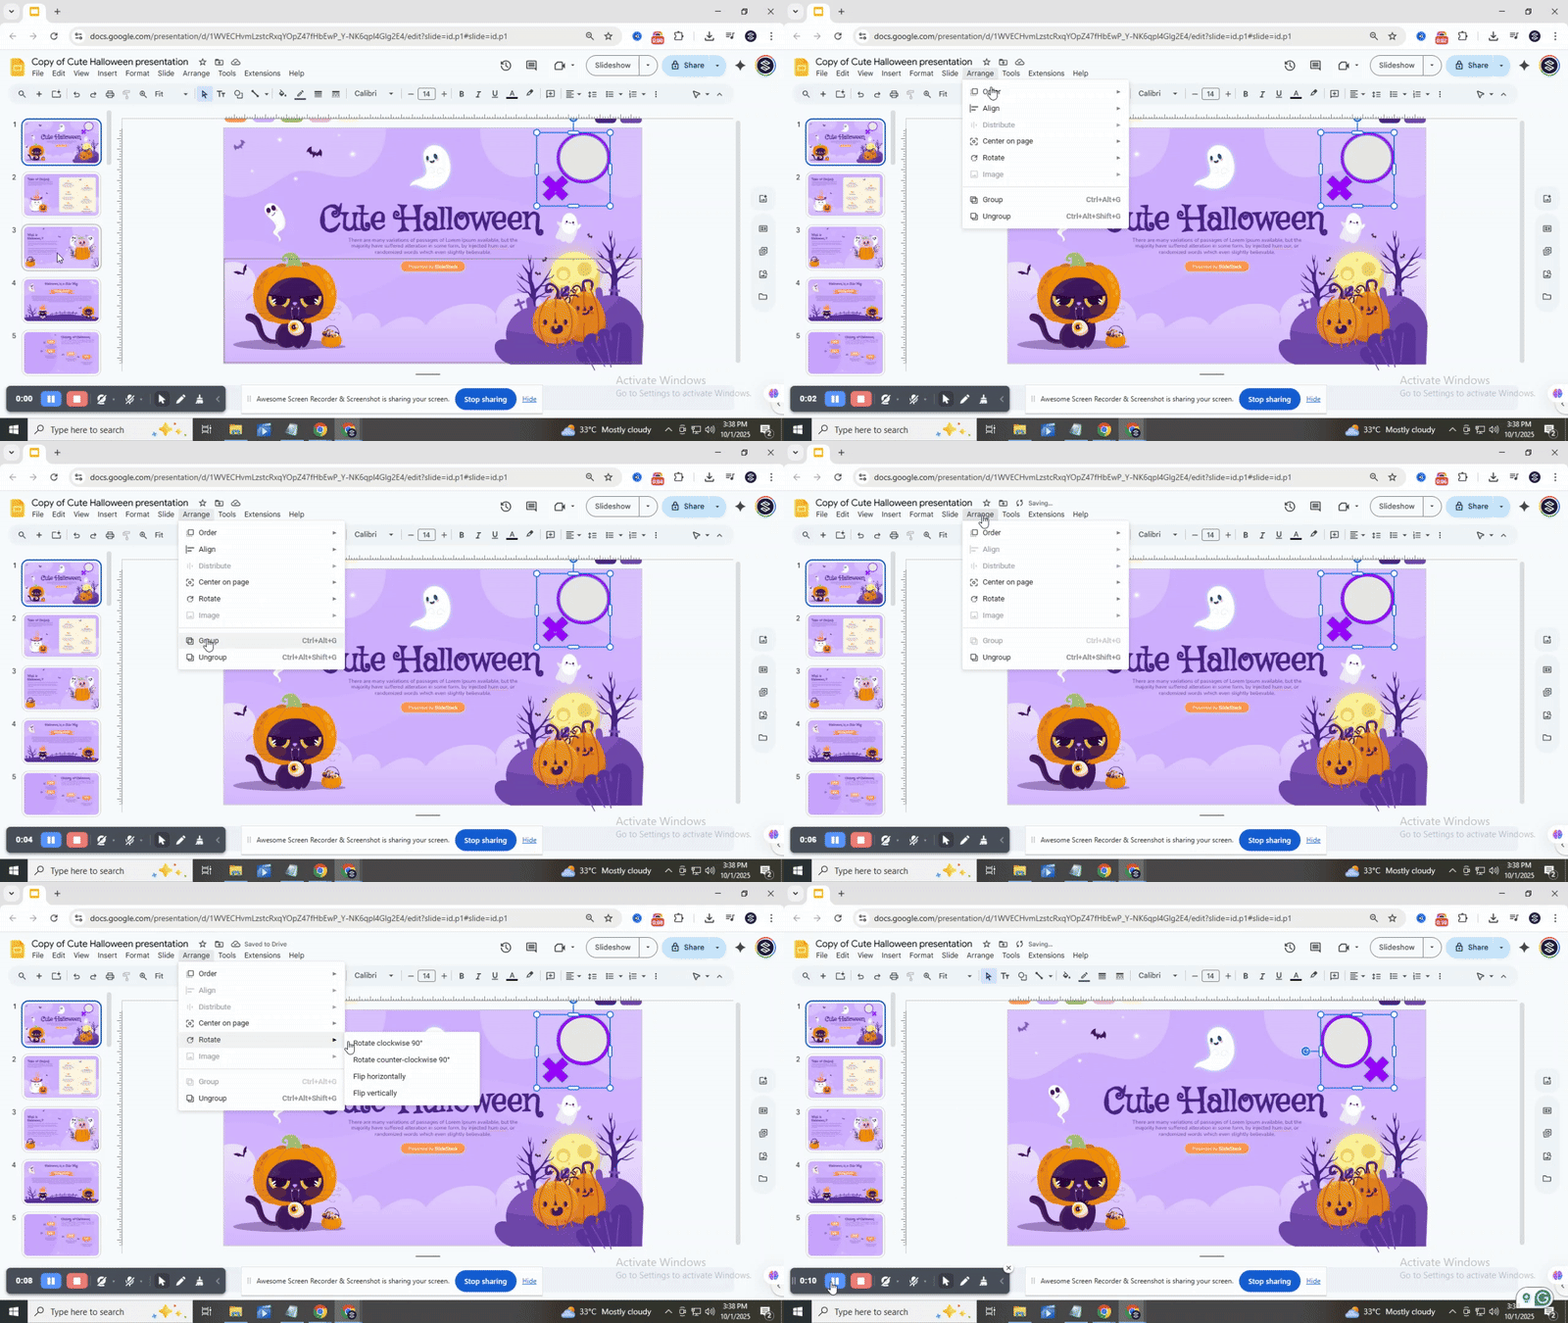
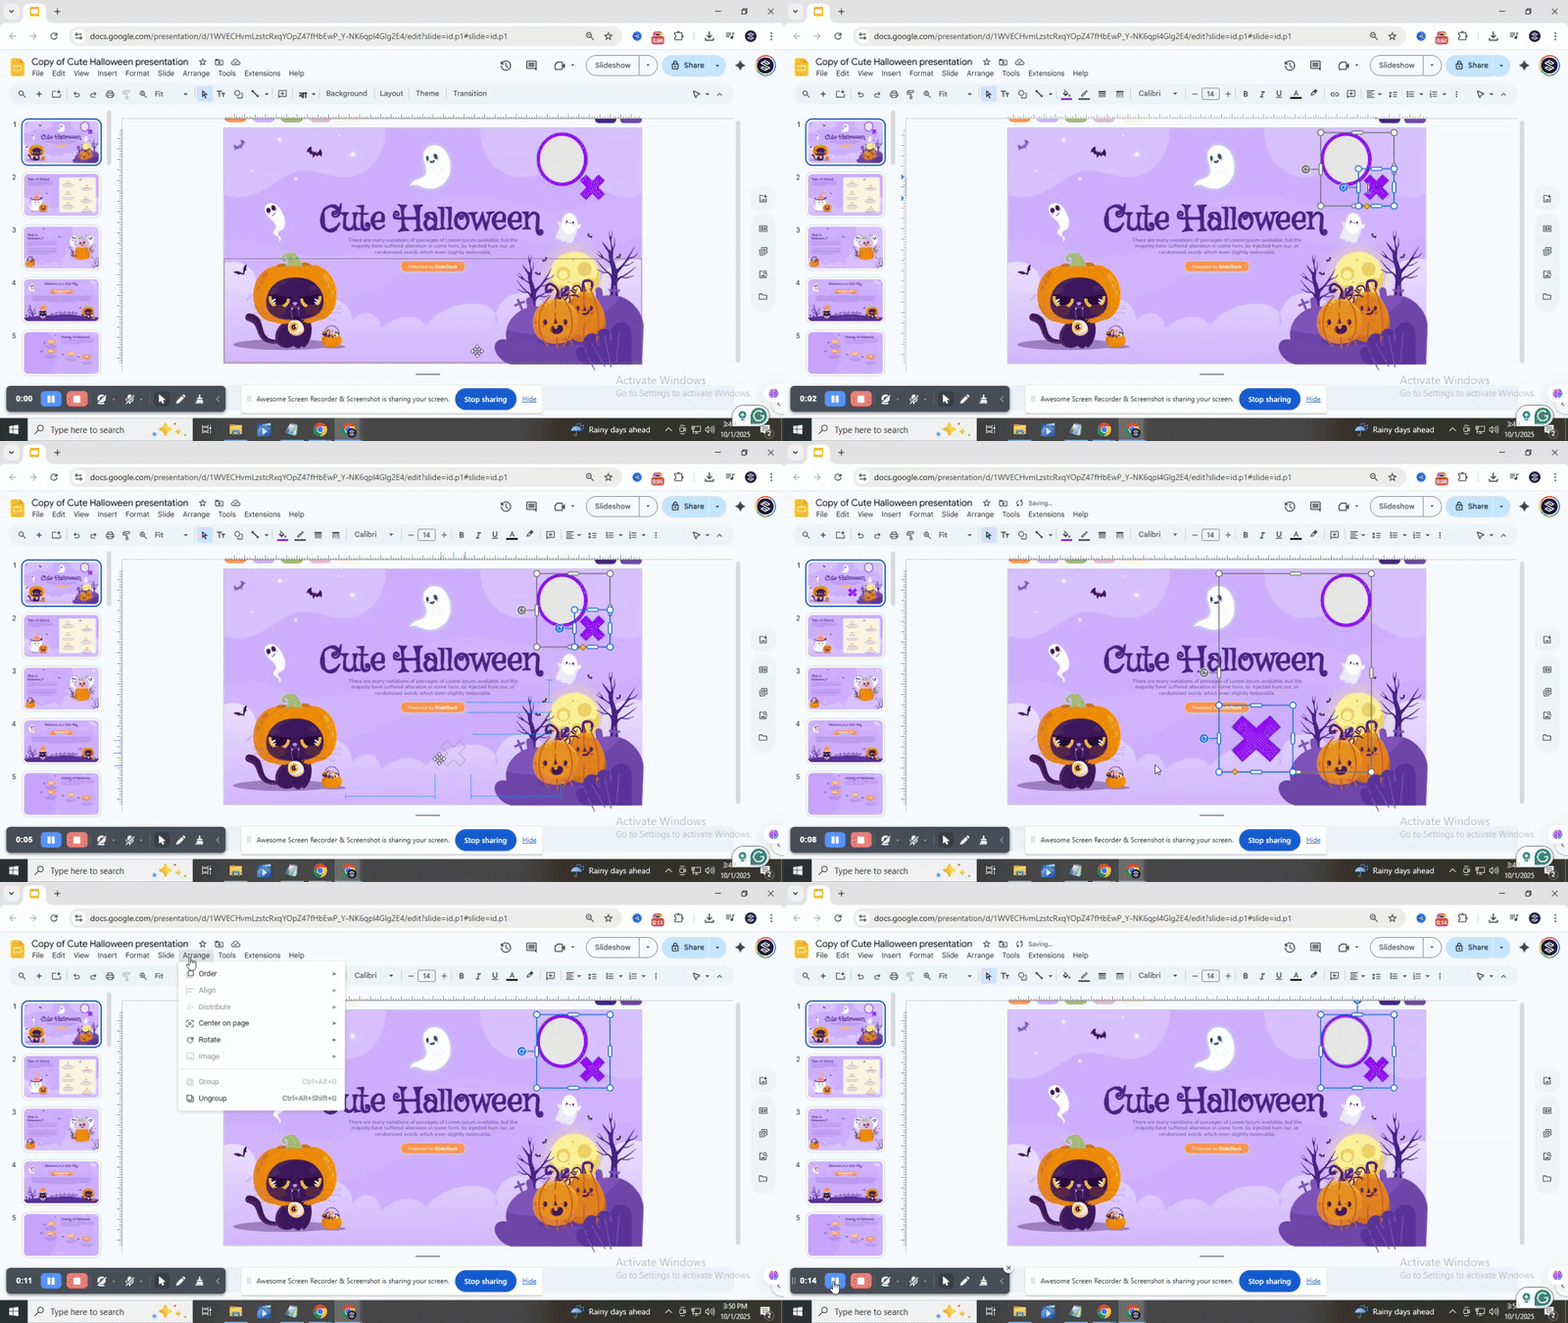
The Group option combines multiple objects into one. After grouping, you can move, resize, or rotate them together.
The Ungroup option separates objects that were grouped. Each object can now be edited individually again. You can double-click a grouped object to edit a single element inside. This way, you do not have to ungroup the objects to make small changes.
How to Align Text in Google Slides - Step-by-Step
Open your Google Slides presentation and select the text box or object you want to align.
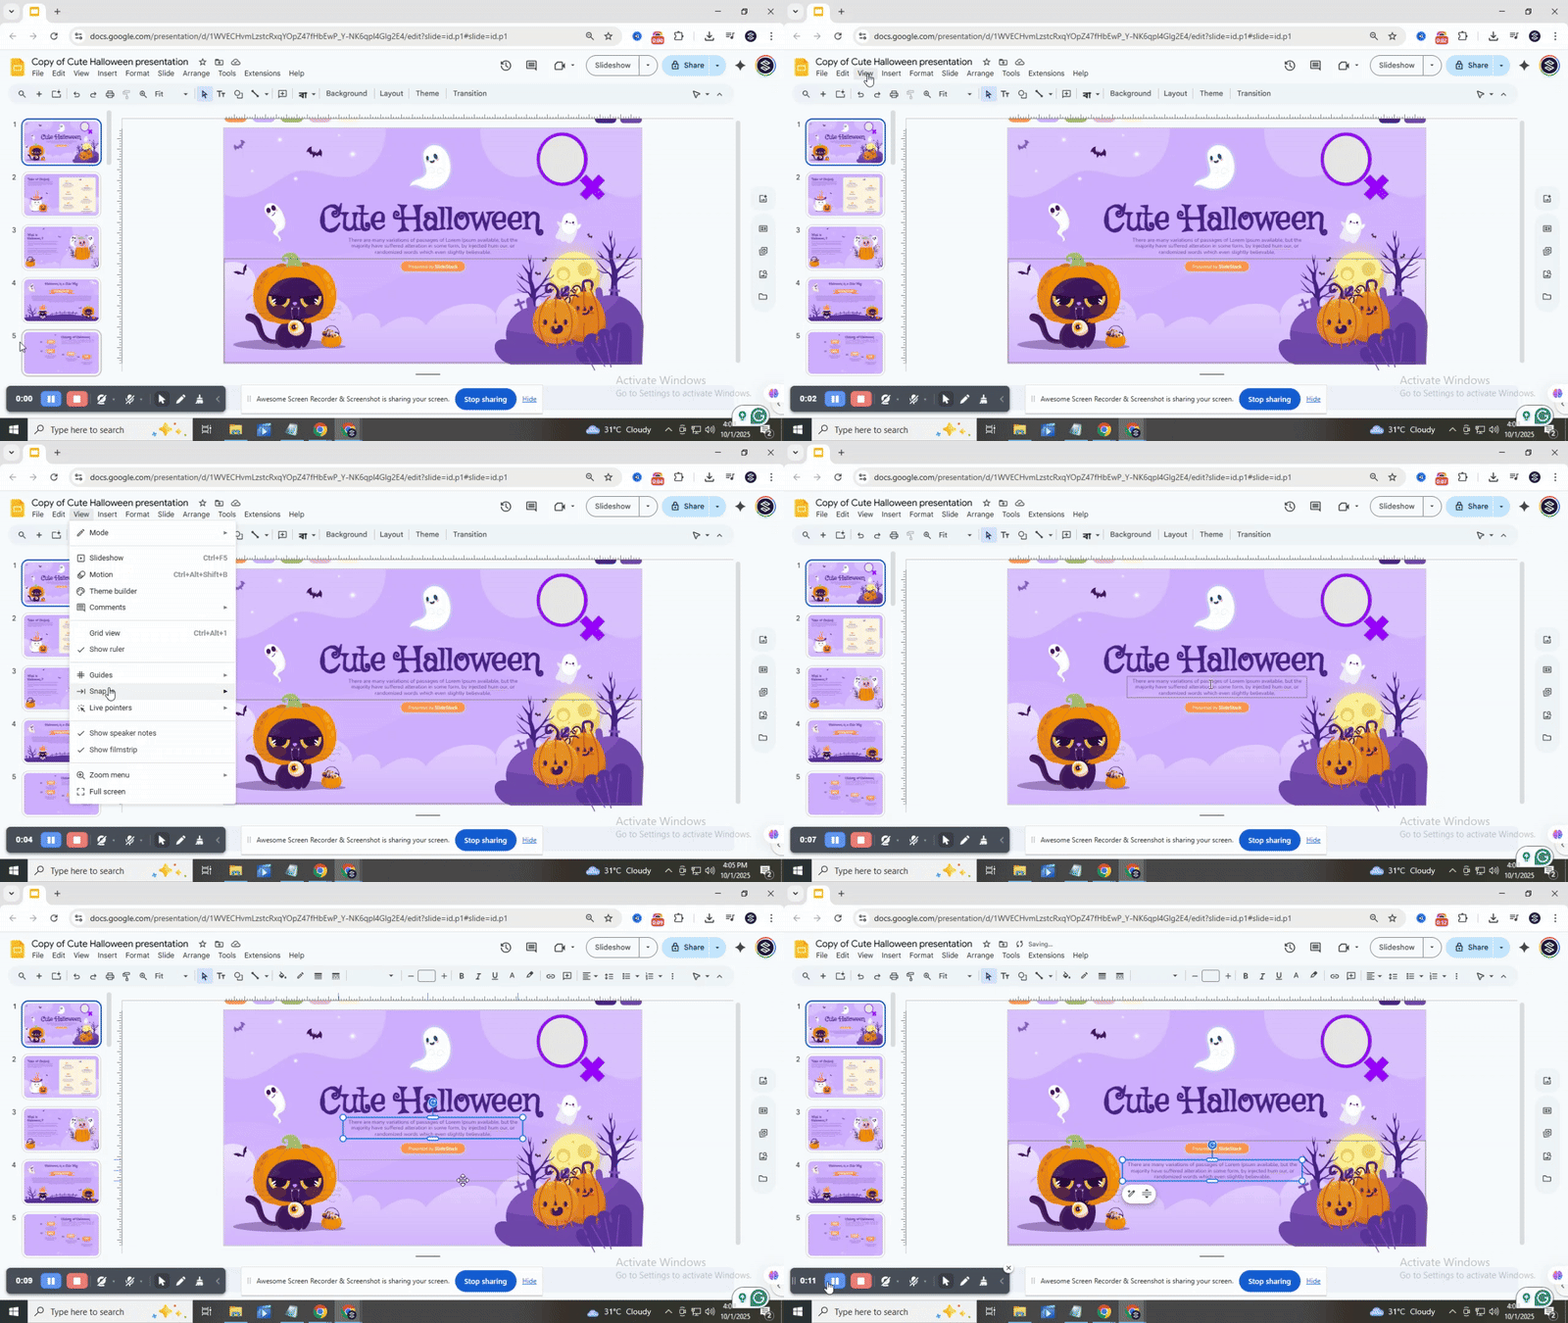
There are two ways to align objects automatically:
Go to View → Snap to → Guides. When you move the object, red lines appear. These lines show how your object aligns with other elements on the slide. This option is enabled by default.
Go to View → Snap to → Grid. The object aligns to an invisible grid. Unlike guides, no visual indicators appear while moving the object.
Final Thought
Taking the time to arrange and align objects in Google Slides makes a big difference. Clean slides help your audience focus on your message. Proper alignment keeps everything balanced and easy to follow. Whether you are adding images, text boxes, or shapes, the tools in Google Slides make it simple to organize your slides. By using guides, grids, and the arrange menu, your slides will look professional and polished. Practicing these techniques will save time and make your presentations more effective.
FAQs:
1: How can I center both the text and the box itself?
Select the text box, then use the alignment options to center the text inside it. Next, move the box itself to the middle of the slide using the guides or gridlines. This ensures both the text and the box are perfectly centered.
2: How do I align bullet points with the rest of my content?
Highlight your bullet points and use the indent or alignment tools to match them with nearby text. You can also adjust spacing between bullets for a cleaner look. This keeps everything in line visually.
3: Why does my text box look uneven even after aligning?
Text boxes can look uneven if the text inside has extra spaces, different fonts, or varying sizes. Check for hidden line breaks or spacing issues. Fixing these usually makes the box appear balanced.
4: Can I save alignment settings for all slides?
You can’t save alignment settings directly for every slide, but using the Slide Master helps. Adjust your text and boxes there, and new slides will follow the same layout. This saves time and keeps everything consistent.
5: What’s the best alignment for titles and headings?
Center alignment usually works best for main titles, as it draws attention. For subheadings or body headings, left alignment keeps the flow easy to read. Choose alignment based on how you want the slide to feel.
You may also be interested in ...
How To Create An Eye-Catching Portfolio
If you’re looking to create an eye-catching portfolio, this post will come in handy. In this article, you can find the easies...
23 Jun, 2024
How To Easily Create An Infographic
Infographics are the perfect way to make a presentation that will impact an audience, but their design and composition might...
08 Jun, 2024
PowerPoint Template Tips & Tricks You Ne...
PowerPoint seems to be an unknown world for many people, especially those who have been assigned to create a presentation out...
08 Jun, 2024
