How to Add, Copy, and Delete Text Boxes in Google Slides Easily
Editing slides in Google Slides can feel tricky if you’re unsure how to handle text boxes. Many users struggle with adding, copying, or deleting them efficiently. Editing slides in Google Slides can feel tricky if you’re unsure how to handle text boxes. Many users struggle with adding, copying, or deleting them efficiently. Imagine quickly adding text across multiple slides or removing unnecessary boxes without fuss. Mastering these steps will give you more control and confidence while creating your slides. Let’s dive into the simple steps for adding, copying, and deleting text boxes so you can start working smarter in Google Slides.
Steps to Connect Text Boxes in Google Slides
Linking text boxes can make your slides easier to read and follow. It helps keep related content together and looks organized. Read the points below to learn the simple steps to connect text boxes effectively.
Adding a Text Box in Google Slides
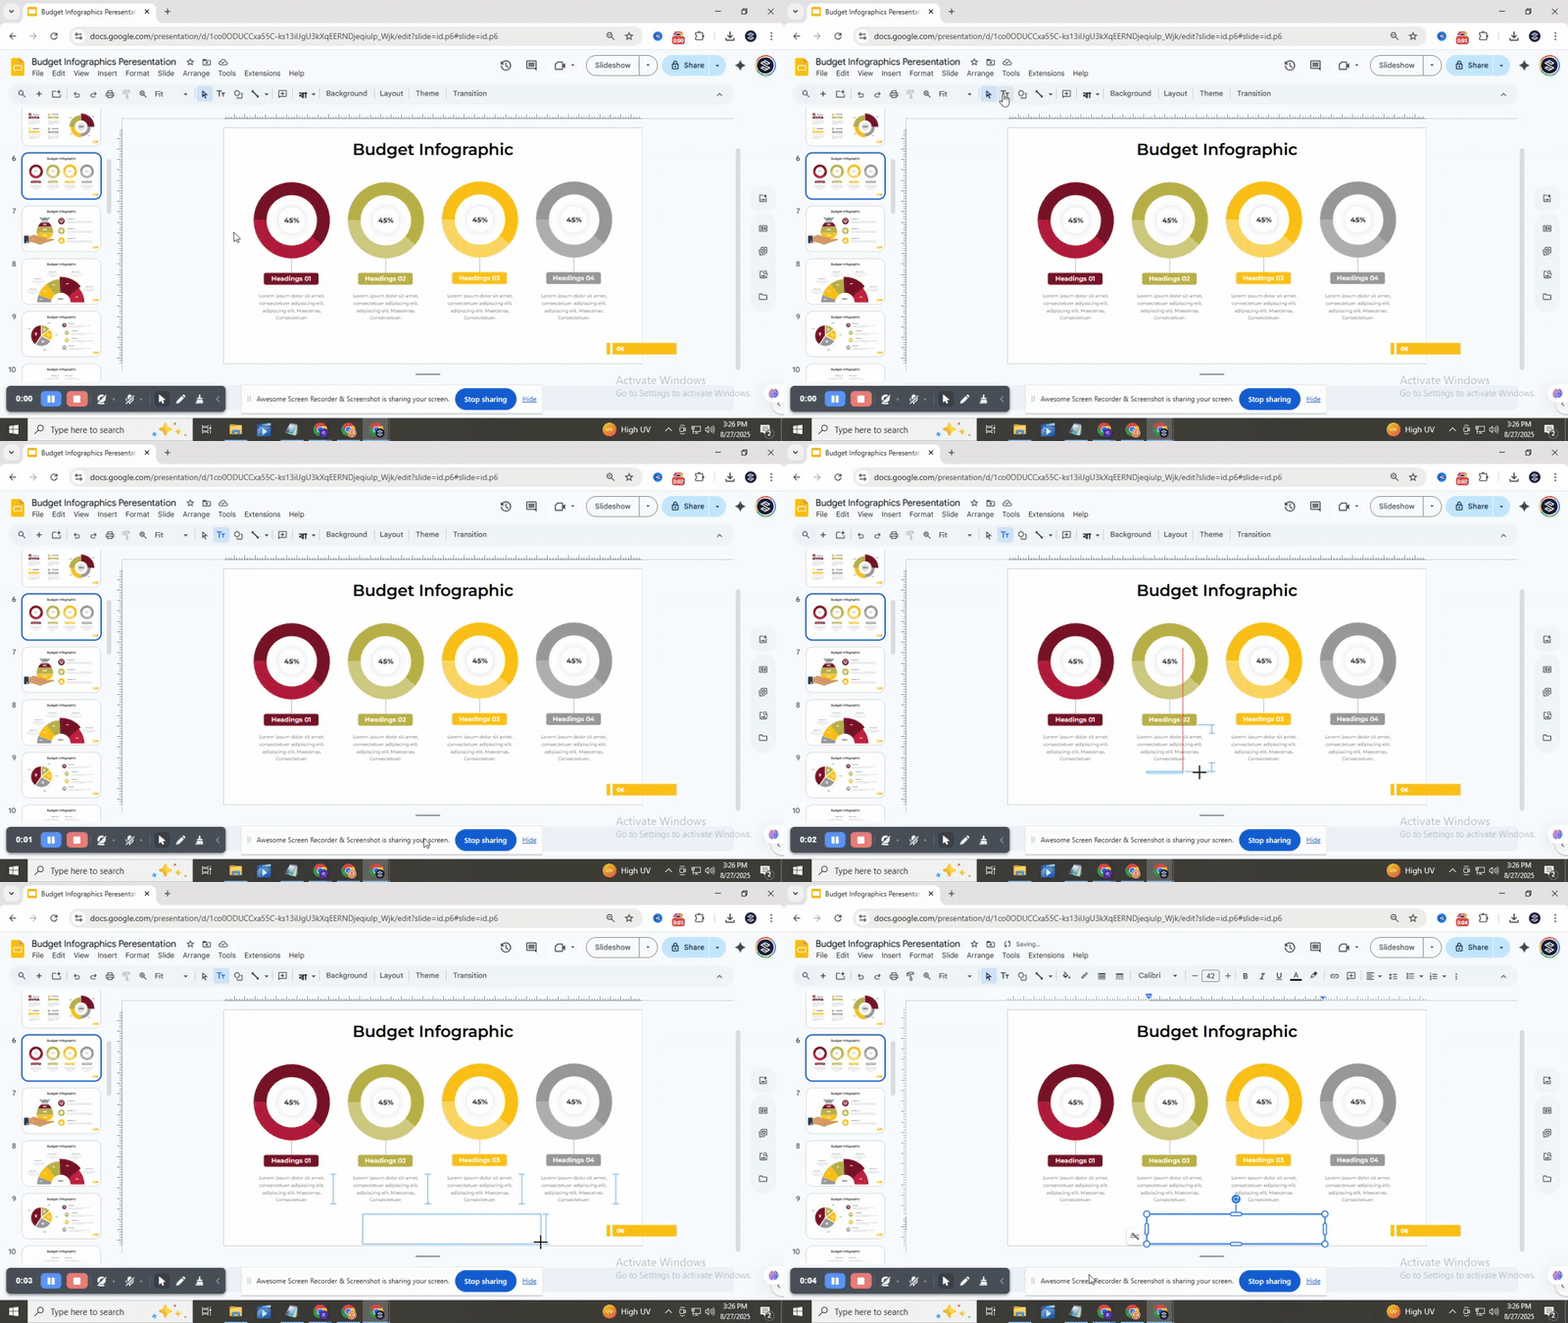
Open your presentation in Google Slides and select the slide where you want to add a text box. On the toolbar, click Text box, then click and drag to create it. Once the box appears, type in your text.
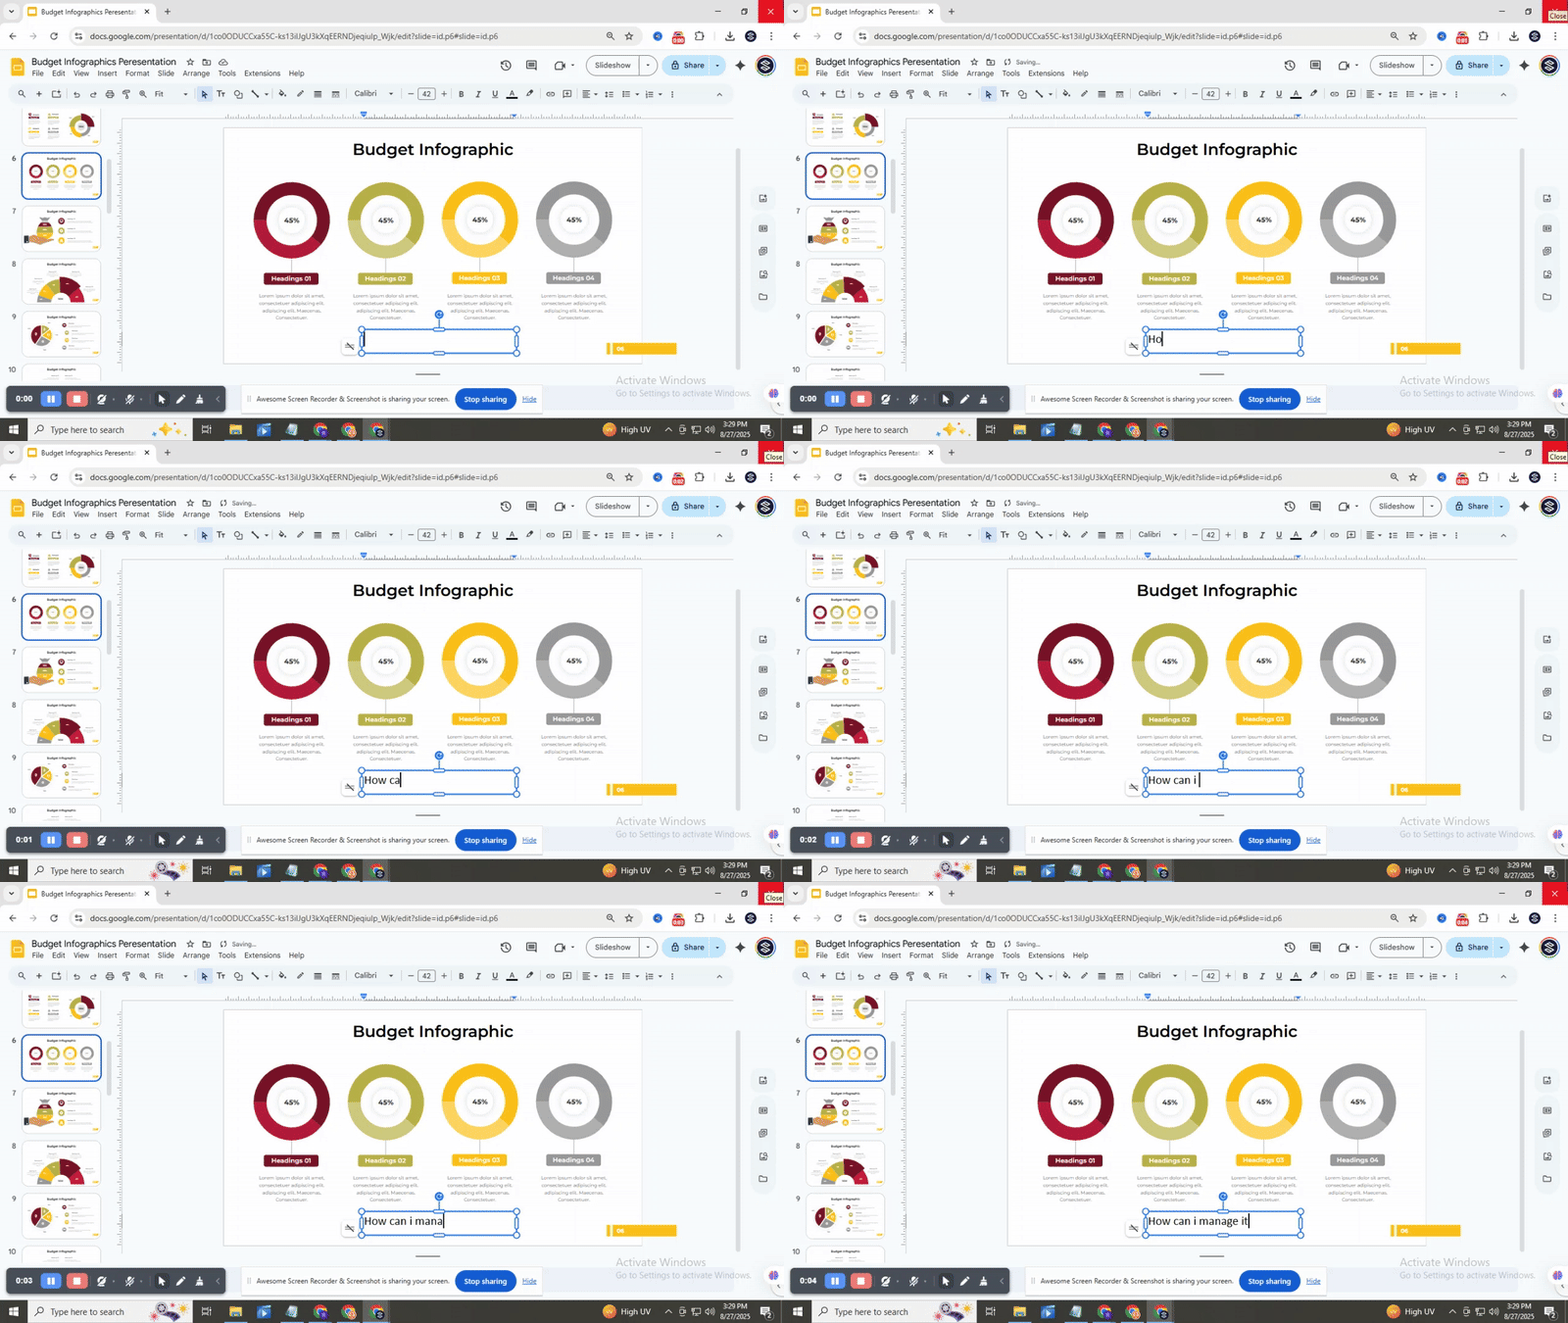
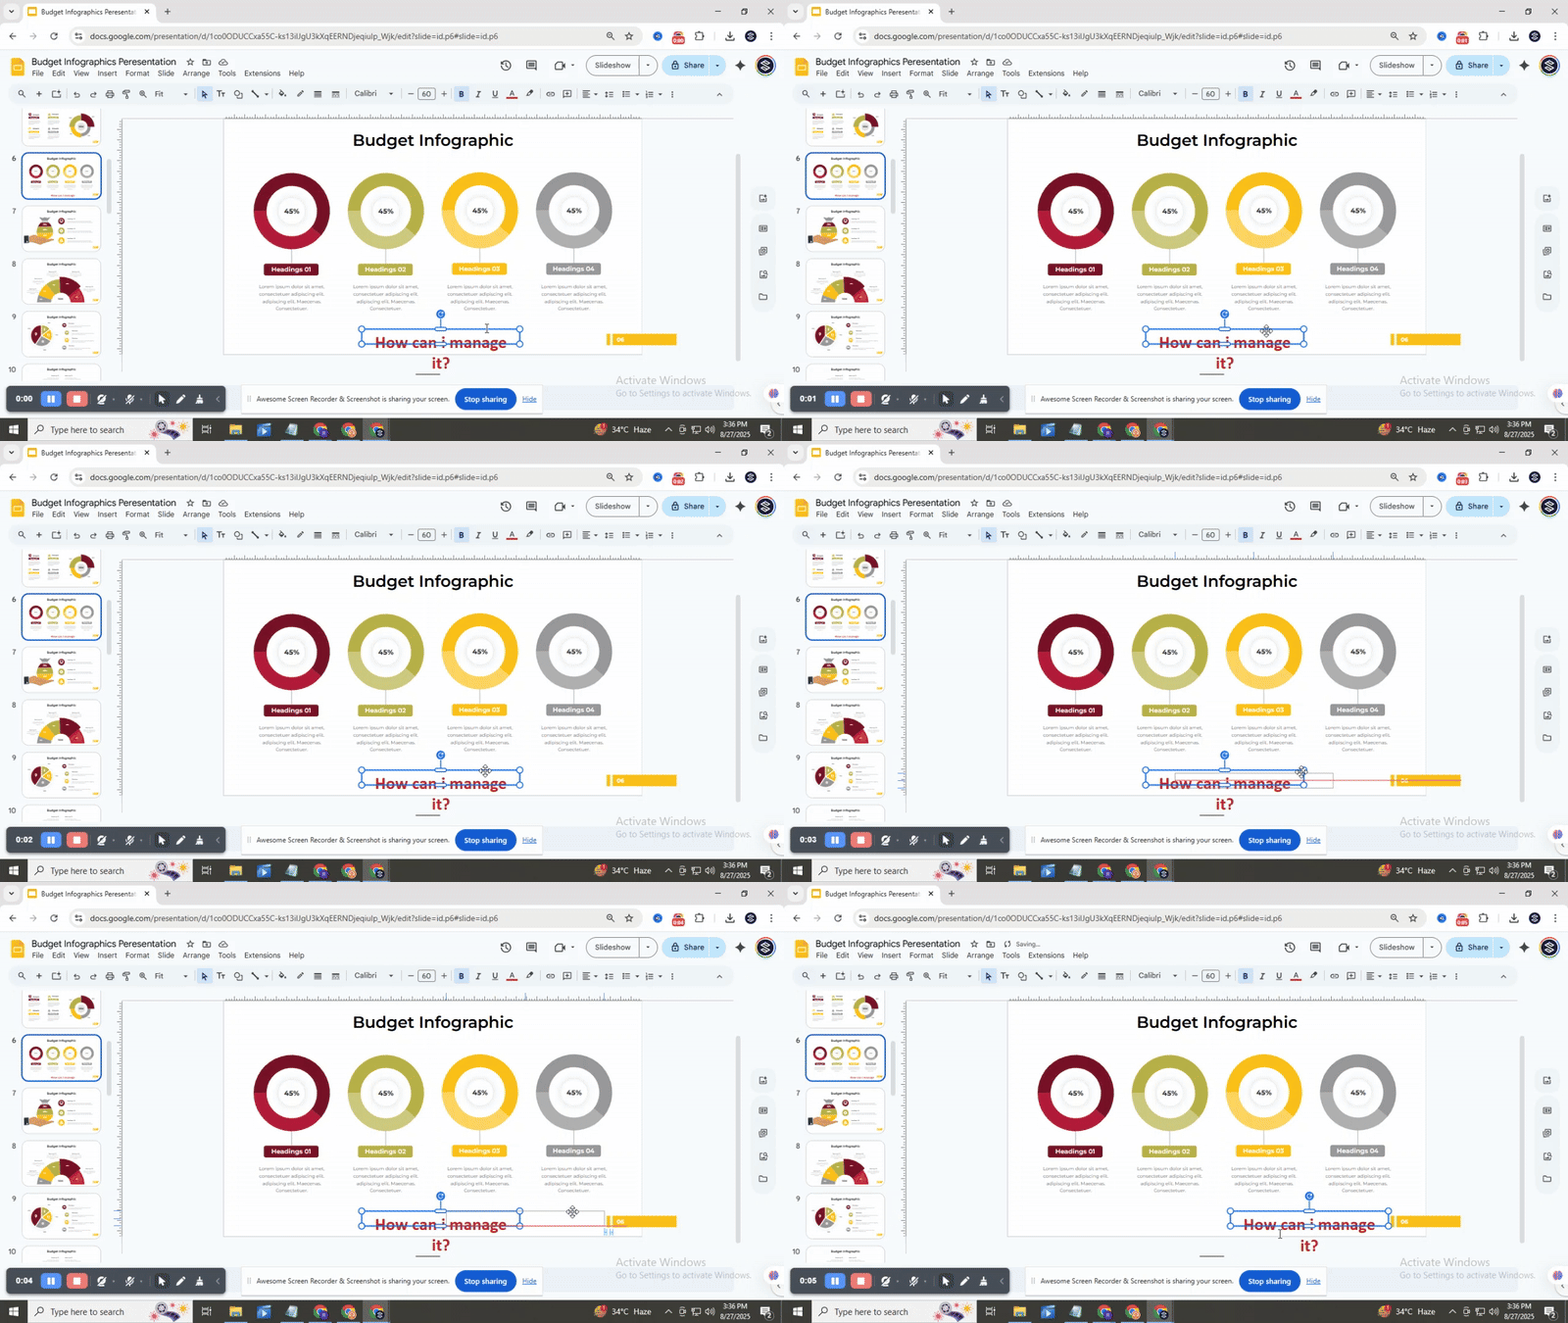
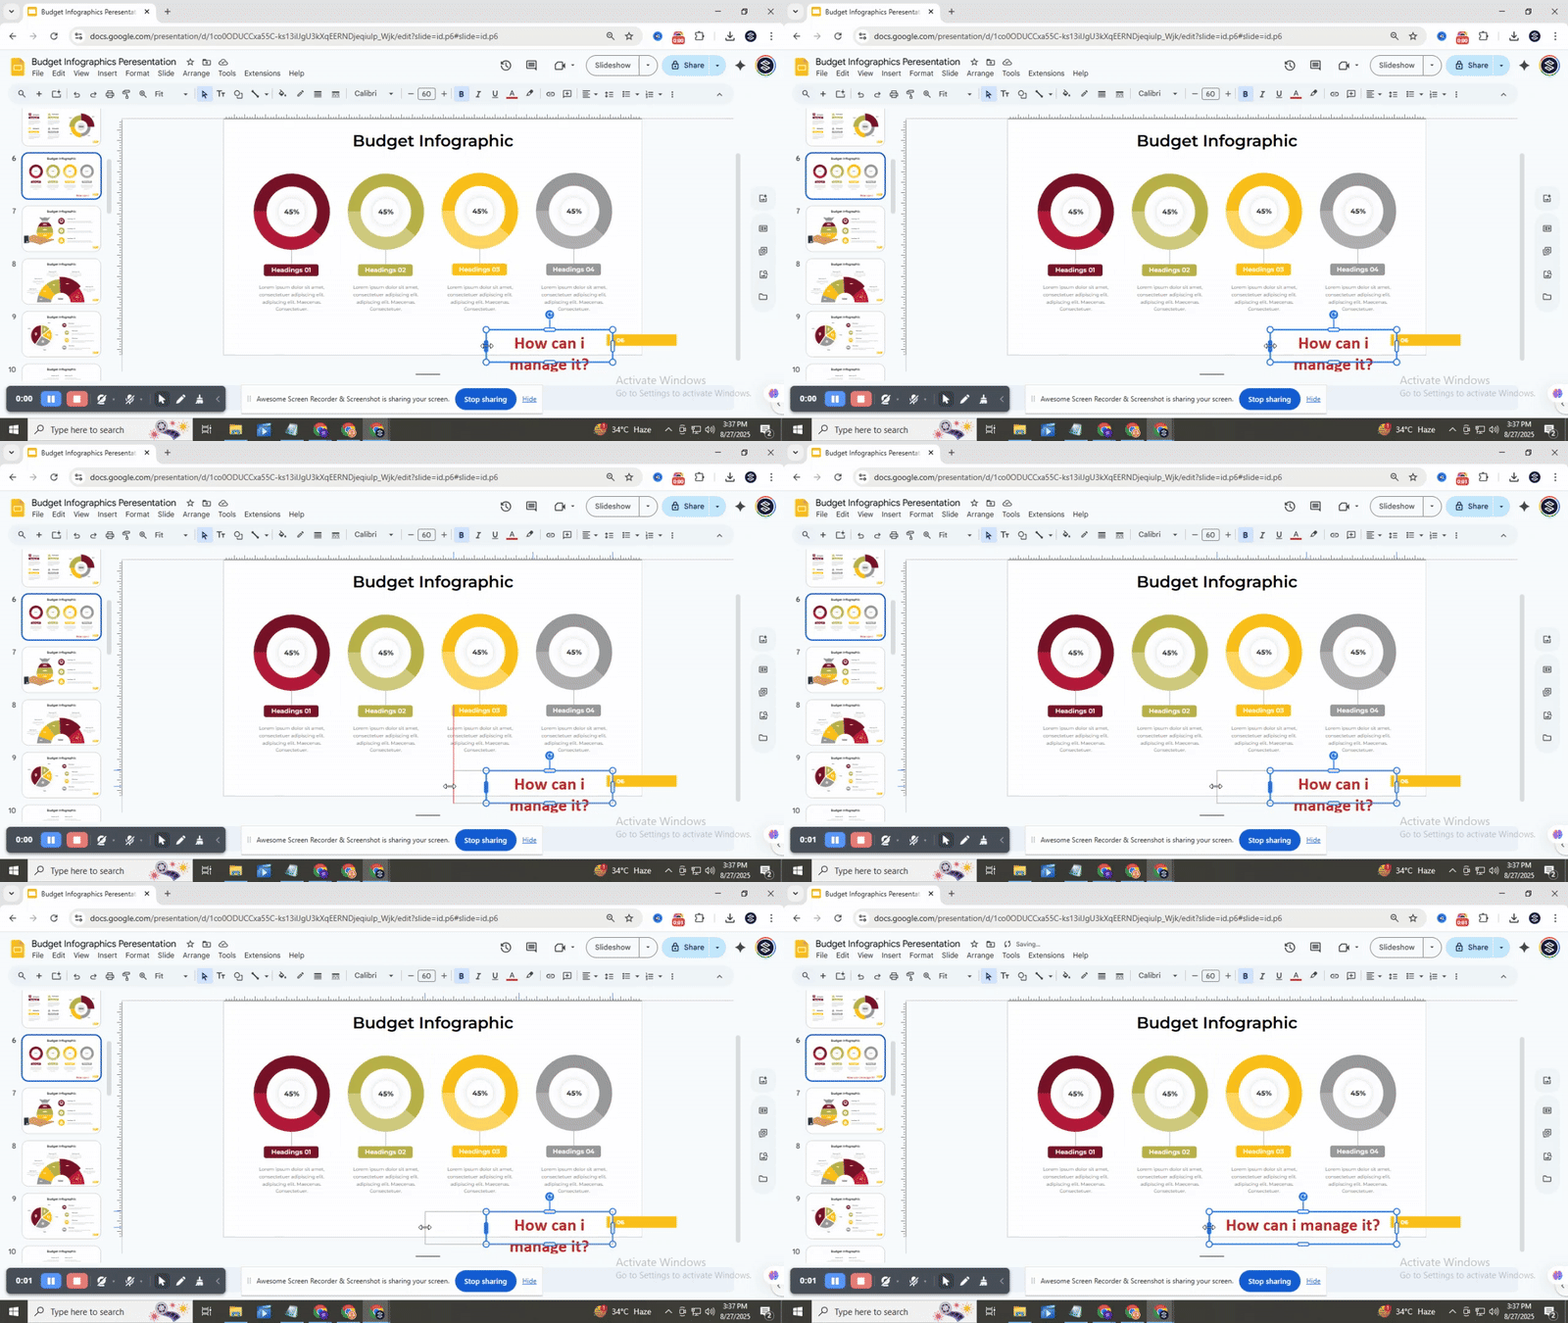
You can format it by changing the font, size, alignment, style, and color using the toolbar options. Move the text box by selecting it and dragging when the cursor becomes a four-headed arrow.
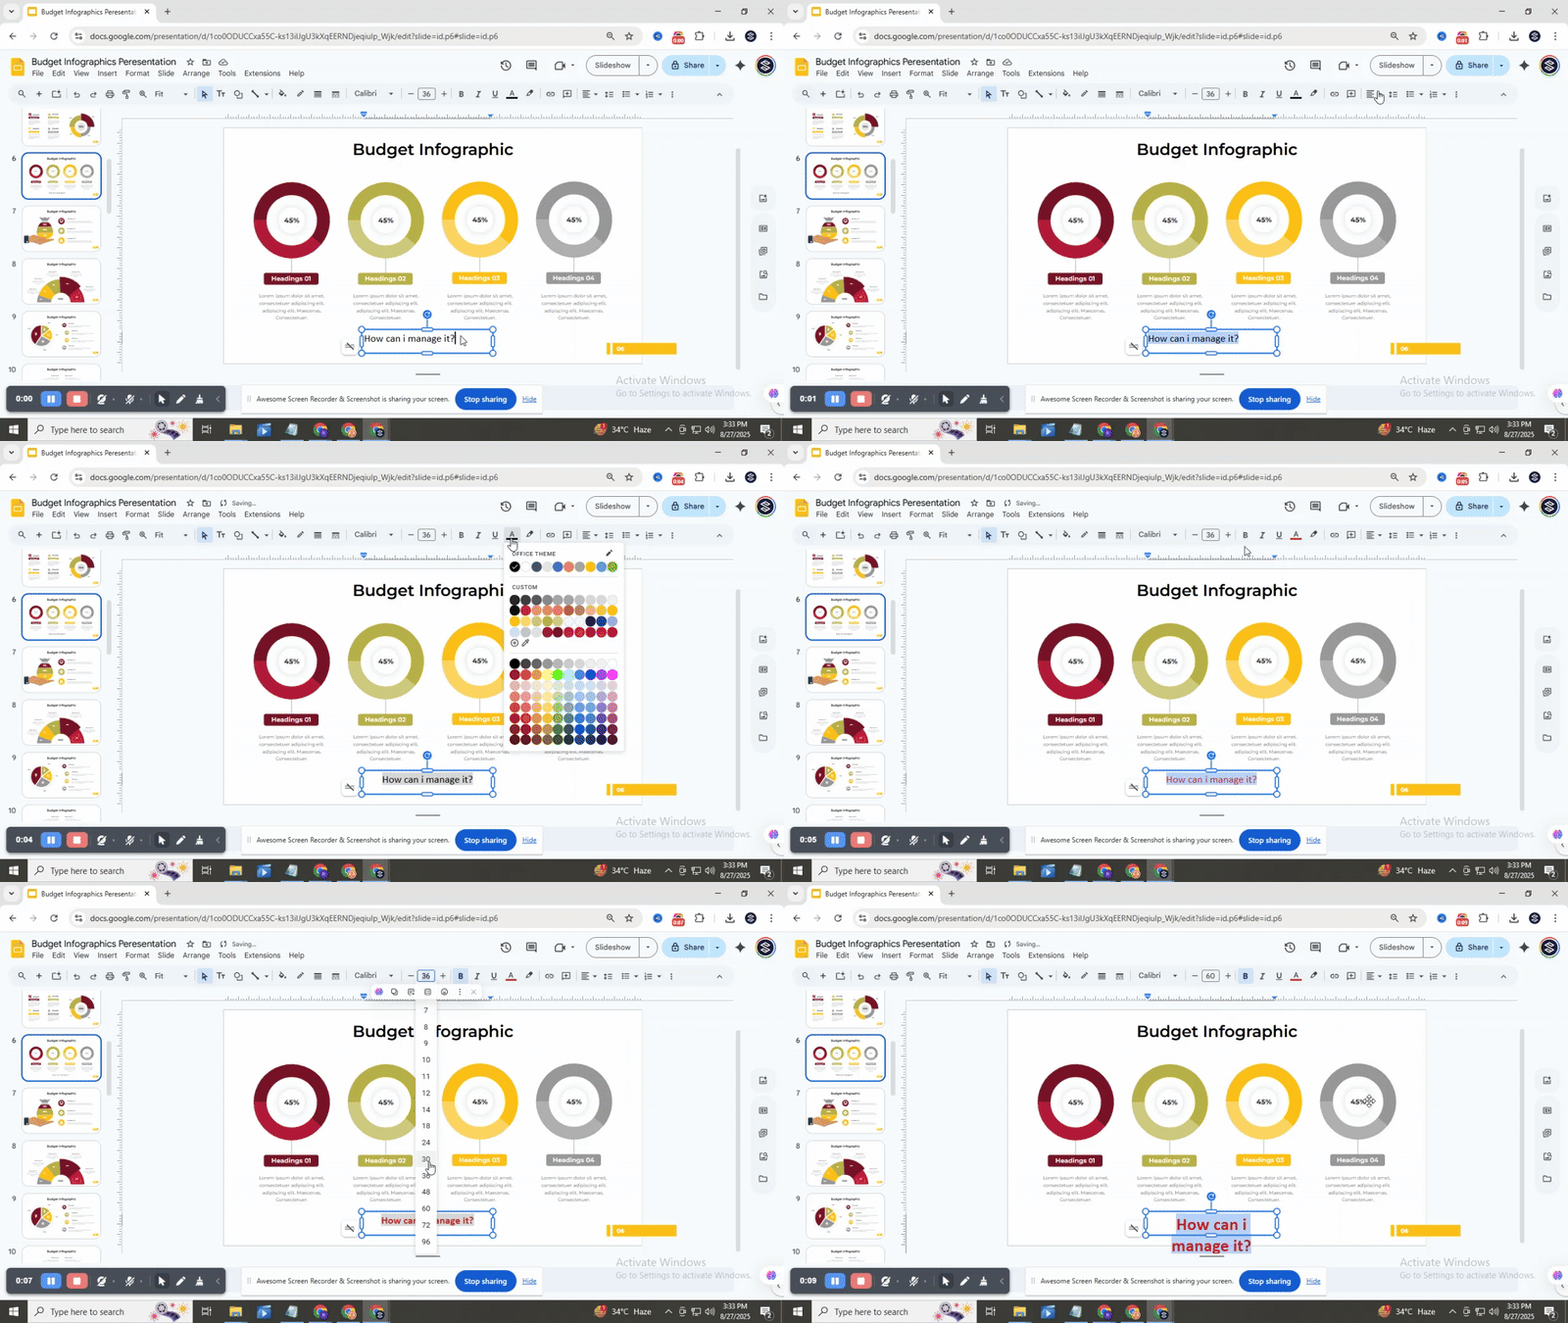
Resize it by dragging any of its handles. You can also add a text box quickly using a keyboard shortcut: press Ctrl + Alt + Shift + T on Windows or Cmd + Option + Shift + T on Mac to insert it without using the toolbar.
Adding the Same Text to Multiple Slides:
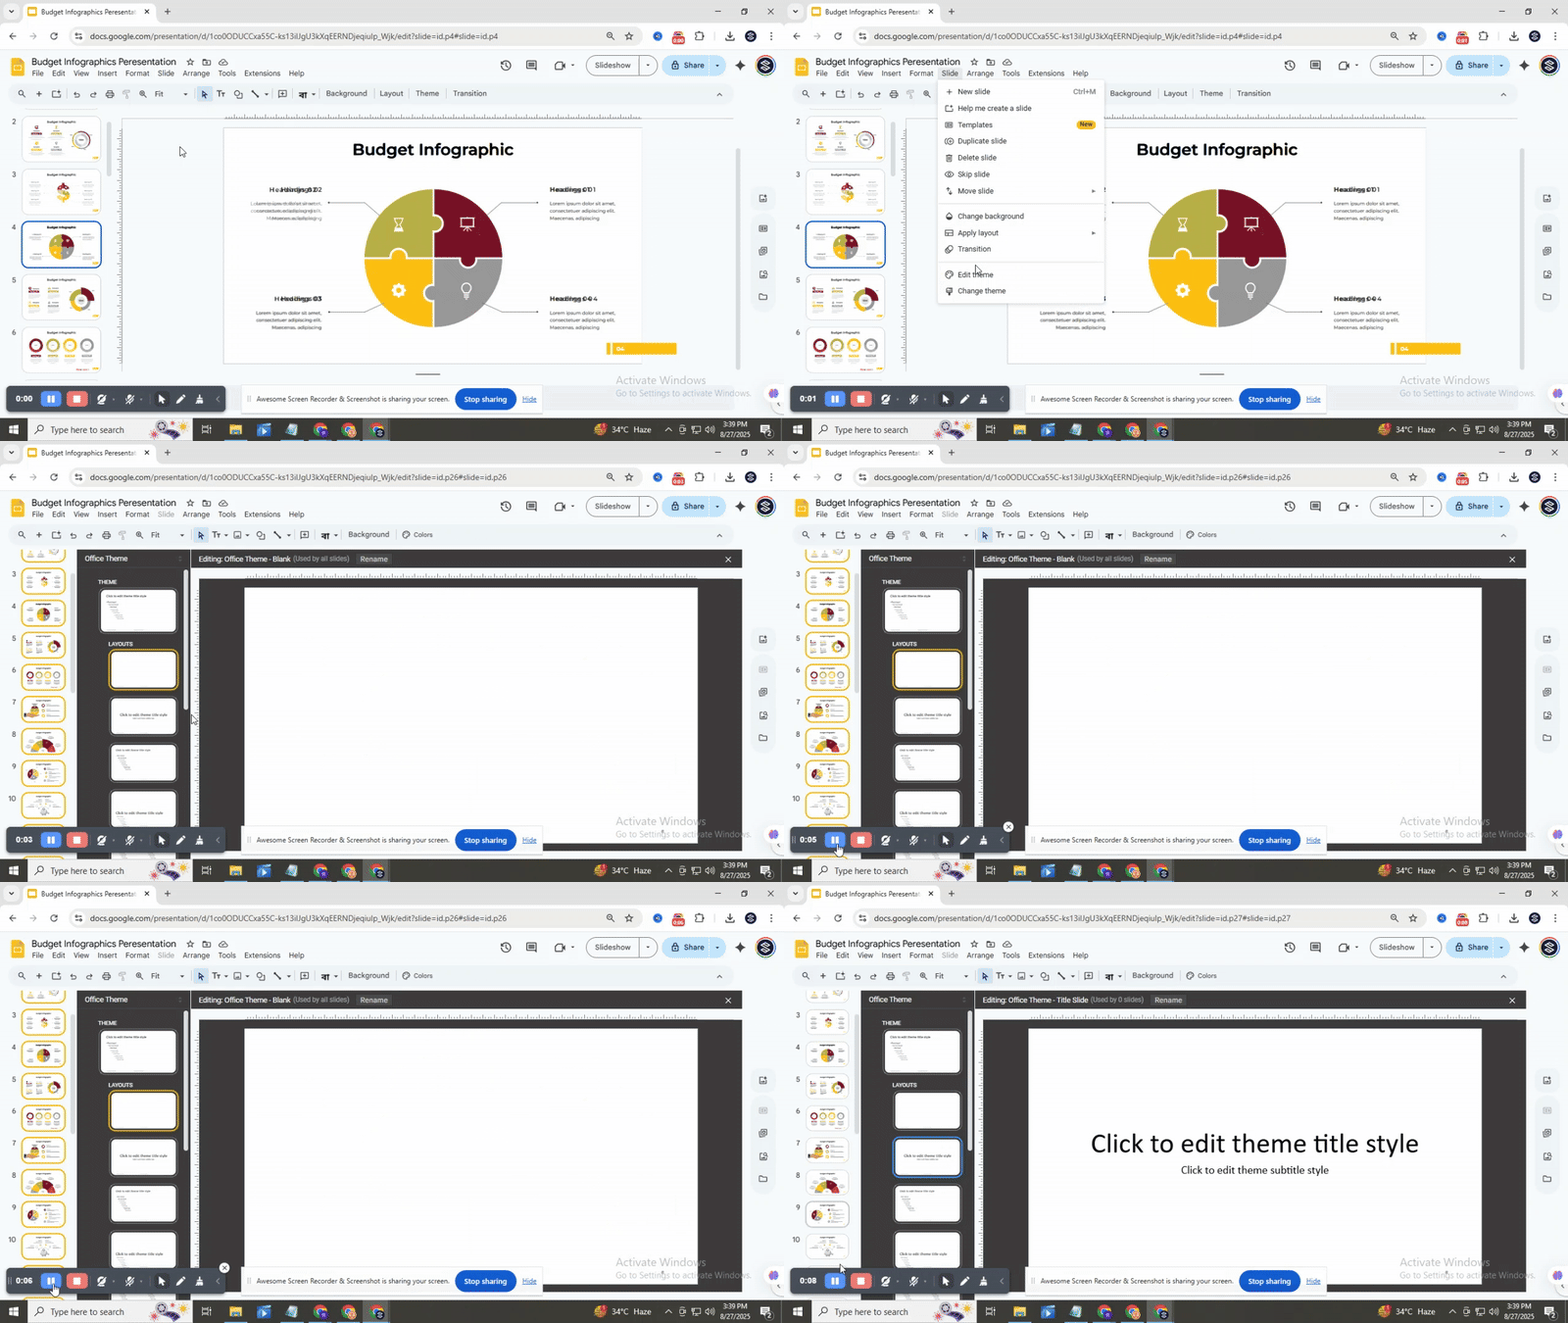
Saving time with repeated text is easy in Google Slides. First, select a slide where you want the text to appear. Access the master slides by clicking Slide → Edit master. The master editor will open, showing the layout master that your slide is based on.
Drawing a text box in the master slide lets you add the text once and apply it to all slides using that layout. Click Insert placeholder → Text box, then drag to the size and position you want.
You can format the text using the toolbar, adjusting font, size, alignment, style, and color. Once done, exit the master view by clicking the “X” at the top-right. The text will now appear on all slides that derive from this master.
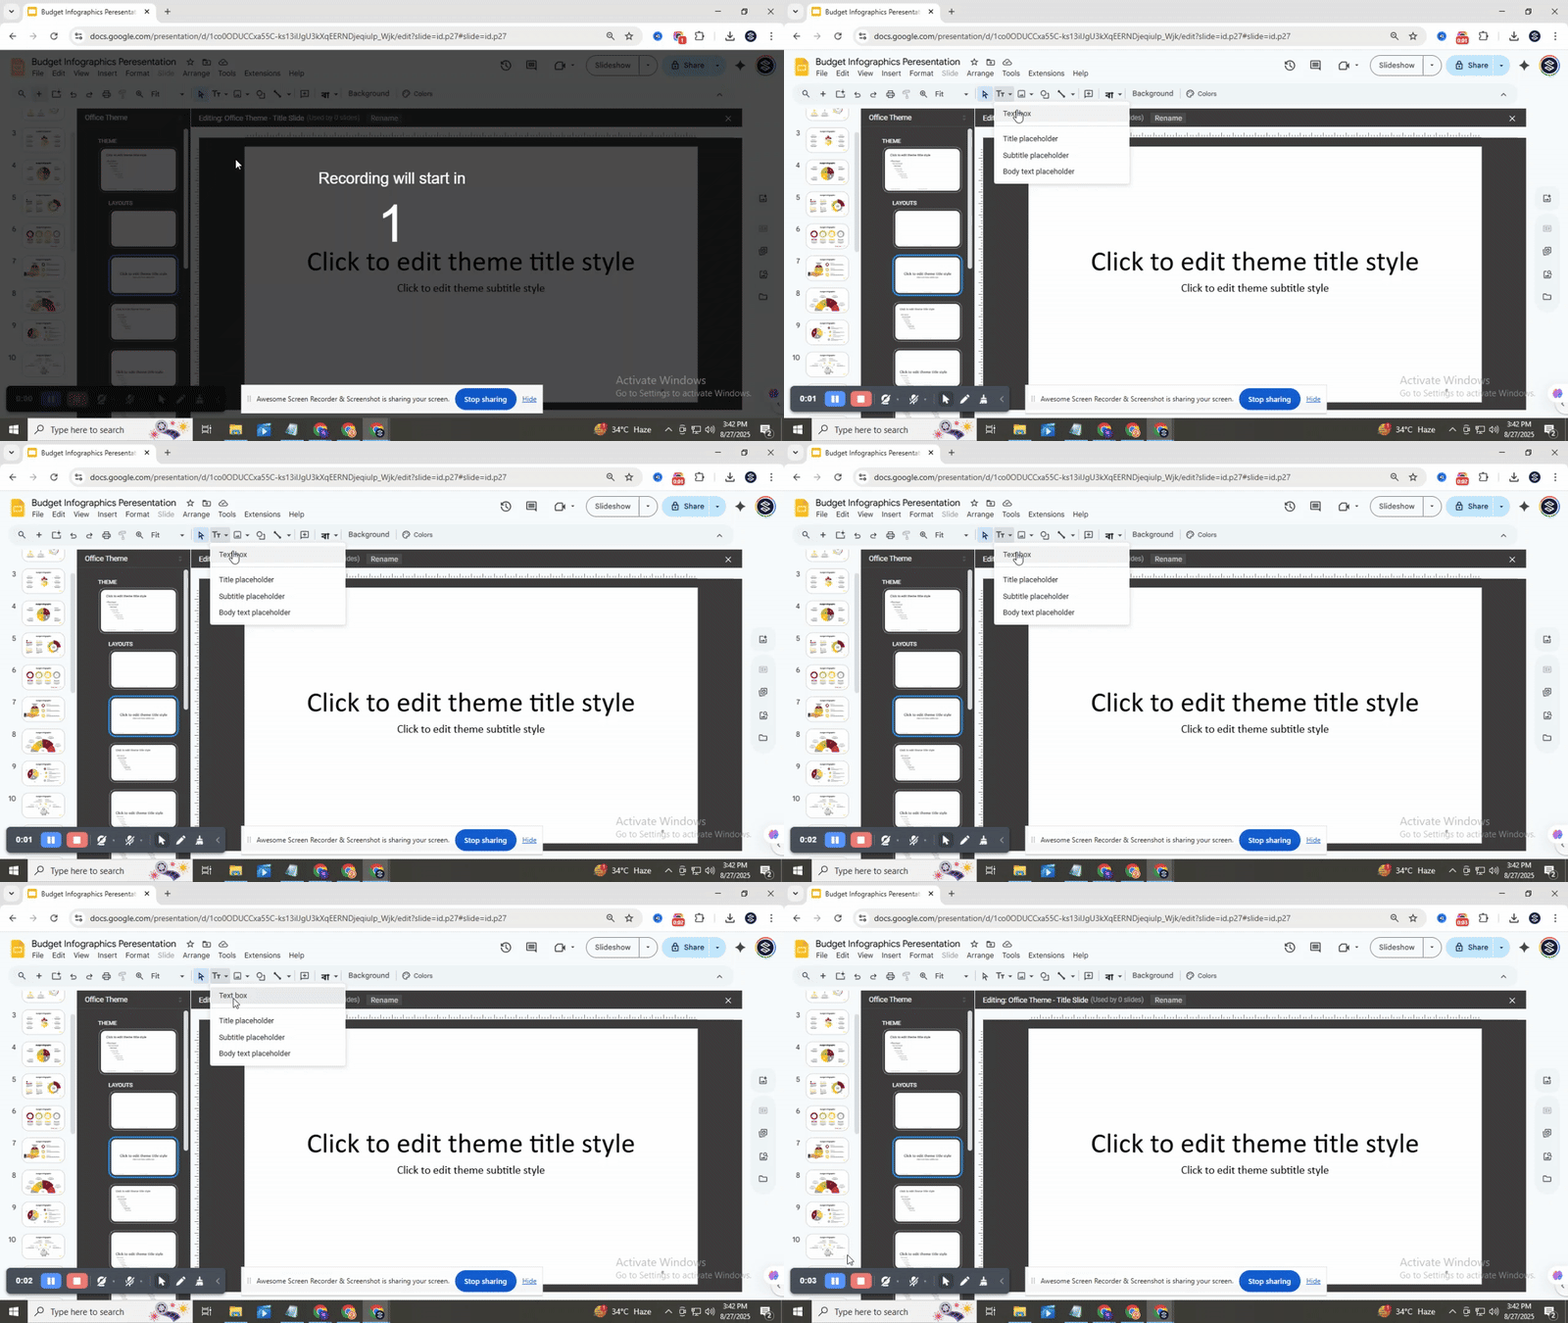
If slides use different layout masters, the text will need to be added separately to each master to maintain consistency. This step ensures the same information, such as headings, footers, or repeated notes, looks uniform across your entire presentation.
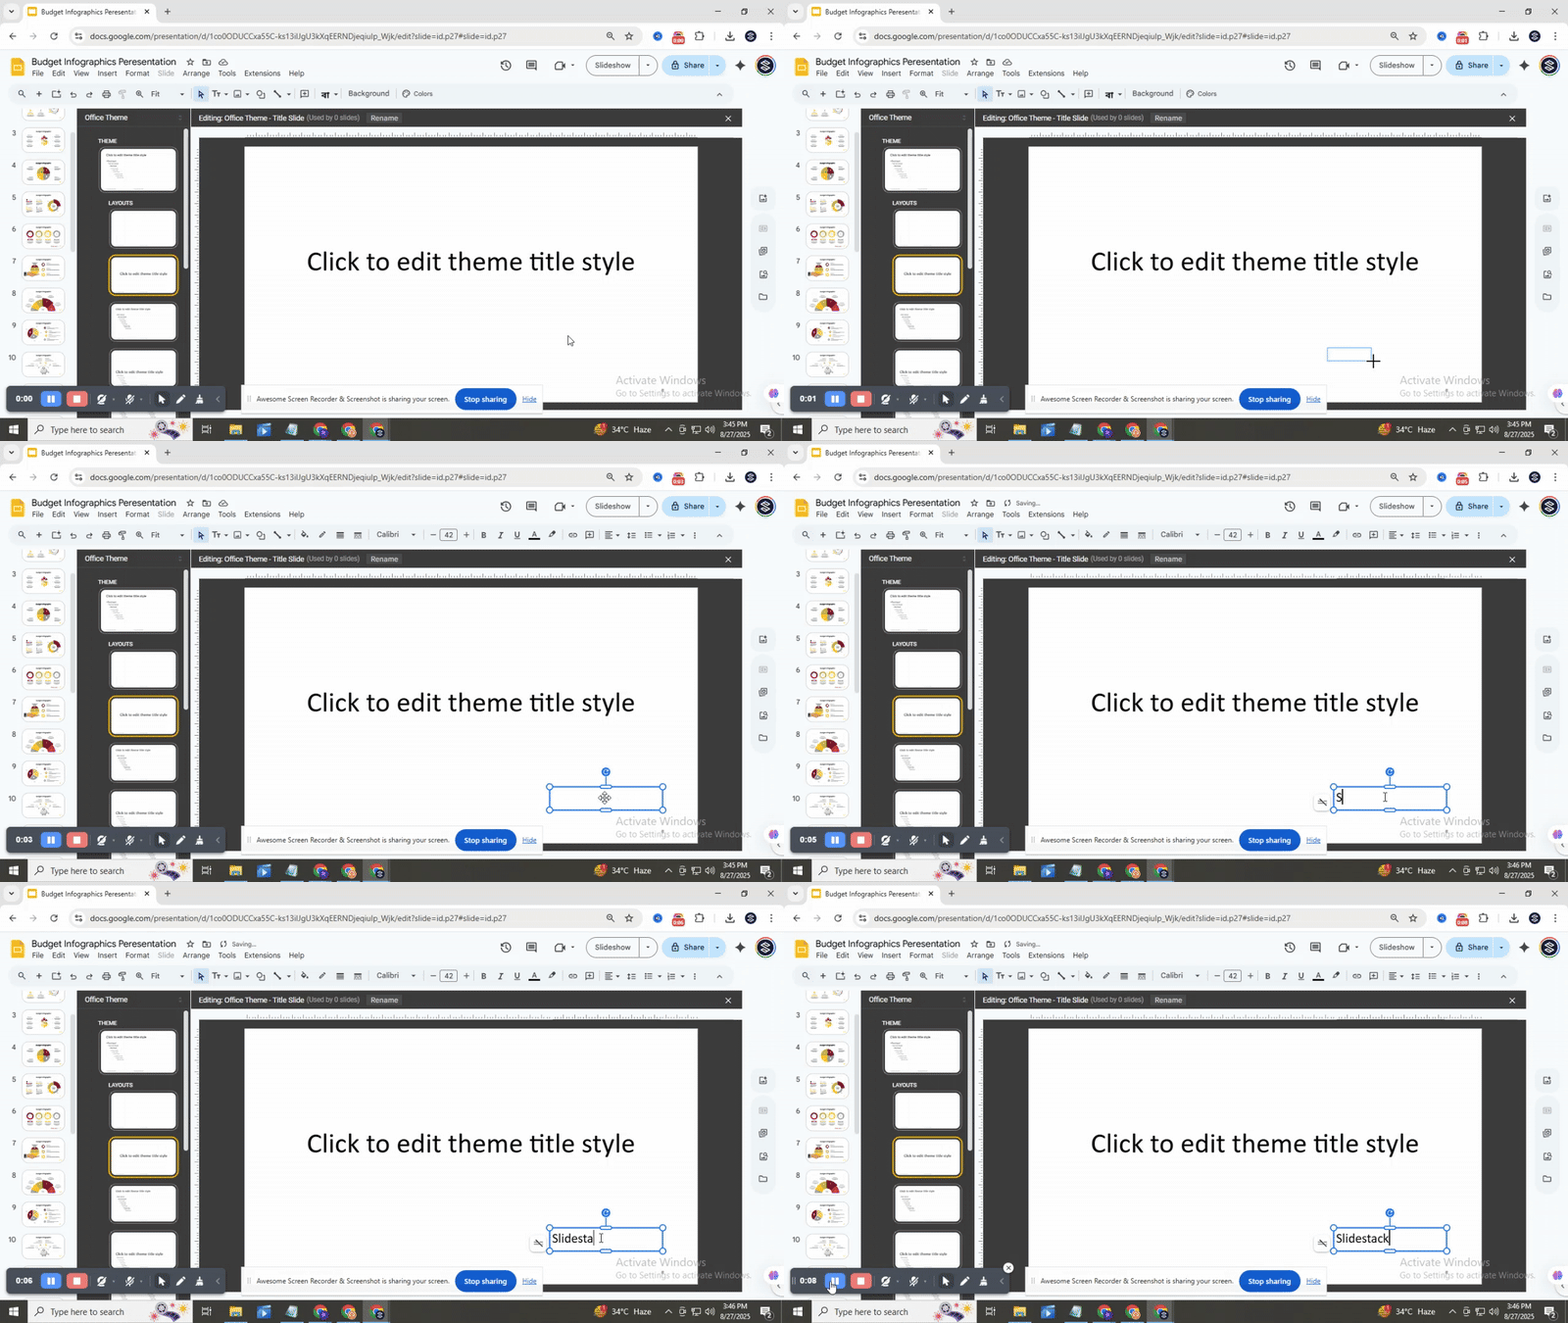
Keeping in mind that text added to master slides cannot be edited directly on individual slides, you’ll need to return to the master view to make changes later. Using this method keeps your slides organized and saves time while creating a polished, consistent presentation. Learn more about adding text boxes
Adding the Same Text to All the Slides
Start by opening your Google Slides presentation. Make sure you are on the slide you want to work with.
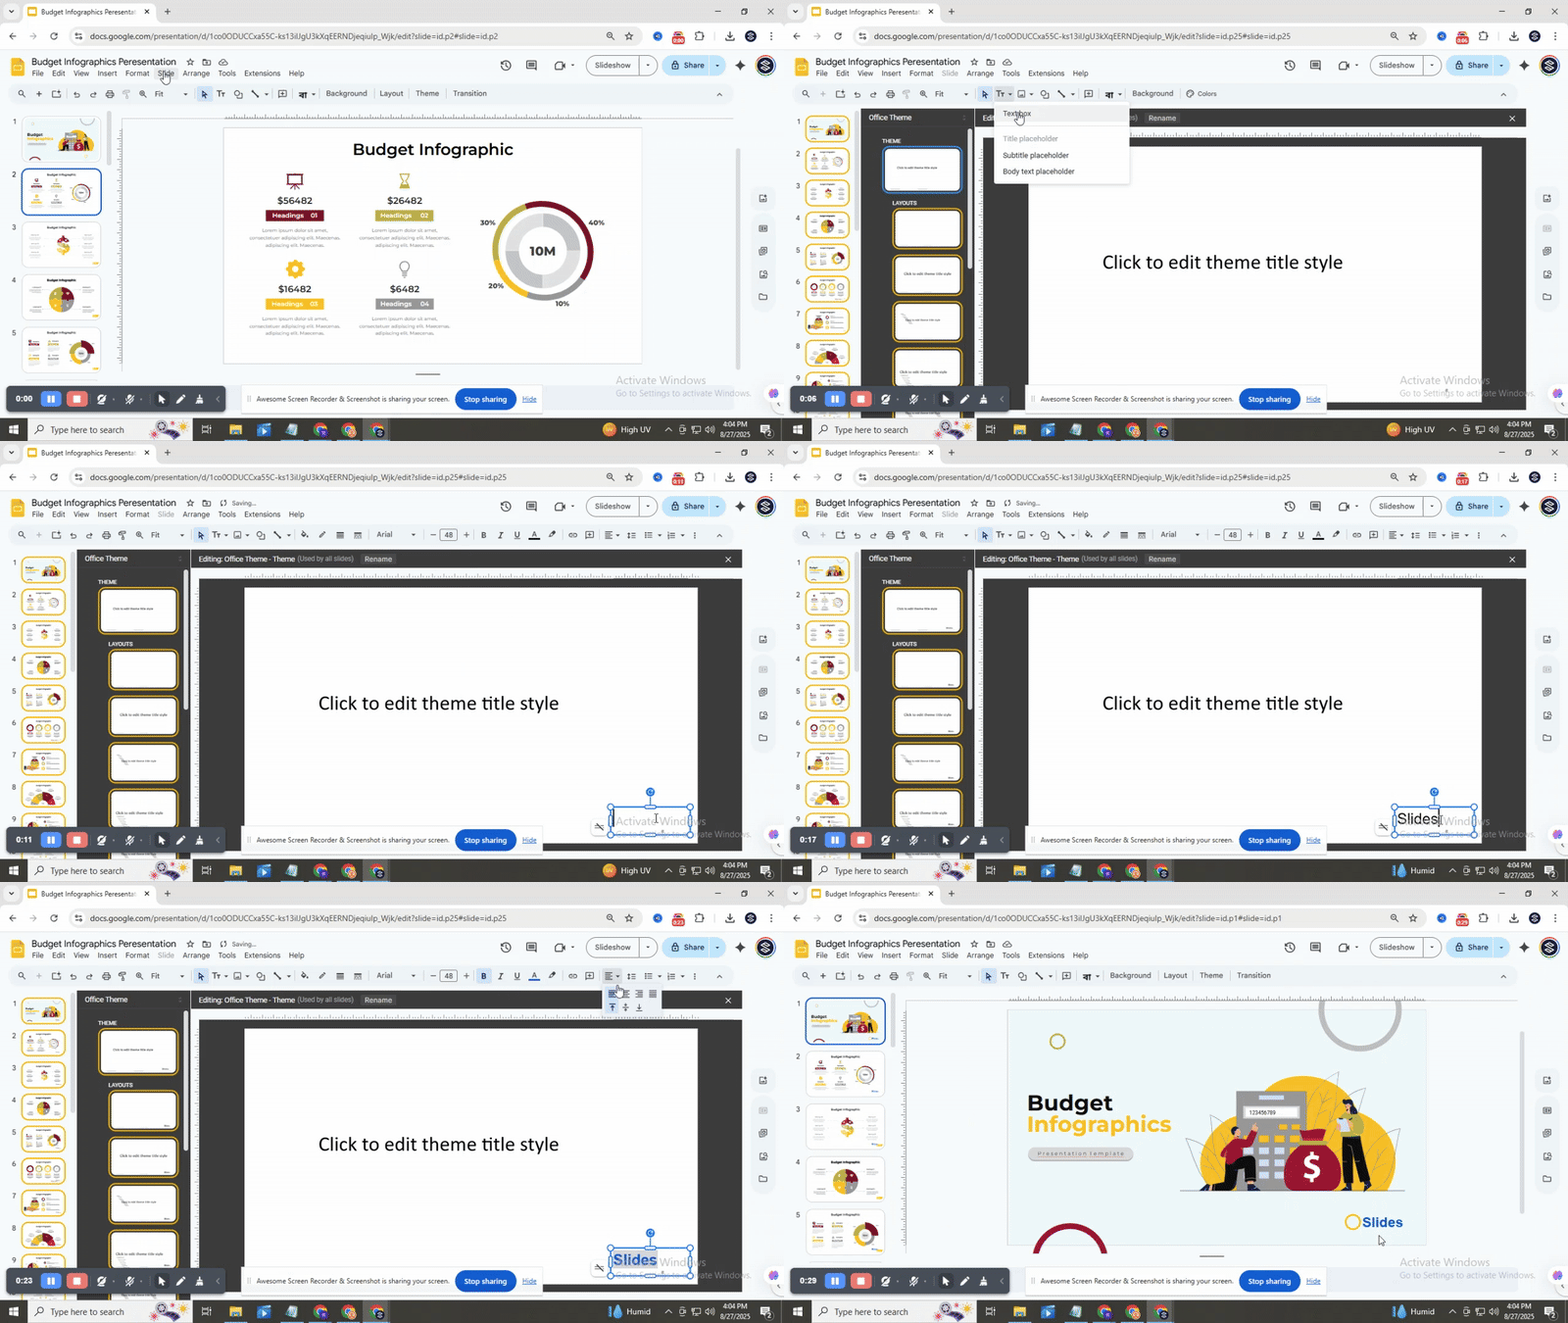
Go to the top menu and click Slide, then select Edit master. This opens the master slides view.
Click the first slide in the left panel. This is the parent slide, and changes here will appear on all slides.
On the toolbar, click Insert placeholder, then choose Text box. Draw the box by clicking and dragging it to the size you need. Click inside the text box and type the text you want to appear on every slide.
Use the toolbar to adjust the font, size, style, or color. Make it clear and readable for all slides.
Click the X at the top-right. Your text now shows on every slide. If you want it on all slides except the cover, add the text box to the layout masters instead. Step-by-step guide to master slide text
Copying and Pasting a Text Box
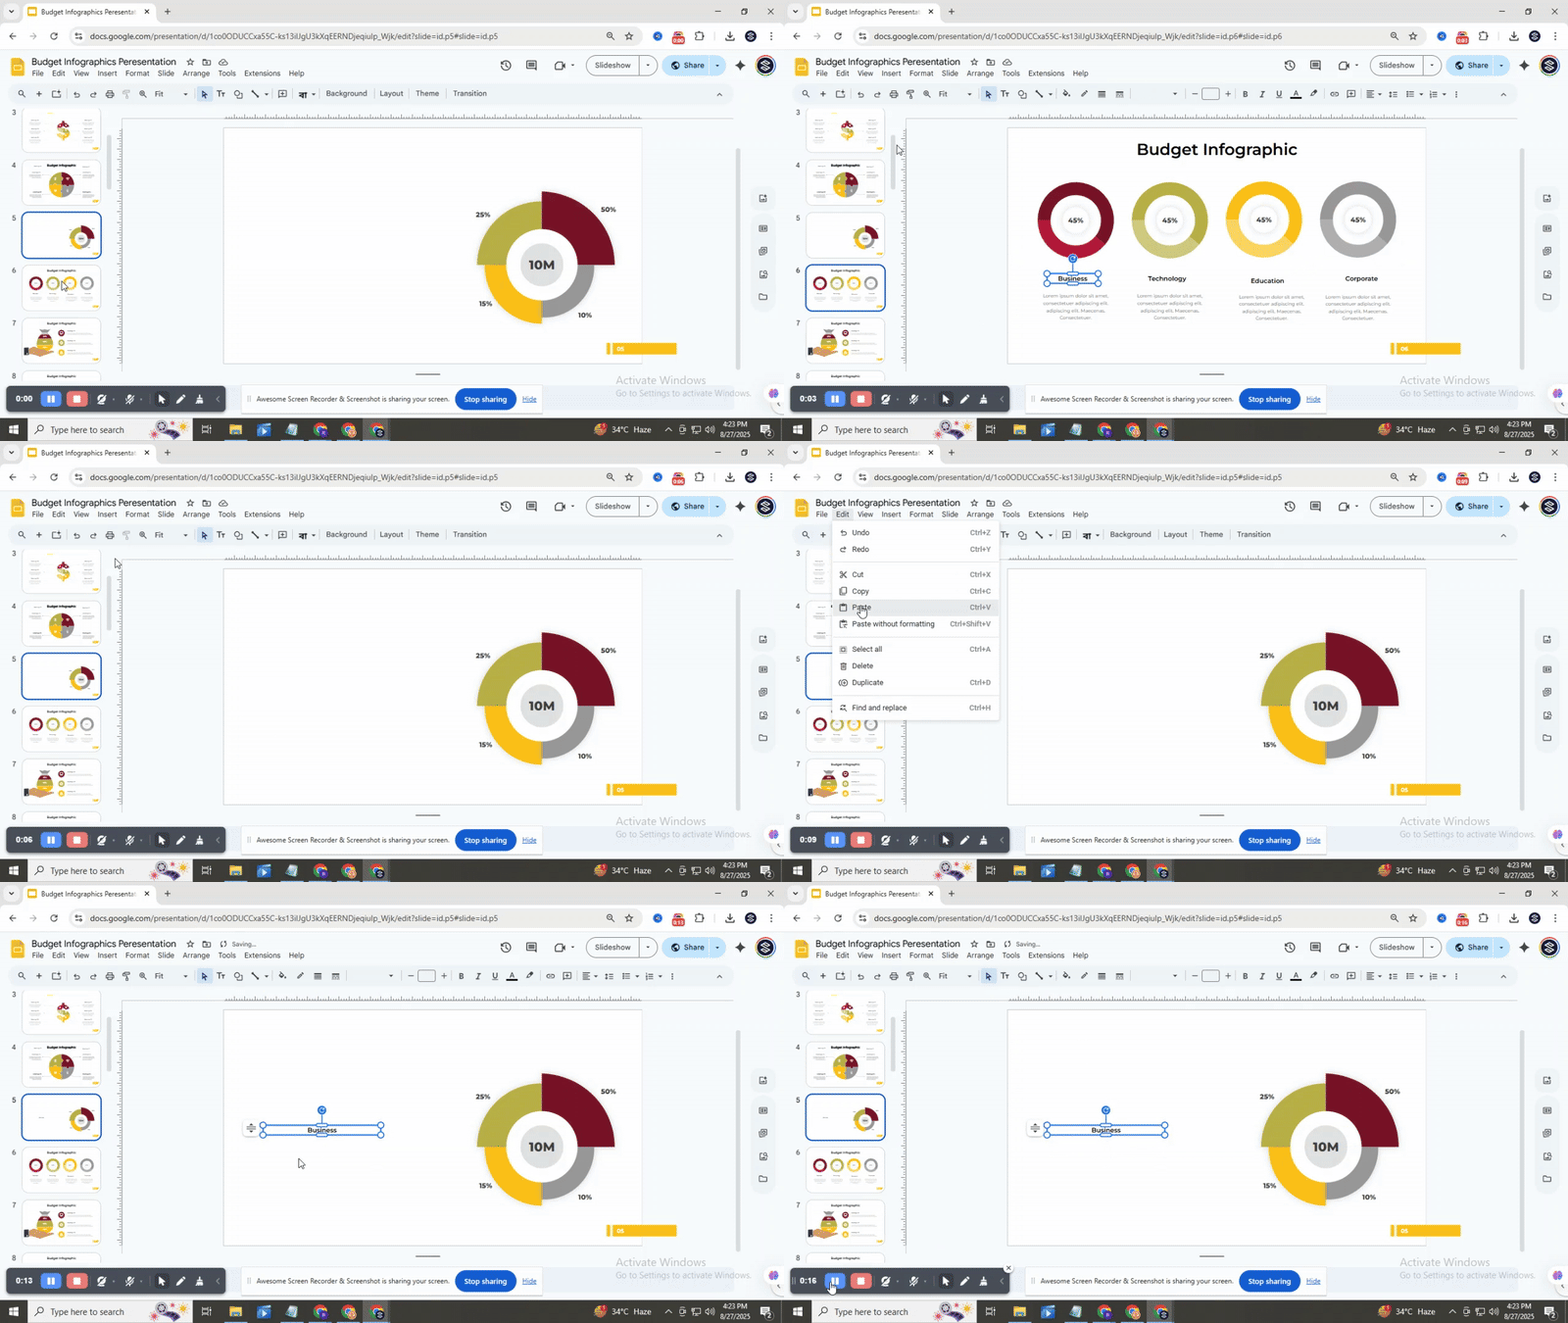
Copying and pasting text boxes helps you reuse content across slides without retyping. Start by selecting the text box you want to copy. Press Ctrl + C (Windows) or Cmd + C (Mac) to copy it. Move to the slide where you want it and press Ctrl + V (Windows) or Cmd + V (Mac) to paste. Drag the pasted box to adjust its position. Keeping placement consistent makes slides look cleaner and easier to read.
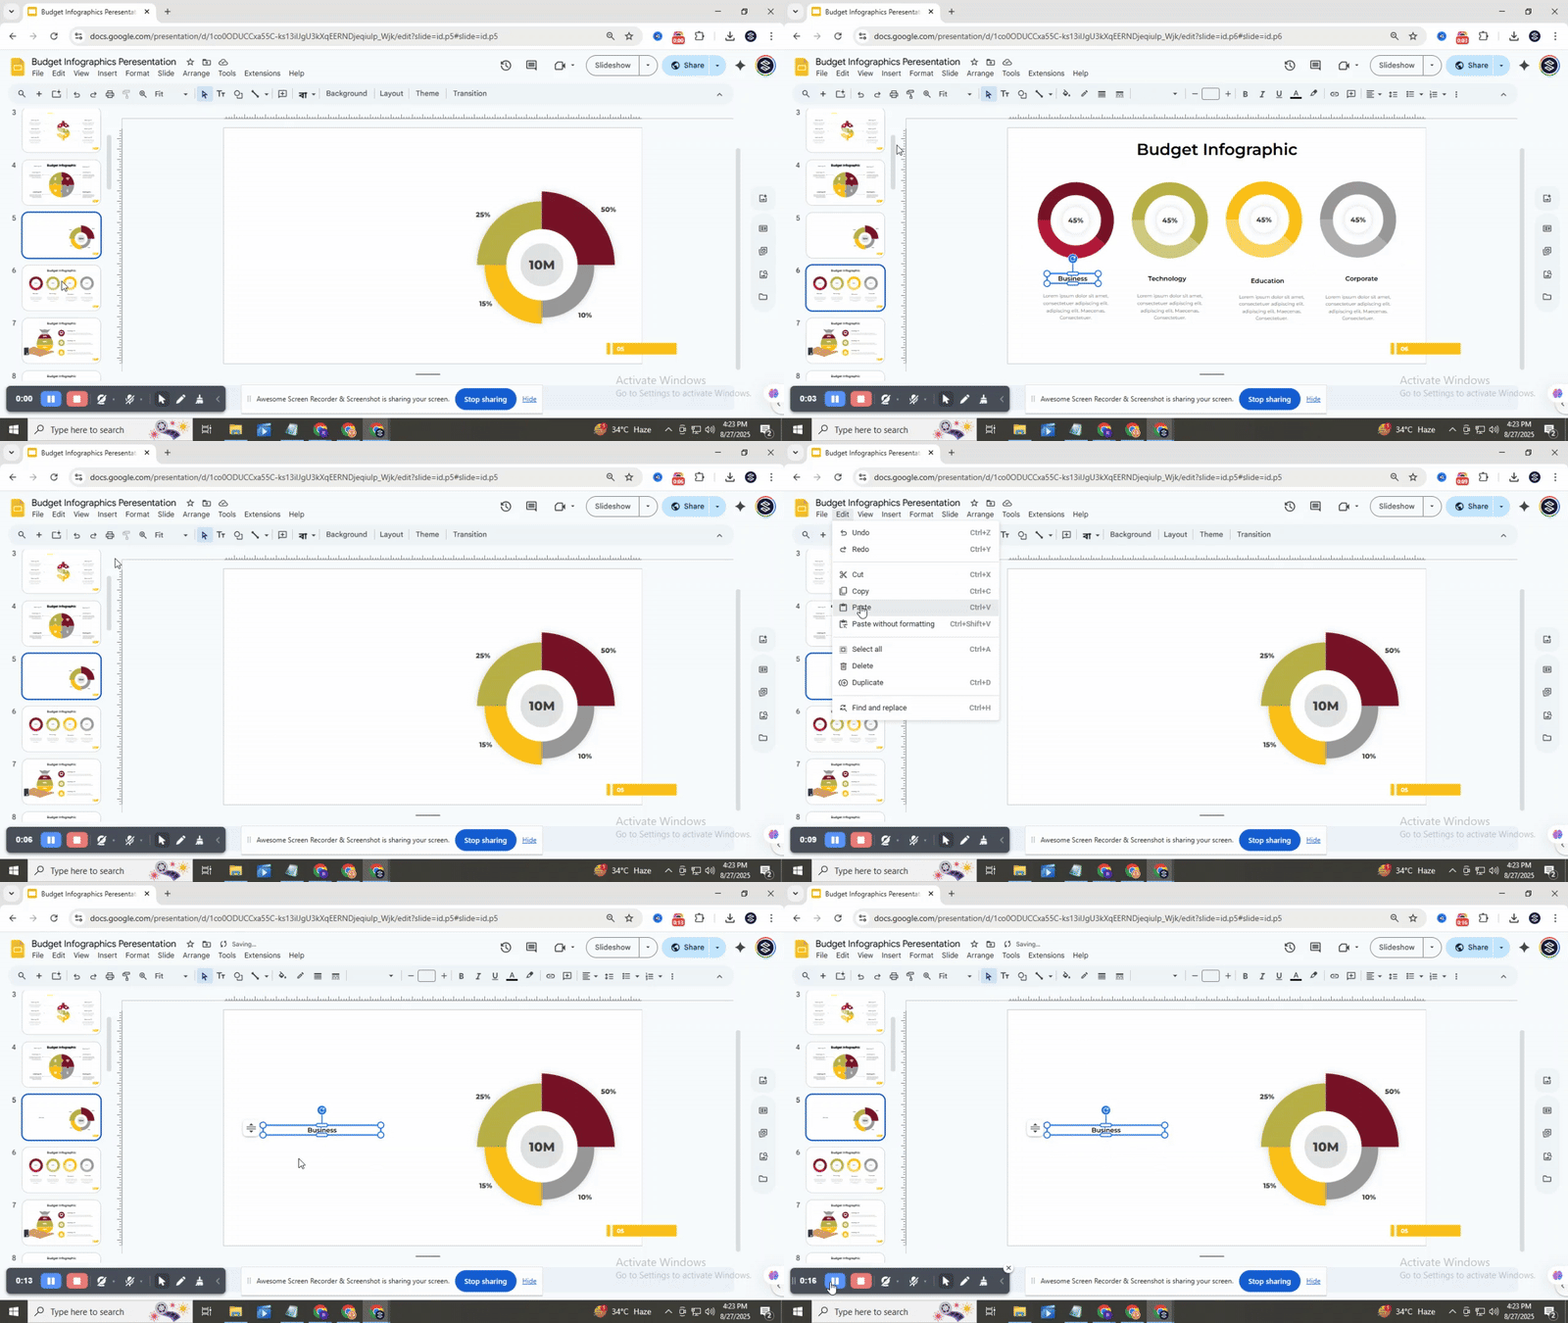
Deleting a Text Box
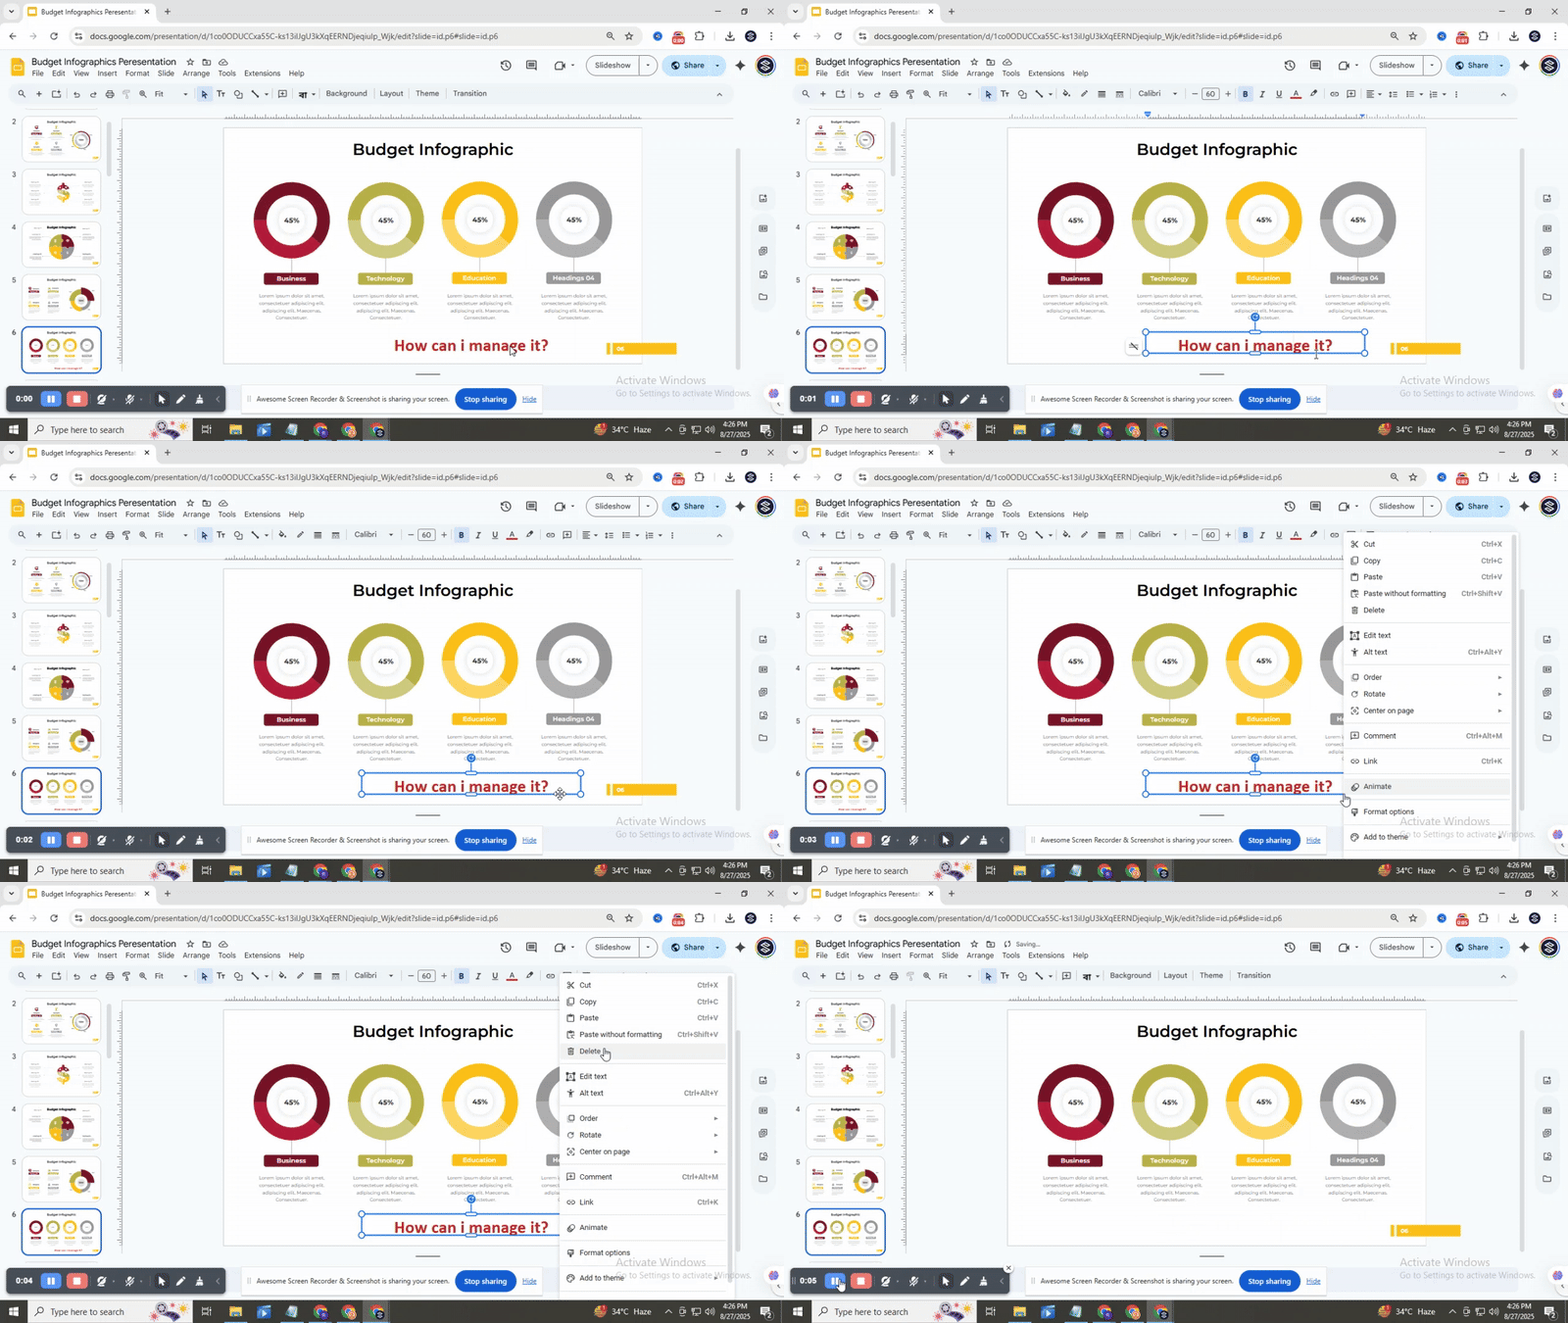
Select the text box you want to remove. Right-click and choose Delete or press the Delete key for a quick removal.
Conclusion
Adding, copying, and deleting text boxes in Google Slides is simple once you know the steps. These actions help keep your slides organized and make your work look clean. Using text boxes correctly also saves time and effort when creating presentations. With practice, managing text on your slides will feel quick and straightforward.
FAQs:
How do I add a text box in Google Slides?
Click on “Insert” in the top menu, then select “Text box.” Click anywhere on your slide to place it, then type your content. You can also use the shortcut Ctrl + Shift + T (Windows) or Cmd + Shift + T (Mac) to add a text box quickly.
Can I automatically link text between text boxes in Google Slides?
No, Google Slides does not support automatic linking of text between boxes. Each text box must be updated separately. You can copy and paste text manually if you want the same content in multiple boxes.
How do I ensure my text boxes stay aligned?
Use the alignment guides that appear when moving boxes. You can also select multiple boxes, right-click, and choose “Align” to line them up. Using consistent sizes helps keep them neat.
Is there an alternative to linking text boxes in Google Slides?
Yes, using the “Master Slide” or duplicating slides can help maintain consistent text across multiple slides. This keeps your formatting uniform without linking boxes.
How can I delete a text box in Google Slides?
Click on the text box to select it, then press the Delete or Backspace key. You can also right-click the box and choose “Delete” from the menu.
You may also be interested in ...
How To Create An Eye-Catching Portfolio
If you’re looking to create an eye-catching portfolio, this post will come in handy. In this article, you can find the easies...
23 Jun, 2024
How To Easily Create An Infographic
Infographics are the perfect way to make a presentation that will impact an audience, but their design and composition might...
08 Jun, 2024
PowerPoint Template Tips & Tricks You Ne...
PowerPoint seems to be an unknown world for many people, especially those who have been assigned to create a presentation out...
08 Jun, 2024
