How to Easily Add, Duplicate, Move, Delete, or Hide Slides in Google Slides
Managing slides in Google Slides can sometimes feel tricky. You might struggle with adding new slides, deleting unnecessary ones, moving them around, or even duplicating and hiding slides for later use. These tasks, if not handled efficiently, can slow down your workflow and make presentations harder to organize.
This guide will walk you through each step clearly and simply. You’ll learn how to add, delete, move, duplicate, and hide slides with ease. By mastering these actions, you can keep your presentations neat, save time, and focus on delivering content smoothly.
Mastering Slides in Google Slides
Mastering Slides in Google Slides makes creating presentations much easier. With the right steps, you can add, edit, and organize slides quickly. Keep reading to learn key tips that will help you work efficiently and get the best results.

How to Add and Delete Slides in Google Slides
Adding slides in Google Slides is simple. You can click the “+” button on the toolbar or go to the Slide menu and select New Slide. Another way is to right-click a slide in the left-hand panel and choose New Slide. For a faster method, press Ctrl + M on Windows or Cmd + M on Mac. The new slide can keep the design of the selected slide or use a default layout.
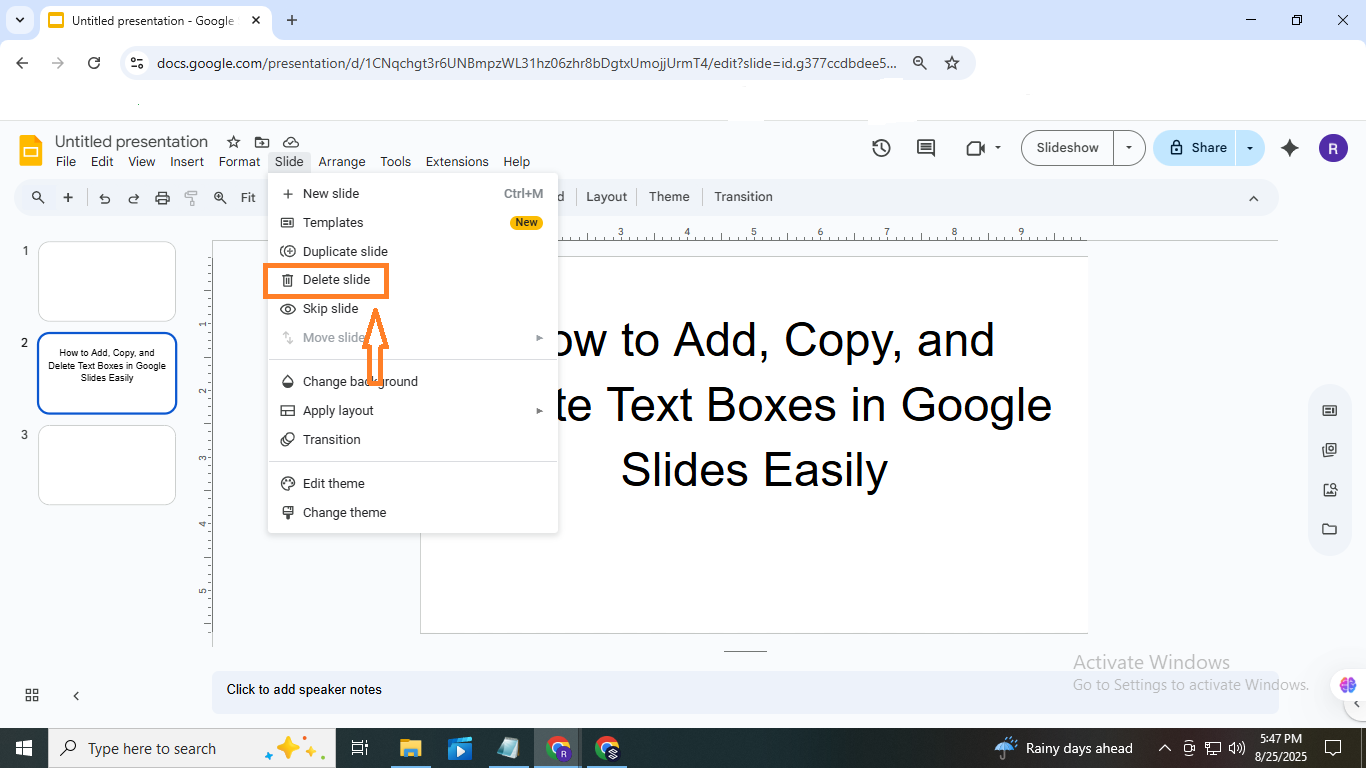
Deleting slides is just as easy. Right-click the slide you want to remove and select Delete, or select it and press the Delete key. This quickly removes unwanted slides.
How to Move Slides in Google Slides
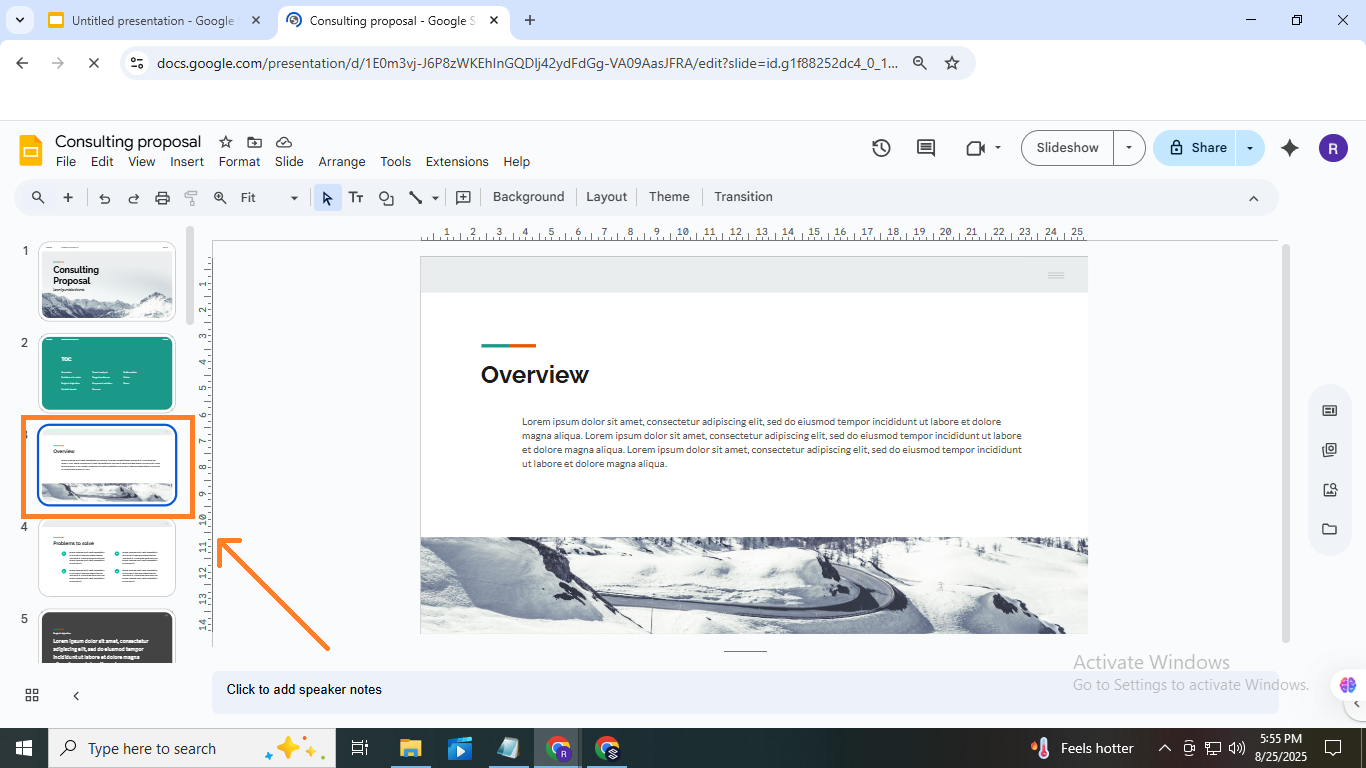
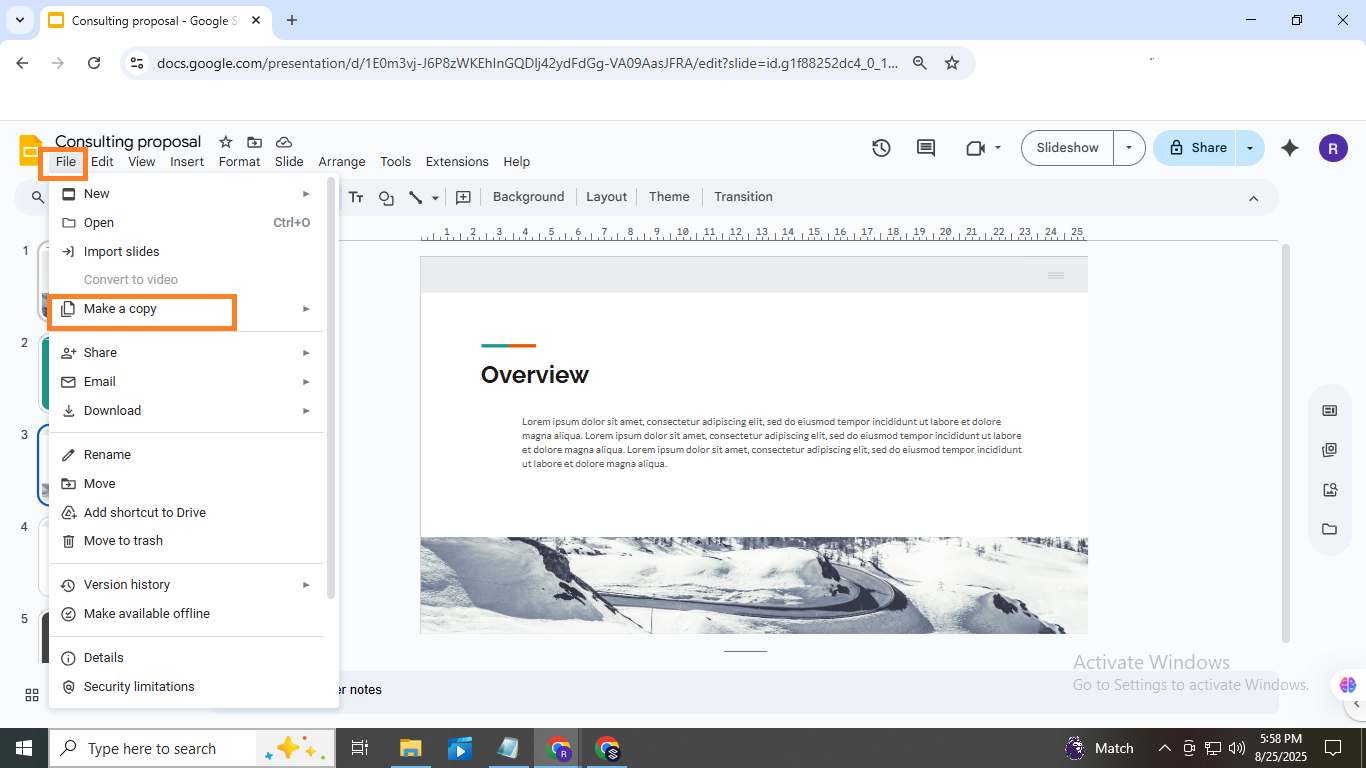
Start by selecting the slide you want to move or duplicate. Drag it to a new position or right-click and choose Duplicate slide. You can also copy slides to another presentation by right-clicking, selecting Copy, and pasting them into the other file.
How to Duplicate Slides in Google Slides
Duplicating slides in Google Slides is simple. Right-click the slide you want to copy and select "Duplicate Slide" from the menu. Alternatively, use the shortcut Ctrl + D on Windows or Cmd + D on Mac to duplicate the slide instantly. This makes it easy to reuse content without having to create new slides from scratch.
How to Hide Slides in Google Slides
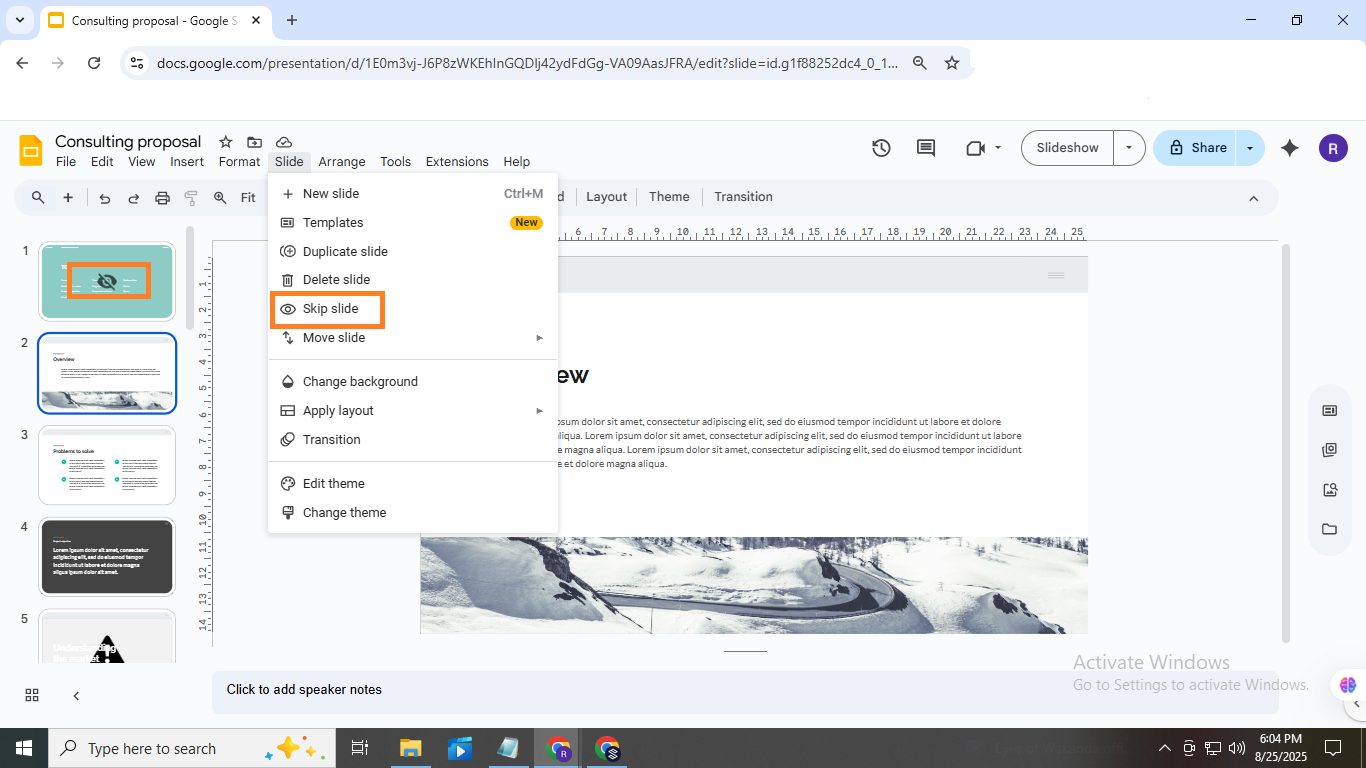
Hiding slides in Google Slides helps you keep content without showing it during your presentation. Right-click the slide thumbnail and choose Skip Slide, and you will see a crossed-out eye icon that marks it as hidden. You can also go to the Slide menu and select Skip Slide from there. For multiple slides, hold Shift or Ctrl/Cmd while selecting, then hide them all at once. To bring the slides back, repeat the process, and the hidden icon will disappear.
Why Add, Delete, Move, Duplicate, or Hide Slides
Managing slides efficiently helps you organize your presentation smoothly. For a detailed guide on adding, duplicating, moving, deleting, or hiding slides in Google Slides, check out our step-by-step guide on Easily Adding, Copying, Moving, Removing, or Hiding Slides in Google Slides.
Why Add Slides
Adding slides helps you supplement details when existing content is not enough and organize complex ideas into smaller, easy-to-understand sections. This keeps your audience engaged and makes your points clearer to follow.
Why Delete Slides
Deleting slides helps remove repeated or decorative content and keeps the audience focused on key points. It also improves flow, shortens presentation time, and makes your main message clear and easy to follow.
Why Move Slides:
Adjusting slide order helps the audience focus on the main ideas. Key slides placed earlier highlight important points, group related slides, and ensure the presentation flows clearly and logically for better understanding.
Why Duplicating Slides:
Duplicating slides lets you reuse layouts and content. This avoids recreating slides, speeds up your workflow, and reduces mistakes, making your presentation process faster and more efficient.
Why hide slides:
Hiding slides helps keep the audience focused on the main points. Extra details stay ready and can be revealed when needed, preventing the presentation from feeling overloaded or overwhelming.
Conclusion:
Mastering slides in Google Slides makes creating presentations easier. You can add new slides, move them where you need, duplicate important content, hide slides for special use, or remove slides you no longer need. Practicing these steps helps you work faster and stay organized. Try each feature, and you’ll soon manage your slides with confidence.
FAQs:
What is the shortcut for batch copying/deleting multiple slides?
To select multiple slides, hold down the Shift key for consecutive slides or Ctrl (Cmd on Mac) for non-consecutive slides. Then press Ctrl+C to copy or Delete to remove them. This works quickly without handling slides one by one.
Why do hidden slides still appear during playback?
Hidden slides are skipped in the main slideshow but may appear if the presentation is set to play all slides. Also, if you present from the edit view instead of the present mode, hidden slides can show up.
How to fix formatting errors when copying slides across documents?
Formatting can change because different presentations may have unique themes or layouts. To fix this, use Paste without formatting or Apply destination theme after pasting. Check fonts, colors, and alignment to ensure consistency.
Does Google Slides support one-click hiding of all slides?
No, Google Slides does not have a one-click option to hide all slides at once. You need to hide slides individually by right-clicking and selecting Hide slide.
Can deleted elements be recovered after deleting slides?
Yes, you can recover deleted slides or elements using Undo immediately after deletion. If the file is closed, check File > Version history to restore an earlier version with the deleted content.


You may also be interested in ...

How To Create An Eye-Catching Portfolio
If you’re looking to create an eye-catching portfolio, this post will come in handy. In this article, you can find the easies...
23 Jun, 2024

How To Easily Create An Infographic
Infographics are the perfect way to make a presentation that will impact an audience, but their design and composition might...
08 Jun, 2024

PowerPoint Template Tips & Tricks You Ne...
PowerPoint seems to be an unknown world for many people, especially those who have been assigned to create a presentation out...
08 Jun, 2024