How to Make a Custom Template in Google Slides (Easy Guide)
Creating presentations can take a lot of time and effort. A custom Google Slides template helps you keep your slides consistent and saves you from starting from scratch each time. Imagine having a ready-made design that fits your style and makes your work look professional every time. This easy guide will walk you through simple steps to create your own Google Slides template, so you can focus more on your content and less on design.
Why Create a Google Slides Template?
Creating a Google Slides template saves time and keeps every presentation consistent. It also makes design work easier for anyone on your team. Read the points below to see why building a template is worth it.
• Consistency: Every slide follows the same look, so your message stays clear and focused.
• Efficiency: You don’t need to start from scratch each time. The structure is ready to go.
• Collaboration: Teams can work together easily with shared slide formats and styles.
Using a template helps everyone stay on the same page. It removes guesswork, keeps branding steady, and speeds up the process. Whether you're building a class report or a team pitch, a solid template makes it easier to get things done right.
Few Steps to Create a Template in Google Slides
Designing your own template in Google Slides gives you full control over style and layout. The process is simple once you know the steps, so let’s go through them one by one.
Step 1: Open Google Slides
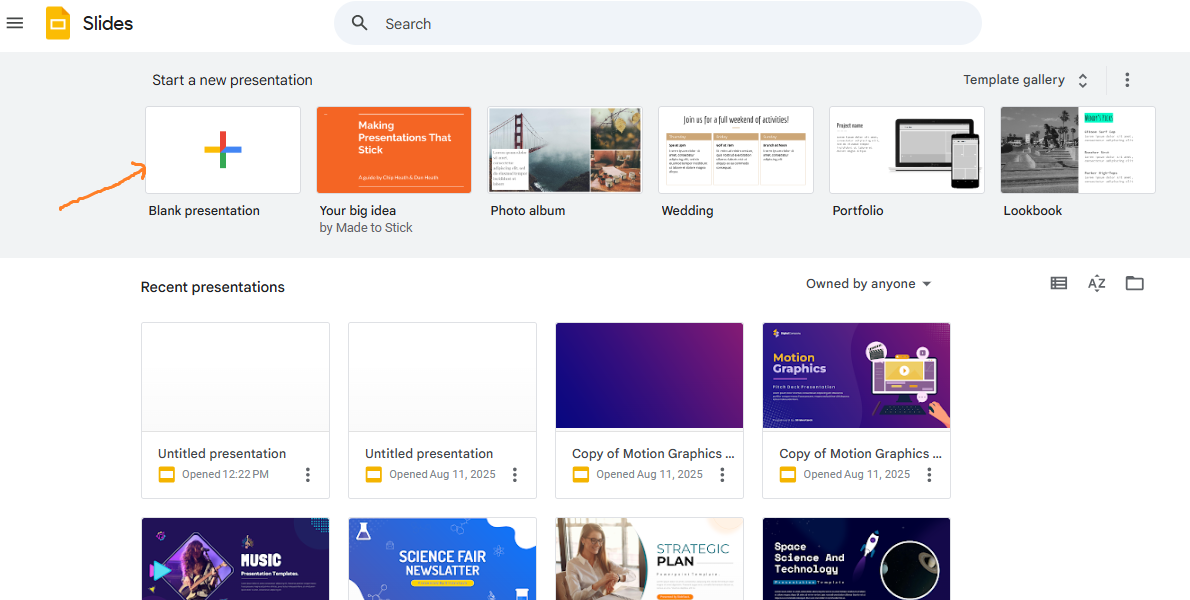
Go to Google Slides and sign in with your Google account. Click the “+ New” button on the left, then choose Google Slides to create a new file.
Step 2: Choose a Blank Presentation
You can start a new presentation by clicking the “Blank” option on the Google Slides homepage.
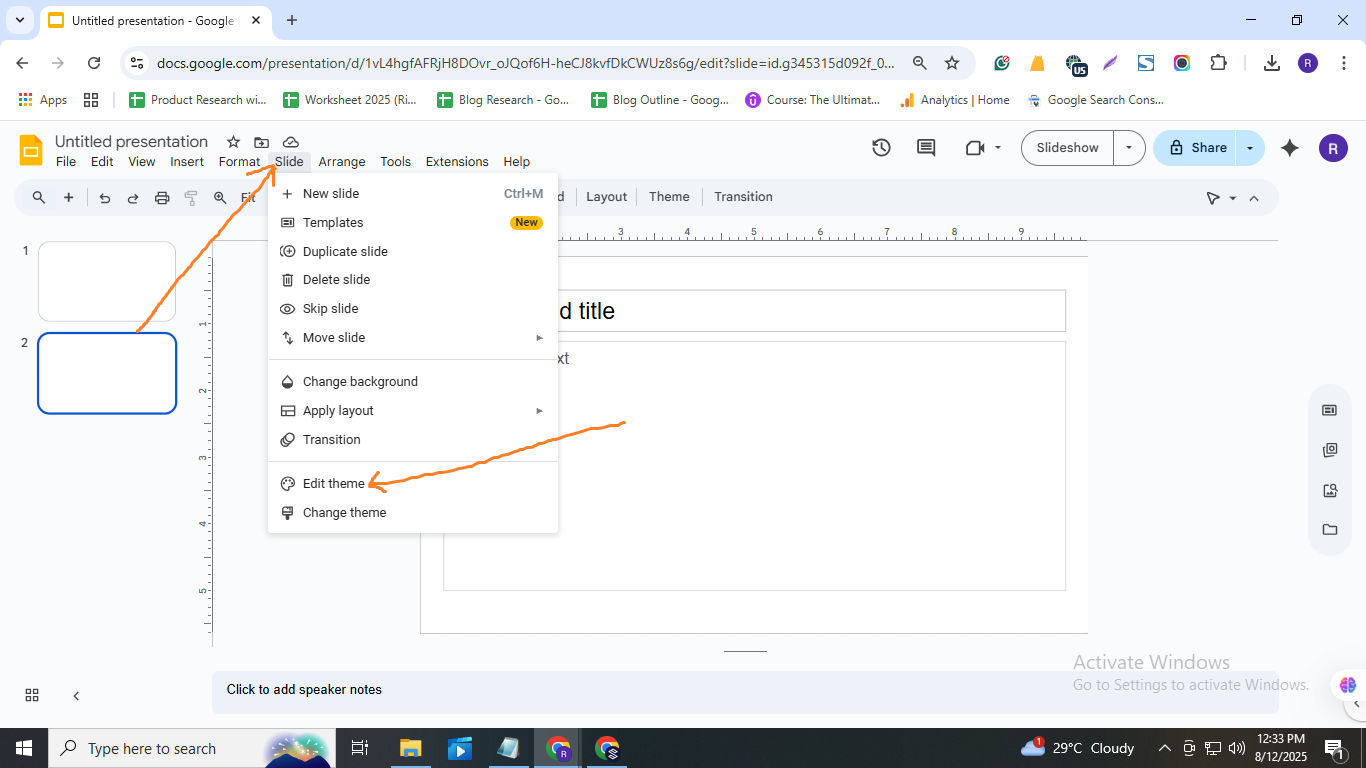
Step 3: Access the Slide Master
You can create and edit slide layouts inside the Slide Master. This helps you design slides for different types of content. Adding layouts helps keep your template flexible and consistent across all slides. It makes the template easier to use for many purposes.
Step 4: Customize the Master Slide
The Master Slide sets universal elements like background, fonts, and logos that apply to all slides.
However, individual layout slides let you customize specific slide types for better control.
• Customize layout slides such as title, content, and section headers to tailor each slide’s look and feel.
• Add placeholder elements like text boxes and images on master or layout slides to maintain consistency in future presentations.
• Set background colors or images and choose fonts that match your brand style across all slides.
Tip: Place logos and other branding elements in the same spot on every slide to keep the design clean and consistent.
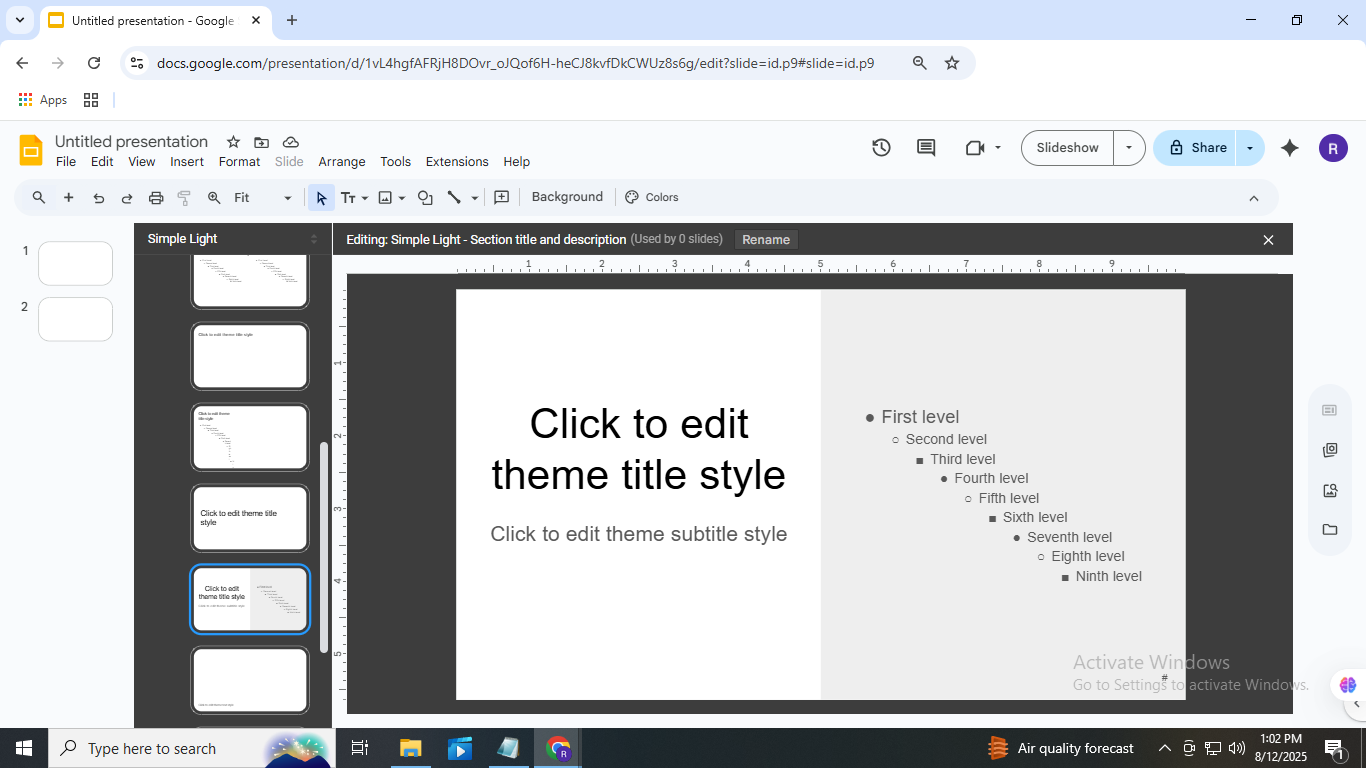
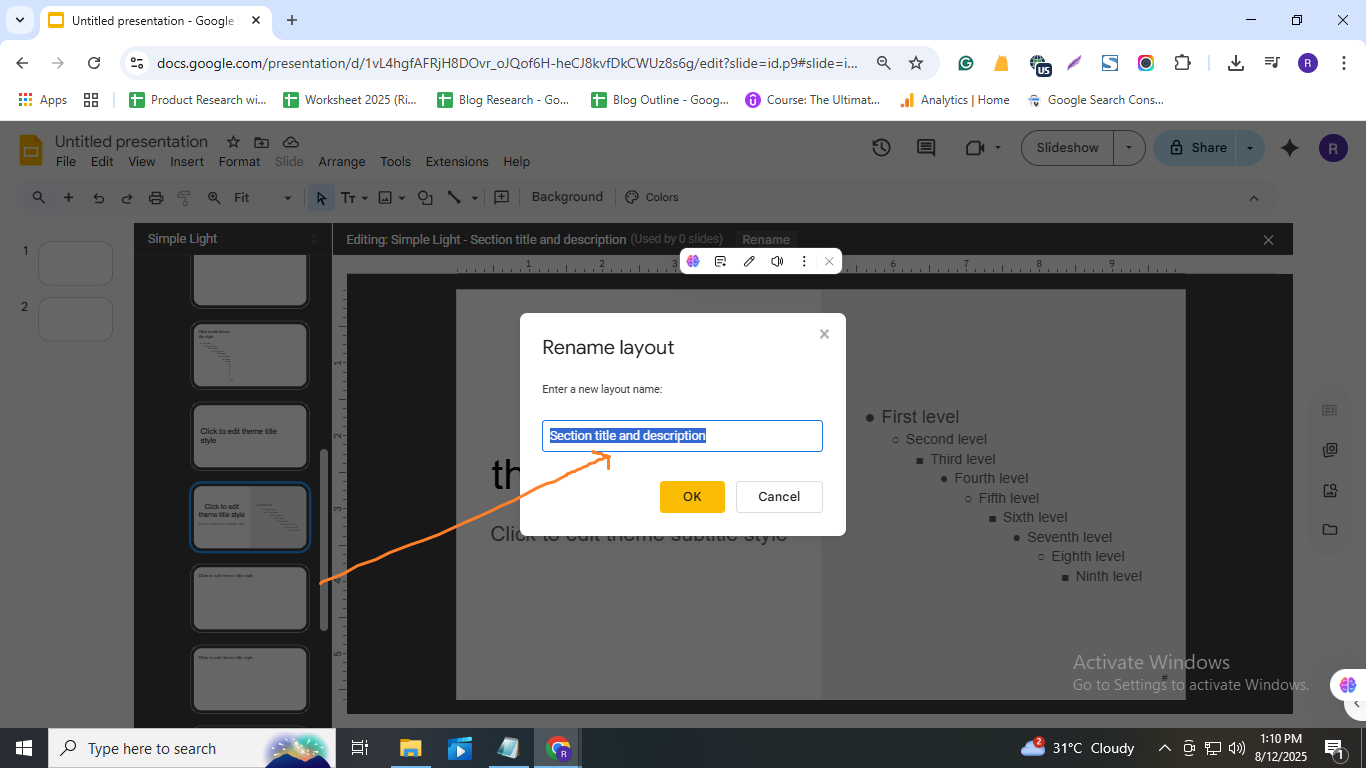
Step 5: Create Slide Layouts
Slide layouts sit right under the master slide. You can change them or make new ones to fit your design. This helps you keep things clean and easy to follow.
You can also apply any layout to slides in your deck. Just go to the toolbar and use the “Layout” dropdown to pick the one you want. This keeps your slides looking the same.
1. Edit existing layouts
• Move text boxes, images, or placeholders around.
• Change background colors or fonts.
• Add placeholders for text, charts, or pictures.
Tip: Start with the most-used ones like Title Slide, Title & Content, or Section Header.
2. Make new layouts
- Click the “+” icon at the top of the master view.
- Adjust it the same way: move boxes, set styles, add placeholders.
- Use layouts for special slides like charts or team pages.
Tip: After you create a layout, use the “Layout” button to apply it to any slide.
Step 6: Save and Share Your Template the Right Way
After your template is ready, saving it the right way helps you and your team use it with ease.
1. Exit the Slide Master view
• Click the X in the top-right of the slide master panel.
• This takes you back to your main slides for saving or sharing.
2. Save and store your template
• Keep it in Google Drive and make a copy whenever needed.
• Or download it as a PowerPoint file (.pptx) for offline use.
Tip: If you're using Google Workspace, save it to a Shared Drive so your team can access it anytime.
Tips for Designing an Effective Google Slides Template
Creating a strong template makes your slides clear, consistent, and easy to follow. To help you design one that works well, let’s look at a few simple tips in the points below.
Use a Simple Color Scheme
Simplicity is key when choosing colors. Stick to 2-3 main colors for titles, backgrounds, and highlights. Using the same colors on every slide helps your audience stay focused and makes your presentation look polished. Avoid sudden changes in color from one slide to the next to keep the flow smooth.
Tip: Create a color palette at the start and apply it across all slides for a professional feel.
Choose Readable Fonts and Use Proper Size
Fonts play a big role in how easy your slides are to read. Choosing clear, simple fonts helps your audience focus on your message. Besides font style, size and spacing between letters and lines also matter a lot for readability.
• Use sans-serif fonts like Arial or Open Sans for body text to keep it clean.
• Make sure font size is large enough, and spacing isn’t cramped, especially for big screens.
Tip: Keep font size at least 18 points and leave enough space to avoid crowded text.
Incorporate Consistent Imagery
Keep your slides looking clean by using image placeholders. They help you plan the layout and keep everything in the right place. Using the same aspect ratio across all images avoids messy, uneven slides.
• Aspect Ratio: Use one ratio for all images to keep things uniform and aligned.
• Resolution: Choose a high-enough resolution to avoid blurry or pixelated results.
Tip: Don’t upload full-size images straight from a camera. Resize them before adding to your slide to keep your file size small and your presentation running smoothly.
Design for Flexibility
A good template handles all kinds of content. Use different slide types for text, images, and charts. This keeps things clear and easy to follow. Also, make sure your design can handle quick changes to colors and logos. That way, teams or clients with their own brand rules can still use the same base template without breaking the layout.
Tip: Try out your slides with a mix of content types and brand styles to make sure they stay clean and balanced.
Include Slide Numbers and Footers
Slide numbers help your audience follow the presentation and find key points during questions or discussions. Adding slide numbers to every layout keeps the deck consistent. Footers can also include your company name or website to add a professional touch and reinforce branding.
Tip: Place slide numbers and footers in the same spot on each slide to keep your presentation tidy and easy to read.
Test Responsiveness
Testing interactive parts like links or buttons is important. These features might work on one device but not on another, especially between tablets and phones. Make sure everything responds correctly to clicks or taps.
Tip: Try clicking all links and buttons on different devices before presenting to avoid surprises during your talk.
Conclusion
Wrapping up helps you see the big picture clearly. It brings together all the important points and shows why they matter. A good conclusion gives you a chance to remind yourself what you’ve learned and how it can help in real life. Taking a moment to reflect can make everything feel more meaningful and ready for what’s next. Keep moving forward with confidence, knowing that each step brings you closer to your goals. You’ve got what it takes to keep growing and doing great things!
If you’re ready to take your slides to the next level, you can always find fresh ideas and inspiring templates here.


You may also be interested in ...

How To Create An Eye-Catching Portfolio
If you’re looking to create an eye-catching portfolio, this post will come in handy. In this article, you can find the easies...
23 Jun, 2024

How To Easily Create An Infographic
Infographics are the perfect way to make a presentation that will impact an audience, but their design and composition might...
08 Jun, 2024

PowerPoint Template Tips & Tricks You Ne...
PowerPoint seems to be an unknown world for many people, especially those who have been assigned to create a presentation out...
08 Jun, 2024