How to Create Breadcrumbs in PowerPoint: A Step-by-Step Guide
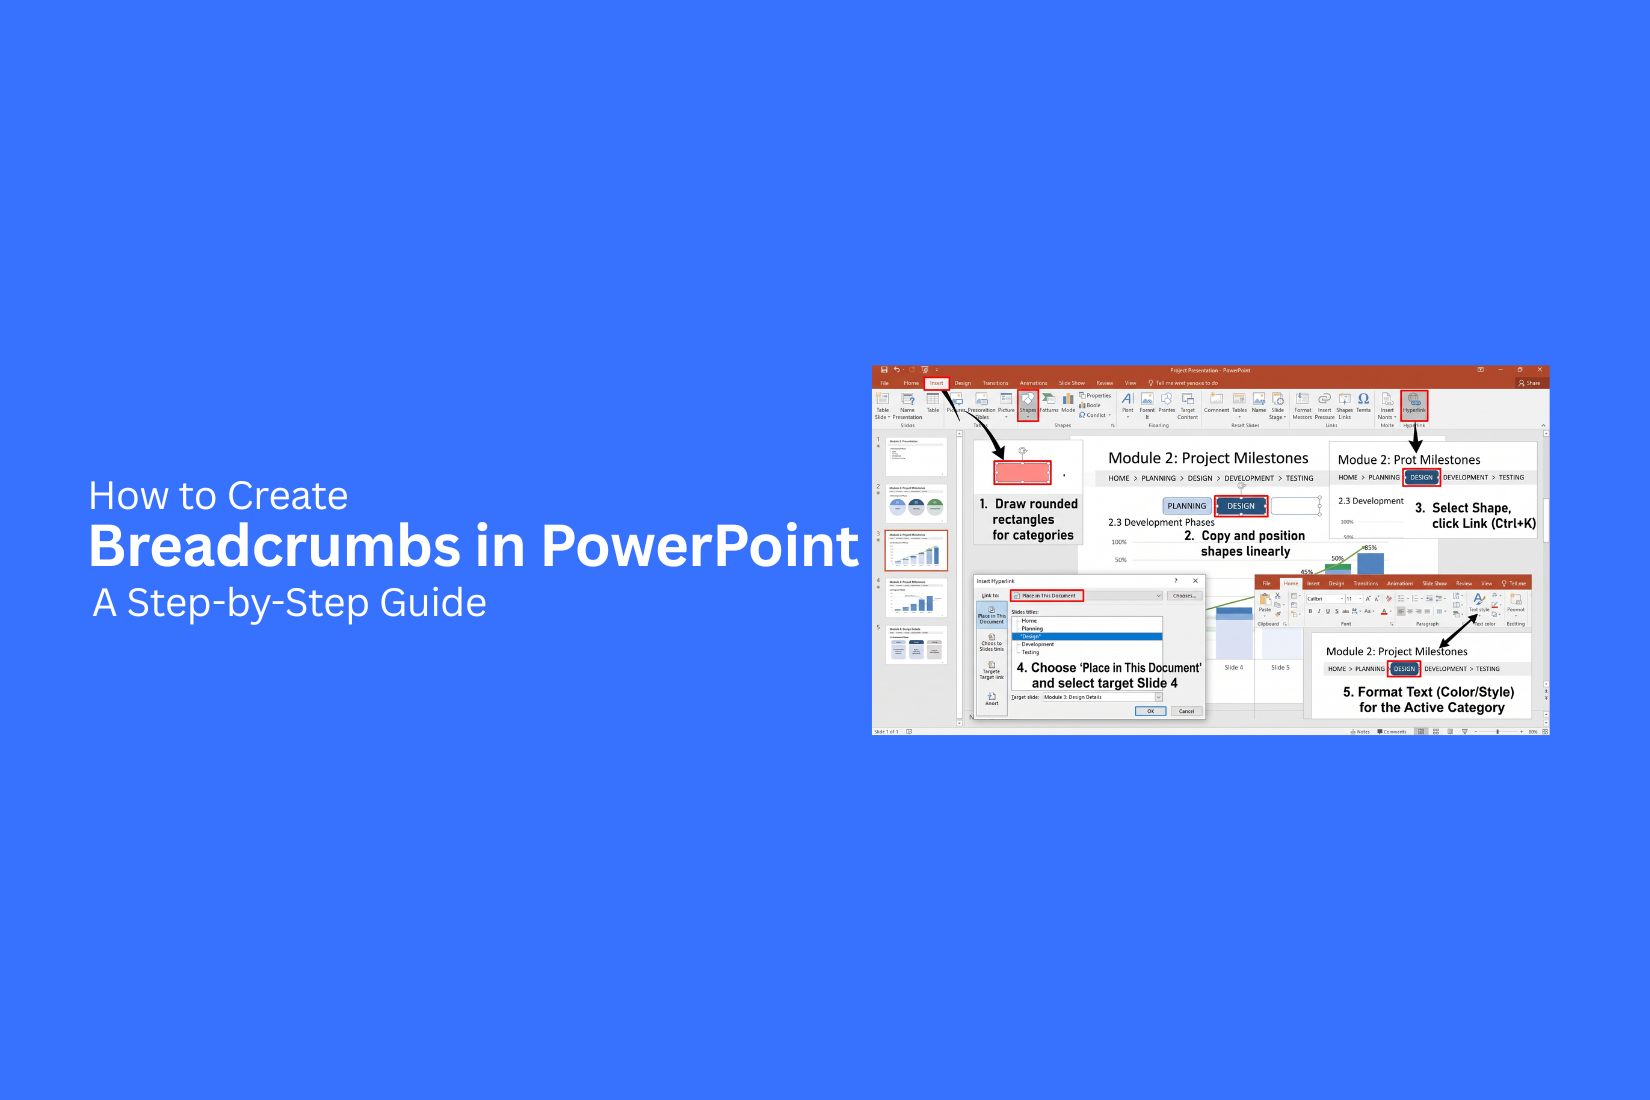
A long PowerPoint presentation can be hard to follow. Viewers may lose track of the section they are viewing, especially as slides move from one topic to another. A clear navigation path can help keep the presentation organized.
That is where breadcrumbs can help. They show the main sections of a presentation and mark the current section. This gives viewers a simple visual guide and makes it easier to understand how each slide fits into the larger structure.
You can create breadcrumbs in PowerPoint with text boxes, shapes, SmartArt, or Slide Master. You can also make them clickable for easier navigation. This guide explains each method step by step, along with design tips, common mistakes, and practical examples.
What Are Breadcrumbs in PowerPoint?
Breadcrumbs in PowerPoint are small navigation elements that show where you are in a presentation. They often appear near the top or bottom of a slide. Each breadcrumb represents a section, topic, or step in the presentation. For example, a presentation about a marketing plan may use breadcrumbs like:
Marketing Plan → Research → Strategy → Budget → Results
The current section can stand out with a different color, font, or shape. This helps the audience see which part of the presentation they are viewing. Breadcrumbs also help the presenter move between related sections. They work well for long presentations with many topics or chapters.
A simple breadcrumb structure can include:
• Main topic: The overall subject of the presentation.
• Sections: The main parts of the presentation.
• Current section: The part being shown on the slide.
• Subsections: Smaller topics within a main section.
PowerPoint does not have a dedicated breadcrumb feature. You can create breadcrumbs with shapes, text boxes, SmartArt, or other built-in tools. This gives you control over the layout, style, and navigation of your slides.
Why Use Breadcrumbs in PowerPoint?
Breadcrumbs give viewers a clear view of where they are in a presentation. They can show the main sections across the top or side of a slide. The current section can stand out, while the other sections stay less prominent. This simple feature can make a slide deck easier to follow.
Improve Slide Navigation
Breadcrumbs help viewers see the main sections of a presentation at a glance. Each label can represent a part of the slide deck, such as Introduction, Research, Results, and Next Steps. The labels also give viewers a sense of progress. They can see where the current slide fits within the full presentation.
Show the Current Section
A breadcrumb can highlight the section that contains the current slide. This helps viewers know what topic you are covering at that moment.
For example, a presentation may use sections such as:
• Overview
• Goals
• Strategy
• Results
• Next Steps
The active section can use a bold font, darker text, or a different shape. The other sections can stay simple and less visible.
Help Audiences Follow the Presentation Structure
A clear presentation structure helps people follow the main message. Breadcrumbs show how each slide connects to the larger topic. This works well for presentations with several topics or stages. The audience can see the path of the presentation without needing to guess what comes next.
Make Long Presentations Easier to Follow
Long slide decks can contain many sections and subtopics. It can be hard for viewers to track their place after several slides. Breadcrumbs provide a simple reference point. They show the current section throughout the deck. This gives the audience a visual cue as the presentation moves from one topic to another.
Create a More Professional Slide Layout
Breadcrumbs can also improve the visual structure of a slide. A small navigation bar can create a clear area for section labels. It can also add consistency across the deck. Keep the breadcrumb small and easy to read. Give the current section more visual weight. This keeps navigation useful without taking attention away from the main slide content.
How to Create Breadcrumbs in PowerPoint
Breadcrumbs show where you are in a presentation. They can list the main sections across the top or bottom of each slide. A simple breadcrumb path helps the audience follow the flow of your content.
Step 1: Plan Your Presentation Sections
Start by listing the main sections of your presentation. Keep the list short and clear. For example, a business presentation may have:
• Introduction
• Market Analysis
• Strategy
• Results
• Next Steps
Use these section names as your breadcrumb labels. Keep the order the same across your slides.
Step 2: Add Text Boxes for Each Section
Open the slide where you want to add the breadcrumbs. Go to Insert > Text Box and add a text box for each section. Type the name of each section into its own text box. Place the text boxes in one row. Keep enough space between them so each label is easy to read. Use the same font, size, and text style for all labels. This creates a consistent look across the presentation.
Step 3: Add Shapes or Separators
Separators help show the order of your sections. You can use lines, arrows, dots, or small shapes between each text box. Go to Insert > Shapes and choose a simple shape. Place it between the section labels. Keep the separators small. They should guide the eye without taking attention away from the section names.
Step 4: Format the Breadcrumb Navigation
Select the text boxes and shapes. Set the font, size, spacing, and alignment. Keep the breadcrumb area in the same place on each slide. The top or bottom edge of the slide often works well. Use a simple color style. Make sure the text has enough contrast against the slide background. Keep the labels short so the breadcrumb does not take up too much space.
Step 5: Highlight the Current Section
Make the active section stand out from the other labels. You can use a different text color, bold text, a filled shape, or an underline. For example, a slide in the Strategy section can show: Introduction | Market Analysis | Strategy | Results | Next Steps. Make Strategy darker or bolder than the other labels. This tells the audience where they are without adding extra text.
Step 6: Add Links to Each Breadcrumb
You can make each breadcrumb clickable. Select a text box or shape, then go to Insert > Link. Choose Place in This Document. Select the slide that matches the section. Click OK to add the link. Repeat this step for each breadcrumb. This lets you move between sections during a presentation.
Step 7: Test the Breadcrumb Navigation
Run the presentation in Slide Show mode. Click each breadcrumb and check where it takes you. Make sure every link opens the correct slide. Check the active section on each slide as well. Also review the breadcrumb layout from the audience's view. Make sure the labels are readable and do not cover other slide content. Fix any spacing, alignment, or link issues before presenting.
How to Create Breadcrumbs With PowerPoint SmartArt
PowerPoint SmartArt can help you build a simple breadcrumb path for your slides. It works well for presentations with several sections. You can show the full path and mark the section the audience is viewing.
Choose a SmartArt Layout
Start by opening the slide where you want to add the breadcrumbs.
- Go to Insert > SmartArt.
- Select a layout from the Process category.
- Pick a layout that shows steps in a clear order.
- Click OK to add it to the slide.
A simple process layout usually works best. It keeps each section in a clear sequence.
Add Your Presentation Sections
Use the SmartArt text pane to add your section names. For example, a presentation may have these sections:
Introduction → Problem → Solution → Results → Next Steps
Enter each section as a separate SmartArt item. Keep the names short so the breadcrumb stays easy to read.
Customize the SmartArt Design
Select the SmartArt graphic to access the SmartArt Design tab. Use the available tools to adjust its look.
You can:
• Change the SmartArt colors.
• Pick a different SmartArt style.
• Adjust the size of the graphic.
• Change the shape style.
• Edit the text size.
Keep the design simple. The breadcrumb should support the slide instead of taking attention away from the main content.
Highlight the Active Section
The active section shows the audience where they are in the presentation. Select the shape that matches the current section. Give it a stronger fill color, darker text, bold text, or another clear visual difference.
For example, a breadcrumb may show:
Introduction → Problem → [Solution] → Results → Next Steps
The Solution section stands out because it is the active part of the presentation. Update the active section on each slide as you move through the presentation.
Convert SmartArt to Individual Shapes
SmartArt has built-in design controls, but individual shapes give you more control over the breadcrumb.
To convert the SmartArt:
- Select the SmartArt graphic.
- Go to SmartArt Design.
- Select Convert.
- Choose Convert to Shapes.
- Ungroup the shapes if needed.
You can now edit each shape on its own. This lets you change colors, spacing, text, borders, and other details for each section. This method works well for custom breadcrumbs that need to match the rest of your PowerPoint design.
How to Add Breadcrumbs Using Slide Master
Slide Master lets you add the same breadcrumb style across multiple slides. This keeps the navigation in the same place and makes it easier to show the current section.
Open the Slide Master
Open your PowerPoint presentation and go to the View tab. Select Slide Master. PowerPoint will show the master slide and its related layouts. Choose the master slide or the layout you want to edit. This gives you a fixed area for your breadcrumb navigation.
Add the Breadcrumb Navigation
Add text boxes, shapes, or other elements to create the breadcrumb path. Use short section names that show where the current slide sits in the presentation. Place the breadcrumb near the top or bottom of the slide. Keep enough space between the breadcrumb and the main slide content.
You can use a simple format such as:
Home > Topic > Section
Use a different text style or color for the current section. This helps readers see their location quickly.
Apply the Breadcrumb Layout
After creating the breadcrumb, return to the Slide Master layouts. Select the layout that should use the breadcrumb navigation. Apply that layout to the slides in the related section. The breadcrumb elements will appear in the same position across those slides. Check each slide after applying the layout. Make sure the breadcrumb does not cover titles, images, charts, or other content.
Customize Breadcrumbs for Different Sections
Different parts of a presentation may need different breadcrumb labels. Create separate Slide Master layouts for major sections.
For example, a presentation may use:
Home > Introduction > Overview
for one section and:
Home > Strategy > Goals
for another.
Keep the same font, spacing, and visual style across the layouts. Change only the section names or highlighted part of the breadcrumb. This creates a clear navigation system without making each slide look different.
How to Make Breadcrumbs Clickable in PowerPoint
Clickable breadcrumbs help readers move through a presentation with less effort. Each breadcrumb can link to a specific slide or section. This works well for presentations with several topics or sections.
Select the Breadcrumb Element
Start by selecting the breadcrumb element on your slide. Click the shape or text that shows the section name. Make sure you select the exact part you want people to click. You can use a text box, shape, or SmartArt element as a breadcrumb. Each item can have its own link.
Add a Link to the Target Slide
With the breadcrumb selected, add a link to the slide you want to open. Go to Insert > Link in PowerPoint. In the link options, select Place in This Document. Choose the target slide from the list. Click OK to apply the link. The selected breadcrumb will now open that slide during the presentation.
Link Each Section to Its Starting Slide
Repeat the same steps for every breadcrumb item. Link each section name to the first slide of its related section. For example, a breadcrumb could include Introduction > Research > Results > Conclusion. The Introduction breadcrumb should link to the first slide of the Introduction section. The Research breadcrumb should link to the first Research slide. This setup gives viewers a simple way to return to an earlier section.
Test the Links in Slide Show Mode
Test every breadcrumb before presenting. Go to Slide Show mode and click each breadcrumb. Check that each link opens the correct slide. Test every section, not just the first few links. Fix any wrong links before you share or present the file. This quick test helps prevent navigation problems during the presentation.
Breadcrumb Design Tips for PowerPoint
Good breadcrumbs should help people see where they are in your presentation. They should stay clear and easy to read without taking attention away from the main slide content. Use these tips to create clean and useful breadcrumbs in PowerPoint.
Keep Breadcrumbs Simple
Use a simple layout with clear section names. Avoid adding too many shapes, colors, or design effects. Breadcrumbs work best as a small guide at the top or bottom of a slide. Keep the design easy to scan. The main slide content should always get more attention than the breadcrumb.
Use Short Section Names
Keep each section name short. Long labels can take up too much space and make the breadcrumb hard to read. Use clear words that quickly tell the audience what each section covers. For example, use Overview, Research, Results, and Next Steps instead of long section titles.
Highlight the Active Section
Make the current section stand out from the other sections. You can use a different color, bold text, or a filled shape. The active section should be easy to spot at a glance. Keep the other section names less prominent so the visual focus stays clear.
Maintain Consistent Spacing
Use the same spacing between each section name. Uneven spacing can make the breadcrumb look messy. Set a clear distance between labels, shapes, or separators. Keep the spacing the same across your slides. This creates a cleaner layout and makes the breadcrumb easier to scan.
Use Readable Fonts
Choose a font that is easy to read at presentation distance. Avoid very small text or decorative fonts. Use the same font family as the rest of your presentation. Keep the font size large enough for the audience to read without effort.
Match Breadcrumbs With Your Presentation Design
Your breadcrumbs should fit the visual style of the presentation. Use colors, fonts, shapes, and line styles that match the rest of your slides. A simple breadcrumb can use the same accent color as your headings. A more visual presentation can use small shapes or lines as section markers. The design should feel like part of the slide, not a separate element.
Keep Breadcrumbs Away From Important Content
Place breadcrumbs in an area that does not block key information. The top edge or bottom edge of a slide often works well. Leave enough space between the breadcrumb and the main content. This helps the audience read both areas without confusion. Keep charts, images, titles, and key points clear and easy to see.
Common Breadcrumb Mistakes to Avoid
Breadcrumbs can help your audience follow the structure of a presentation. Poor design choices can make them hard to use. A few simple checks can keep your breadcrumbs clear and useful.
Using Too Many Navigation Levels
Too many levels can make breadcrumbs hard to read. Keep the path short and show only the main sections. A simple structure helps the audience see where they are without taking attention away from the slide content. For example, a path such as Overview > Strategy > Sales > Q3 > Regional Sales may take up too much space. A shorter path like Overview > Strategy > Regional Sales is easier to scan.
Making Breadcrumbs Too Small
Small text can make breadcrumbs difficult to read, especially from the back of a room. Use a font size that stays clear on a large screen. Keep enough space around the breadcrumb text. Avoid squeezing the labels into a narrow area just to save space.
Using Too Many Colors
Too many colors can make the breadcrumb trail look busy. Use a simple color scheme that matches the rest of the presentation. A common approach is to use one color for inactive sections and a stronger color for the active section. This creates a clear visual difference without adding extra noise.
Forgetting to Update the Active Section
The active section should always match the slide the audience is viewing. An outdated active section can create confusion. Check the breadcrumb on each slide before presenting. Make sure the current section is easy to spot and matches the slide content.
Adding Incorrect Links
Incorrect links can send the audience to the wrong slide or section. This can break the flow of a presentation. Test each clickable breadcrumb before sharing or presenting the file. Check that every link leads to the correct section.
Making Breadcrumbs More Prominent Than the Main Content
Breadcrumbs are a navigation aid, not the main message. They should support the slide without competing with its content. Keep the breadcrumb area smaller and less noticeable than the slide title, key data, or main visual. The audience should notice the main content first and use the breadcrumbs as a guide.
Breadcrumb Examples for Different Presentations
Breadcrumbs can change based on the type of presentation. The labels should match the main sections of your content. Keep them short so the audience can read them at a glance.
Business Presentations
Business presentations often cover several areas, such as company results, goals, plans, and risks. A breadcrumb path could look like:
Company Overview → Performance → Key Results → Next Steps
On a financial review slide, the current section can stand out. The other sections can use a lighter style. This helps the audience see both the current topic and the full presentation path.
Sales Presentations
Sales presentations can use breadcrumbs to guide the audience through the sales story. A simple path can show the customer journey from the problem to the proposed answer.
For example:
Customer Needs → Product Overview → Key Benefits → Pricing → Next Steps
The active section can use a bold font or a different fill color. This makes it easy to see where the presentation is at any point.
Training Presentations
Training presentations often have several lessons or learning steps. Breadcrumbs can show the current lesson and its place in the full session.
For example:
Course Overview → Lesson 1 → Lesson 2 → Practice → Review
The breadcrumb can stay in the same spot on each slide. This creates a steady visual guide for learners. It also makes it easier to see how each lesson fits into the session.
Academic Presentations
Academic presentations may cover a research question, methods, findings, and results. Breadcrumbs can help the audience follow the research structure.
For example:
Research Question → Background → Method → Findings → Discussion
The current section should stand out. Keep the other labels simple. This lets the audience focus on the research content without losing track of the presentation structure.
Project Presentations
Project presentations often cover the project plan, progress, results, and next actions. Breadcrumbs can show how the discussion moves from one project stage to another.
For example:
Project Overview → Goals → Progress → Results → Next Steps
A progress report can highlight Progress. A final results slide can highlight Results. The same breadcrumb layout can stay across the deck for a consistent visual structure.
Interactive Presentations
Interactive presentations can use breadcrumbs to show the audience where they are during activities, questions, or group tasks.
For example:
Introduction → Activity 1 → Discussion → Activity 2 → Recap
The active section can use a clear highlight. This works well for workshops, group sessions, and presentations with audience participation. A breadcrumb can also show the current activity number, such as Activity 2 of 4. This gives the audience a clear sense of their place in the session.
Breadcrumbs vs. Other PowerPoint Navigation Methods
PowerPoint offers several ways to help viewers move through a presentation. Each method serves a different purpose. Breadcrumbs show the viewer’s current place in the presentation. Other tools help users jump to a specific slide, section, or topic.
Breadcrumbs vs. Table of Contents
A table of contents shows the main topics at the start of a presentation. It gives viewers a quick view of the presentation structure. Breadcrumbs work throughout the presentation. They show the current section and the path from the main topic to the current topic. A table of contents works best for an overview. Breadcrumbs work better for showing where the viewer is during the presentation.
Breadcrumbs vs. Hyperlinks
Hyperlinks let you jump from one slide to another. You can link text, shapes, images, or other objects to a slide or section. Breadcrumbs also support navigation, but their main job is to show location. A breadcrumb can include clickable sections that let viewers return to an earlier part of the presentation. Use hyperlinks for direct jumps between related slides. Use breadcrumbs to show the path and help viewers understand their current location.
Breadcrumbs vs. Action Buttons
Action buttons are clickable shapes that can perform actions in PowerPoint. They can move to another slide, return to a previous slide, or go to the beginning of a presentation. Breadcrumbs are more focused on structure and location. They can show a path such as Home > Marketing > Campaign Results. Action buttons work well for basic controls. Breadcrumbs work well for presentations with several sections or levels of content.
Breadcrumbs vs. Section Zoom
Section Zoom lets you create a visual navigation system for PowerPoint sections. Viewers can select a section and jump to it during the presentation. Breadcrumbs provide a smaller navigation element within individual slides. They show the section path without taking up much space. Section Zoom works well as a visual menu. Breadcrumbs work well as a location guide across a presentation.
PowerPoint Breadcrumb Checklist
Use this checklist to review your breadcrumbs before presenting:
• Show the current section: Make the active section easy to identify.
• Keep the path short: Include only the sections needed to show the current location.
• Use clear labels: Keep breadcrumb text short and easy to read.
• Keep the design consistent: Use the same position, font, size, and style across slides.
• Match the slide design: Make sure the breadcrumb fits the overall slide layout.
• Use enough contrast: Make the text easy to see against the background.
• Add links when useful: Make breadcrumb sections clickable when navigation is needed.
• Check every link: Test each clickable breadcrumb before presenting.
• Avoid clutter: Keep breadcrumbs small enough to support the slide without taking attention away from the main content.
• Highlight the active section: Use a clear visual difference between the current section and the other sections.
• Review the presentation flow: Make sure the breadcrumb path matches the actual slide structure.
Final Notes
Breadcrumbs are a simple way to show where viewers are in a PowerPoint presentation. They work best in long decks with several sections or topics. You can create breadcrumbs with text boxes, shapes, SmartArt, or Slide Master. You can also add links to make each section clickable. Keep the labels short, use clear spacing, and make the active section easy to spot.
Before presenting, check the breadcrumb path on every slide. Test all links and make sure the navigation does not cover important content. A well-planned breadcrumb system gives viewers a clear path through your presentation. It also makes long slide decks easier to follow and navigate.
FAQs
What are breadcrumbs in PowerPoint?
Breadcrumbs are small navigation elements that show the current section of a presentation. They usually appear at the top or bottom of a slide. They can also include links to other sections.
Does PowerPoint have a built-in breadcrumb feature?
No. PowerPoint does not have a dedicated breadcrumb feature. You can create breadcrumbs with text boxes, shapes, SmartArt, or Slide Master.
Can I make PowerPoint breadcrumbs clickable?
Yes. You can add links to breadcrumb text boxes or shapes. Use Insert > Link and select Place in This Document. Then choose the slide you want to open.
Can I add breadcrumbs to every slide?
Yes. Slide Master can help place the same breadcrumb layout across many slides. This keeps the position, font, spacing, and style consistent.
Can I use SmartArt to create PowerPoint breadcrumbs?
Yes. A SmartArt process layout can show your presentation sections in order. You can also convert SmartArt to shapes for more control over each breadcrumb.
How should I highlight the active breadcrumb?
Use a different color, bold text, underline, or a filled shape. The active section should stand out from the other labels without taking attention away from the main slide content.
Where should breadcrumbs appear on a PowerPoint slide?
The top or bottom of the slide often works well. Place them in an area that does not cover the title, images, charts, or other key content.
How many sections should a breadcrumb include?
Keep the path short. Show the main sections needed to explain the current location. Too many levels can make the breadcrumb hard to read.
Are breadcrumbs useful for long PowerPoint presentations?
Yes. They can help viewers track the current section and understand how each slide fits into the presentation structure.
What is the difference between breadcrumbs and a table of contents?
A table of contents shows the main topics at the start of a presentation. Breadcrumbs stay on slides and show the viewer's current section and path.
Should every breadcrumb be clickable?
Not always. Clickable breadcrumbs are useful for presentations that need quick movement between sections. A simple visual breadcrumb works well for presentations that only need a location guide.
How do I test PowerPoint breadcrumb links?
Run the presentation in Slide Show mode. Click each breadcrumb and check that it opens the correct slide. Test every link before presenting or sharing the file.


You may also be interested in ...

How To Create An Eye-Catching Portfolio
If you’re looking to create an eye-catching portfolio, this post will come in handy. In this article, you can find the easies...
23 Jun, 2024

How To Easily Create An Infographic
Infographics are the perfect way to make a presentation that will impact an audience, but their design and composition might...
08 Jun, 2024

PowerPoint Template Tips & Tricks You Ne...
PowerPoint seems to be an unknown world for many people, especially those who have been assigned to create a presentation out...
08 Jun, 2024