How to Animate Maps in PowerPoint: Easy Guide
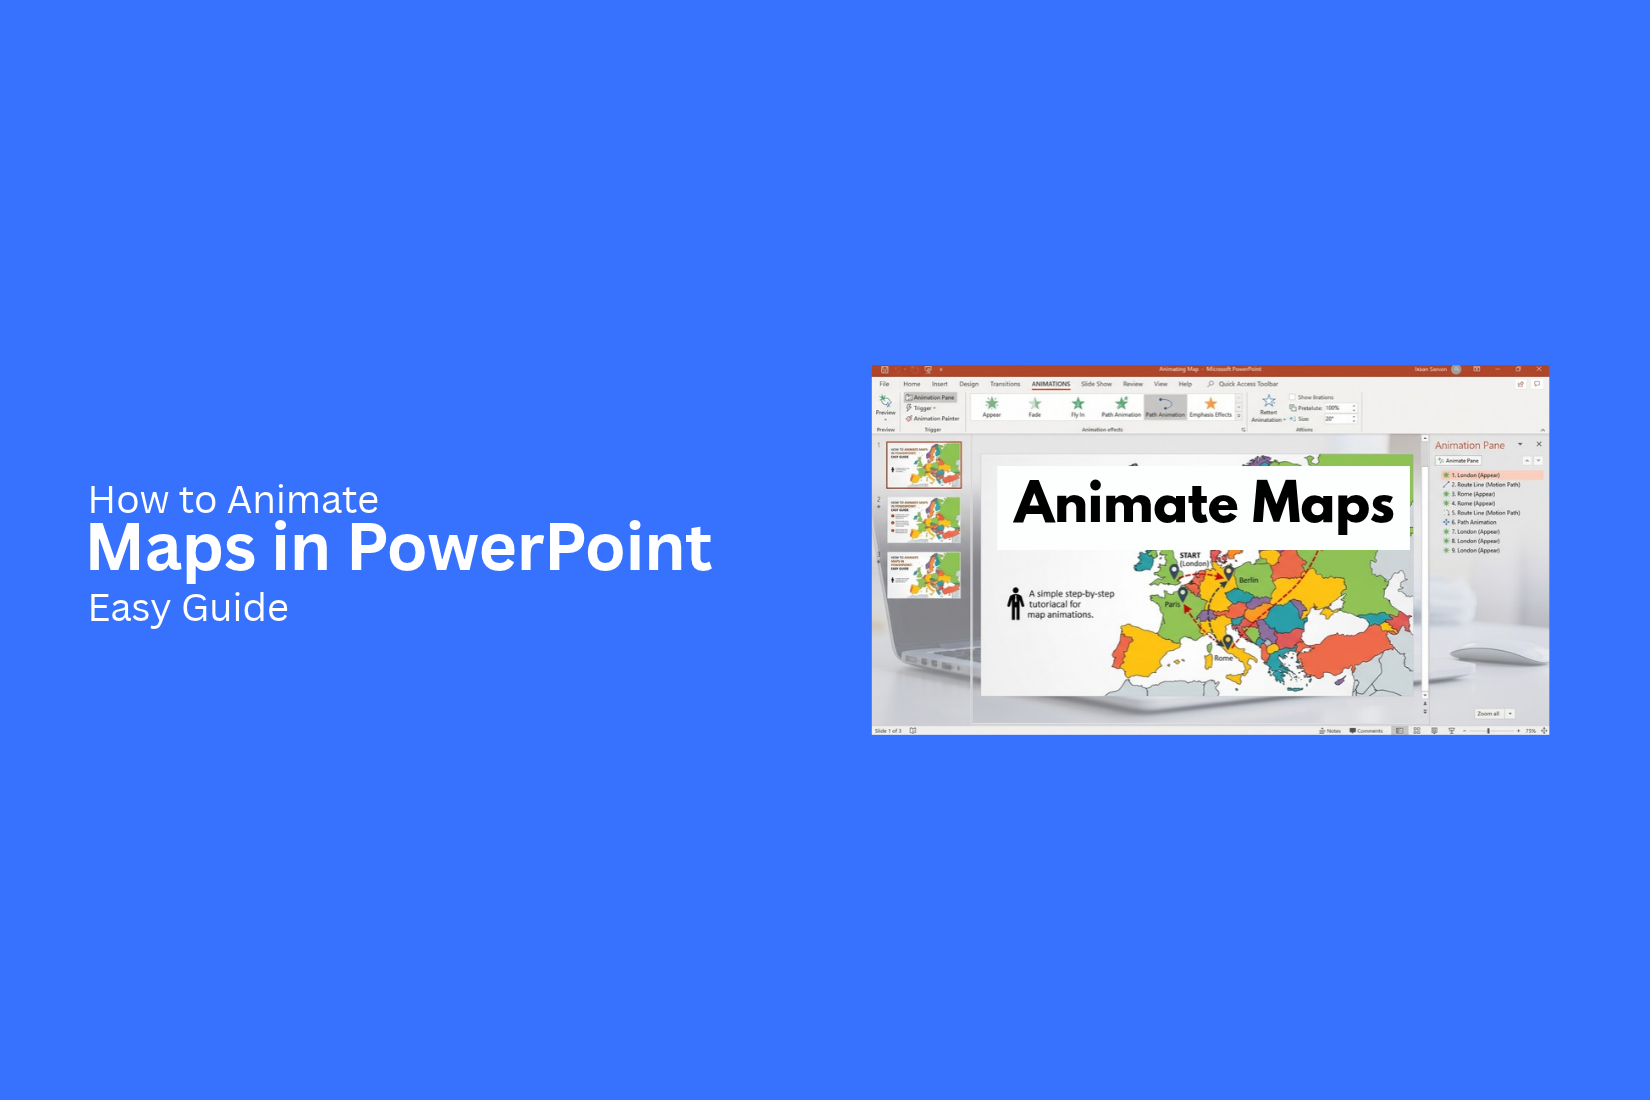
A static map can make a PowerPoint slide feel hard to follow. It may show many places, routes, or regions at once, leaving your audience unsure where to look. This gets harder with travel routes, sales areas, or regional data that needs a clear flow. A well-planned animation can make the map easier to read and guide attention from one location to the next.
PowerPoint gives you several ways to animate maps. You can reveal locations, move along a route, highlight regions, or zoom into a specific area. Each method fits a different presentation goal. This guide shows how to animate maps in PowerPoint, adjust timing, and create smooth map effects that support your message.
What Is a Map Animation in PowerPoint?
A map animation in PowerPoint adds movement to a map on a slide. It can show places, routes, regions, or changes over time. Instead of showing the full map at once, you can reveal parts of it step by step. For example, a map can show a route from one city to another. You can also highlight one region at a time during a presentation. This makes the map easier to follow.
PowerPoint offers several animation effects for map elements. You can make a map appear, move, fade, or change focus during a slide. Map animations work best with a clear purpose. Each movement should help the audience follow the information on the slide. Too many effects can make the map hard to read.
Why Animate a Map in PowerPoint
A map can show places, routes, borders, or other areas. Animation can help guide your audience through the map step by step. A static map shows all the details at once. This may make the slide harder to follow. Animation lets you control what appears first and what comes next.
You can use map animation to:
• Show a route from one place to another.
• Focus on one area at a time.
• Show changes across different locations.
• Guide the audience through a process.
• Make map-based slides easier to follow.
The goal is not to add motion just for style. Each animation should help explain the map. A simple effect can make the main point easier to see.
Different Methods to Animate a Map in PowerPoint
PowerPoint gives you several ways to animate a map. Each method can show a different part of your message. You can use a map template, show a route, move between map views, highlight regions, or reveal locations one at a time. The best method depends on what you want your audience to see first. A route animation works well for travel paths. Region highlights help focus attention on certain areas. A location-by-location effect can guide viewers through a map in a clear order.
Method 1: Animate a Map Using a PowerPoint Map Template
A PowerPoint map template gives you a ready-made map to work with. You can add animation effects to map elements and control how they appear. Start by adding your map template to a slide. Adjust its size and position. Add any text or labels you need.
Next, select the map element you want to animate. Open the Animations tab. Pick an animation effect from the available options. Use the Animation Pane to set the order of each effect. You can also adjust the timing. This helps each map part appear at the right point in your presentation.
Method 2: Animate a Route on a Map
A route animation can show movement from one place to another. This works well for travel routes, delivery paths, or other journeys. Start with a map on your slide. Add a line or path that follows the route. Place the path over the map.
Select the route line and add an animation effect. Set the duration to control how quickly the route appears. A longer duration makes the route easier to follow. Add location labels along the route. This gives your audience clear points to follow as the route appears.
Method 3: Use Morph Transition for Map Animation
Morph can create a smooth change between two map views. This method works well for showing movement from one location to another. Create the first slide with your starting map view. Duplicate the slide. Then change the map position, size, or focus on the second slide.
Open the Transitions tab on the second slide. Select Morph. Play the slides to check the movement. The map can shift from the first view to the second view as the presentation moves forward.
Method 4: Highlight Regions With Emphasis Animations
Some maps contain several regions. You may want to draw attention to only a few of them. Select the region you want to highlight. Add an emphasis animation from the Animations tab. Set the timing and order of the effect.
Repeat the process for other regions. Place each effect in the order you want your audience to follow. Use labels or short text beside the highlighted areas. This makes the purpose of each region easier to follow.
Method 5: Reveal Map Locations One by One
A map can contain many locations. Showing all of them at once can make the slide hard to follow. A one-by-one reveal keeps the focus on one location at a time. Add your locations to the map. Each location can use a marker, icon, or text label.
Select the first location and add an entrance animation. Repeat the process for the other locations. Use the Animation Pane to set their order. Set each effect to appear after the previous one. Your map will then reveal each location in a clear sequence.
How to Animate a Map in PowerPoint Step by Step
A map can show more than locations. Animation can help your audience follow a route, area, or key point. PowerPoint gives you several ways to animate map parts. The steps below show how to build the effect from start to finish.
Step 1: Add Your Map to a Slide
Start by adding your map to the PowerPoint slide. Go to Insert > Pictures and choose your map file. Place the map where you want it on the slide. Keep enough empty space around the map. This gives each animated part room to appear clearly.
Step 2: Separate the Map Elements
A single map image acts as one object. You cannot animate each part on its own. Separate the map into parts first. You may need to use separate shapes, icons, lines, or text boxes for key areas. Each part can then have its own animation. For example, a route can use a line. A city can use a circle or icon. A label can use a text box.
Step 3: Select the Elements You Want to Animate
Click the map element you want to animate. Select only the parts that need movement or a visual effect. Keep the number of animated elements low. Too many effects can make the map hard to follow.
Step 4: Add an Animation Effect
Select an element. Open the Animations tab in PowerPoint. Choose an effect from the available options. Appear, Fade, and Wipe work well for map elements. Use an effect that matches the purpose of the map. A city marker may use Appear. A route line may use Wipe. A label may use Fade.
Step 5: Adjust Animation Timing
Open the Timing options for the selected animation. Set the duration and start option. On Click starts the effect after a click. With Previous, it starts with another effect. After Previous starts it after the earlier effect ends. Keep the timing easy to follow. Short effects often work well for simple map animations.
Step 6: Set the Animation Order
Open the Animation Pane from the Animations tab. You can see all effects listed there. Drag the effects into the order you want. Start with the main map area. Then show routes, markers, labels, or other details. A clear order helps your audience follow the map without guessing what to look at next.
Step 7: Preview and Refine the Animation
Play the animation from the start. Watch how each map element appears. Check the order, speed, and timing. Remove effects that add noise. Change the order if one part appears too early or too late. Run the preview again after each change. The final animation should guide attention across the map in a clear and simple way.
How to Create a Route Animation on a Map
A route animation can show movement from one place to another. You can build the route with shapes or use a motion path. Both methods can work well for travel plans, delivery routes, and location-based presentations.
Draw a Route Using Shapes
Shapes give you a simple way to draw a custom route on a map.
- Add your map image to the slide.
- Go to Insert > Shapes.
- Pick a line or freeform shape.
- Draw the route across the map.
- Adjust the line color and width.
- Place markers at key stops along the route.
A line with a clear color can stand out from the map. Keep the route simple so viewers can follow it easily.
Add a Motion Path
A motion path can make an object move along a route.
- Add an icon or shape to the starting point.
- Select the object.
- Open the Animations tab.
- Choose Add Animation.
- Select a motion path.
- Set the path to follow the route on your map.
- Preview the animation.
A car, plane, person, or location marker can work as the moving object. Keep the object close to the route so the movement looks clear.
Adjust the Route Direction and Speed
The direction and speed affect how the route feels during the presentation. Select the animated object and open the animation settings. Set the duration to control how long the movement takes. A longer duration creates slower movement. A shorter duration creates faster movement.
Check the route in Preview. Make sure the object starts at the right location and follows the route in the correct direction. Adjust the path or timing if the movement feels too fast or too slow. A steady speed often makes the route easier to follow. The map should stay visible while the object moves. This helps the audience track the journey from start to finish.
How to Create a Map Zoom Animation With Morph
A map zoom animation can help you guide viewers from a full map to one specific area. PowerPoint’s Morph transition makes this effect simple. Start with a full map slide. Then create a second slide with a closer view of the area you want to show.
Duplicate the Map Slide
Start with the slide that contains your full map.
- Select the map slide.
- Right-click the slide thumbnail.
- Select Duplicate Slide.
- Keep the first slide as the full map view.
- Use the copy for the zoomed view.
This gives PowerPoint two slides to work with. The first shows the full map. The second shows the selected region.
Zoom In on a Specific Region
Open the duplicated slide. Select the map and make it larger. Move the map so the region you want to show is easy to see. Keep the same map on both slides. Only change its size and position on the second slide. Check the slide before moving on. The selected region should stay within the slide area.
Apply the Morph Transition
Select the second slide. Open the Transitions tab. Choose Morph from the transition options. PowerPoint uses the changes between the two slides to create the zoom effect. Start the slideshow to preview the result. The map should appear to move from the full view into the selected region.
Adjust the Transition Timing
The transition speed affects how the zoom feels. Open the Transitions tab and find the Duration setting. Enter a time that fits your presentation. A shorter duration creates a quick zoom. A longer duration gives viewers more time to follow the map movement. Preview the slide again after changing the timing. Keep the speed steady and easy to follow.
How to Highlight Countries, States, or Regions
Maps can show a lot of location data on one slide. Highlighting a specific country, state, or region makes the main point easier to follow. PowerPoint gives you several ways to make a map area stand out.
Change the Color of a Region
A simple color change can draw attention to one area of your map. Select the country, state, or region you want to highlight. Then choose a fill color that stands out from the rest of the map. Keep the other areas in softer or neutral colors. This creates a clear visual difference. It also helps your audience spot the selected region quickly. Use the same color style across your map. This keeps the slide clean and easy to read.
Add an Emphasis Animation
An emphasis animation can bring extra attention to a region during your presentation. Select the map area you want to animate. Open the Animations tab and choose an effect from the emphasis options.
Use a simple effect that does not distract from the map. You can make the selected area change color, pulse, or grow slightly. Set the animation to start at the right point in your presentation. This helps the map match your spoken explanation.
Add Labels and Location Markers
Labels help your audience identify key places without guessing. Add a text box near each important country, state, or region. Keep the text short and easy to read. Location markers can also point to cities, offices, events, or other key spots. Use simple shapes or icons for these markers.
Place labels and markers close to their locations. Leave enough space between each item so the map stays clear. Animate the labels or markers along with the regions they describe for a smooth presentation.
Creating Effective Animated Map Presentations in PowerPoint
An animated map can make a presentation easier to follow. The movement should have a clear purpose. Each slide should help the audience understand the map and its message.
Build a Smooth Animated Sequence
Start with a clear order for your map animation. Show one part at a time. Move from one location or point to the next in a way that feels easy to follow. Keep the sequence short. Too many movements can make the map hard to follow. Each animation should lead naturally to the next part.
Keep Animations Simple and Purposeful
Use only the animations that support your message. Avoid adding effects just to make the slide move. A clean animation helps the audience focus on the map. It also keeps the slide from feeling busy.
Maintain Consistency Across Slides
Use similar animation styles across your presentation. Keep the movement direction, speed, and effect style consistent. This creates a clear pattern for the audience. They can focus on the map instead of learning a new animation style on every slide.
Use Timing to Guide Attention
Animation timing can control the order in which people view the map. Give each part enough time to be seen before the next movement starts. Slow down key moments. Keep less important movements shorter. Good timing helps direct attention without adding extra text.
Focus on Storytelling
A map should support the main point of your presentation. Use animation to show how locations, routes, or changes connect to that point. Build the story step by step. Each movement should add something useful to the message.
Test and Refine Your Slides
Play the full presentation before you present it. Check the timing, movement, and order of each animation. Look for parts that feel too slow or too quick. Remove movements that do not help the message. A few small changes can make the full map sequence easier to follow.
Common Mistakes to Avoid
Map animations can make a PowerPoint slide easier to follow. They can also make a slide hard to read if the effects are not used with care. A few simple choices can keep your map clear and easy to understand.
Overusing Animation Effects
Too many animation effects can distract your audience. A map does not need an effect for every part. Use simple effects for key areas, routes, or changes. Keep the focus on the main point of the slide.
Mixing Inconsistent Styles
A map can look messy if its colors, icons, and effects do not match. Use a similar style across the slide. Keep the same color rules for regions, markers, and routes. This gives the map a clean look.
Animating Everything at Once
Showing every map element at the same time can make the slide feel crowded. Build the map in a clear order. Start with the main area, then add routes, markers, or other details. This helps the audience follow each step.
Ignoring Timing and Flow
Animation timing affects how easy the map is to follow. Effects that move too quickly can be hard to track. Effects that move too slowly can lose attention. Set a steady pace that matches your explanation.
Using Low-Quality Maps
A blurry map can make your presentation look weak. It may also make small areas, roads, or labels hard to see. Use a clear map with enough detail for your slide size. Test the map in Slide Show view before presenting.
Adding Too Many Labels or Markers
Too many labels can cover important parts of a map. Too many markers can also make the slide crowded. Show only the details your audience needs. Remove extra labels and markers that do not support your main message.
Best Practices for Animated Maps in PowerPoint
Animated maps can make a presentation easier to understand. Good animation helps the audience follow locations, routes, and changes. Keep each effect simple and tied to the main point.
Use Animation to Support the Message
Start with the message you want to share. Then choose an animation that helps explain it. A moving route can show travel between two places. A zoom effect can bring focus to one area. Avoid adding motion just for visual effect. Too many animations can distract from the main idea.
Keep Movement Easy to Follow
Use simple movement that the audience can track. Move map markers along a clear path. Avoid rapid jumps or too many objects moving at once. Give each movement enough time to be clear. The audience should know where the animation starts and where it ends.
Use Consistent Timing
Keep similar animations at similar speeds. A route that moves slowly on one slide should not move very quickly on another slide without a reason. Consistent timing makes the presentation feel smoother. It also helps the audience know what to expect.
Make Important Locations Stand Out
Use size, color, labels, or motion to highlight key locations. A marker can grow slightly or appear with a simple effect. A short label can also help the audience identify the place. Keep the rest of the map simple. This creates a clear visual focus and keeps attention on the location that supports your message.
When to Use Animated Maps in PowerPoint
Animated maps can help show movement, location, and changes across different areas. They work well for presentations that use routes, regions, or geographic data. A few simple animations can make map details easier to follow.
Travel and Route Presentations
Use animated maps to show travel routes from one place to another. You can reveal each stop in order. A moving line can also show the path of a trip. This works well for travel plans, tour presentations, and delivery routes. It helps the audience follow the journey without reading a long list of locations.
Business and Sales Presentations
Maps can show where a company operates or where customers are located. Animation can reveal each market or sales area one at a time. You can also use animated markers to show new locations, sales regions, or store openings. This keeps the focus on the areas that matter most.
Geography and Education
Animated maps can make geography lessons easier to follow. Use them to show borders, regions, countries, cities, or changes over time. For example, a map can reveal countries one by one during a lesson. A simple zoom effect can also bring attention to a specific area.
Data and Regional Analysis
Maps are useful for showing data across different regions. Animation lets you present each area in a clear order. You can highlight regions based on sales, population, growth, or other data. Showing one region at a time helps the audience focus on the numbers and their location.
Final Takeaways
Map animations can make PowerPoint slides easier to follow. The key is to use movement with a clear purpose. A route can show travel from one place to another. A zoom can focus on a specific area. A region highlight can draw attention to key data.
Keep your map clean and easy to read. Use simple effects such as Appear, Fade, Wipe, and Morph. Set a steady timing for each effect. Use the Animation Pane to control the order.
Test your slides before presenting. Check the route, zoom, labels, markers, and timing. Remove any effect that does not help explain the map. A clear animated map should guide the audience from one point to the next without making them work to understand the slide.
FAQs
Can you animate a map in PowerPoint?
Yes. You can animate map elements such as routes, markers, labels, and regions. Use effects such as Appear, Fade, Wipe, and Morph to create the desired movement.
How do you animate a route on a PowerPoint map?
Add a line or freeform shape over the map to draw the route. Then apply an animation to the route. You can also use a motion path with a marker or icon to show movement along the route.
Can you make a map zoom in PowerPoint?
Yes. Morph can create a map zoom effect. Duplicate the map slide, make the map larger on the second slide, and move the target area into view. Apply Morph to the second slide.
How do you highlight a country or region in PowerPoint?
Select the country or region and change its fill color. You can also add an emphasis animation to make the area stand out during the presentation.
How do you animate map locations one by one?
Add markers or labels to the map. Give each one an entrance animation. Use the Animation Pane to set the order. Set each effect to start after the previous one.
How long should a map animation last?
The right duration depends on the amount of information on the map. Keep simple effects short. Give route movements and zoom effects more time so viewers can follow them.
How do you keep map animations easy to follow?
Use simple effects, clear labels, and a logical order. Avoid animating every map element. Keep the movement steady and give important locations enough time to be seen.
What are common mistakes with animated maps?
Common mistakes include using too many effects, adding too many labels, using low-quality maps, mixing different styles, and setting poor timing. Keep the map focused on the main message.



You may also be interested in ...

How To Create An Eye-Catching Portfolio
If you’re looking to create an eye-catching portfolio, this post will come in handy. In this article, you can find the easies...
23 Jun, 2024

How To Easily Create An Infographic
Infographics are the perfect way to make a presentation that will impact an audience, but their design and composition might...
08 Jun, 2024

PowerPoint Template Tips & Tricks You Ne...
PowerPoint seems to be an unknown world for many people, especially those who have been assigned to create a presentation out...
08 Jun, 2024