How to Wrap Text in Google Slides Easily
Struggling to fit text neatly around images in Google Slides can be frustrating. Often, your words overlap visuals or leave awkward blank spaces, making your slides look messy and hard to read. Fortunately, there’s a simple way to fix this.
By wrapping text properly, you can create clean, organized slides that are easy to follow. In this article, you’ll learn two simple steps to wrap text in Google Slides, along with practical methods and tips to refine the layout. Follow these steps, and your presentations will look polished, professional, and visually appealing without extra effort.
2 Simple Steps to Wrap Text in Google Slides
Wrapping text in Google Slides can make your slides look cleaner and easier to read. Following a few simple steps helps your content fit neatly without clutter. Check out the points below to learn the two easy steps you can use right away.
Step 1 – Inserting Text Box and Image
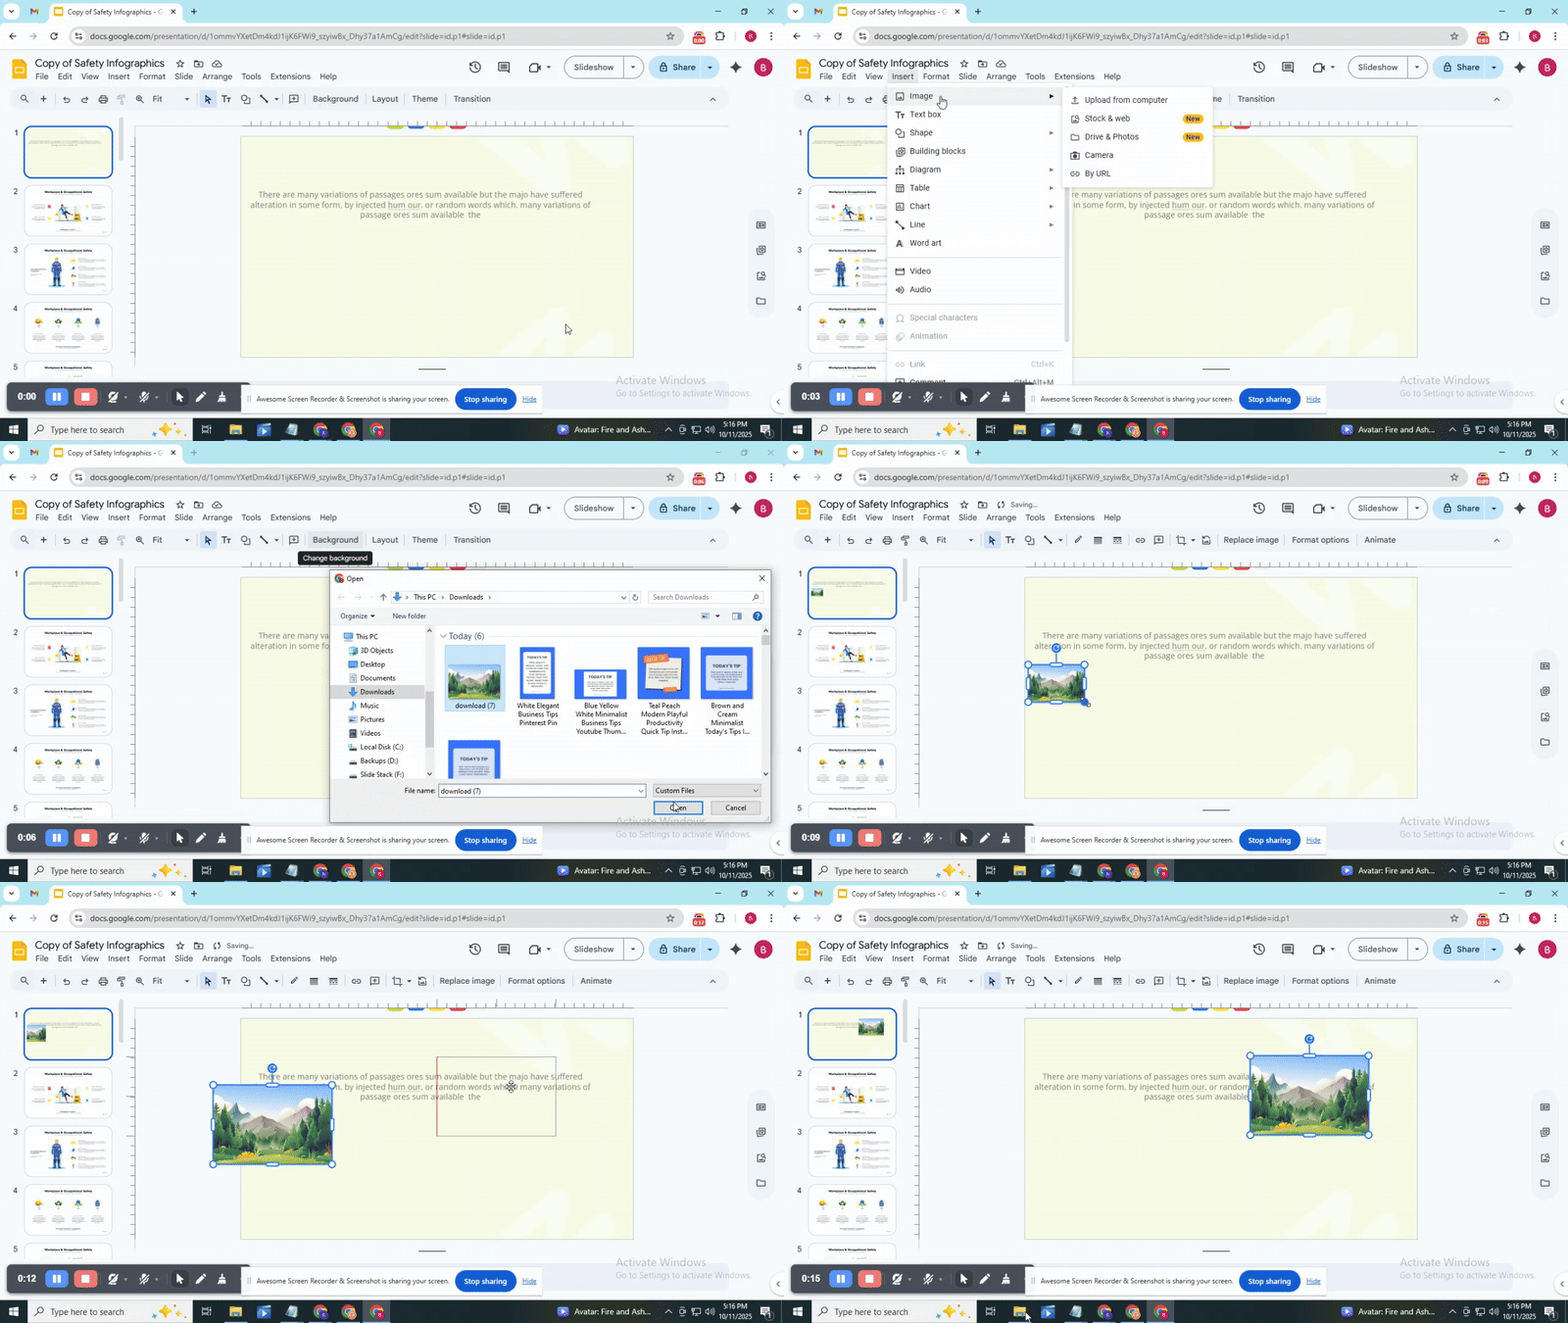
Inserting an Image
• Open your Google Slides presentation.
• Click Insert in the top menu.
• Select Image.
• Choose where to get your image: Upload from computer, Search the web, or Drive.
• Click the image to add it to your slide.
• Drag the corners to resize and move it where you want.
• Position the image so there is space for text around it.
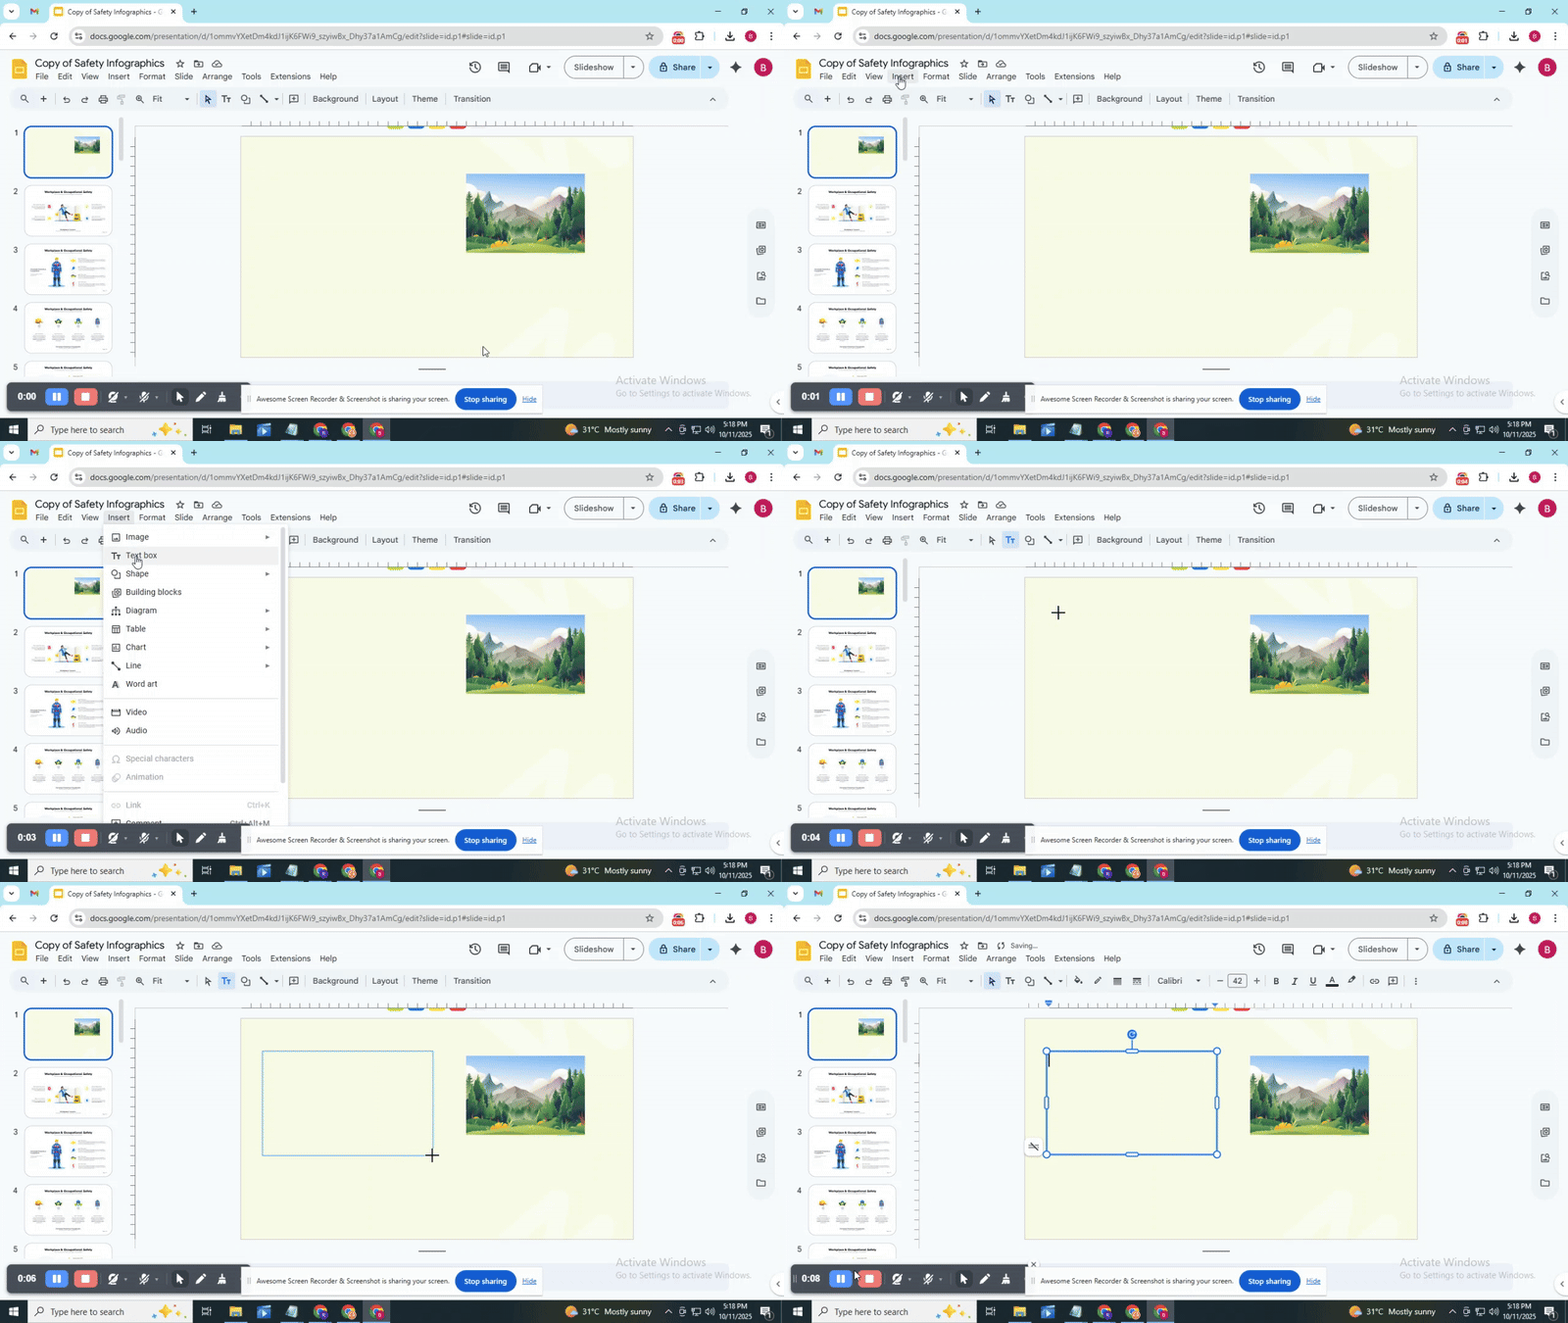
Inserting a Text Box
• Click Insert in the top menu.
• Select the Text box.
• Click and drag on the slide to draw the box.
• Type your text inside the box.
• Resize or move the text box so it wraps nicely around your image.
• Adjust spacing or alignment to keep the layout clear.
Adding images and text boxes in Google Slides is easy when you follow these steps. Make sure the text box is close to the image so your content looks neat and readable.
Step 2 – Aligning Text Box with Image for Text Wrapping
Getting your text to sit neatly around images can make your slides look sharper. You have a few options to adjust the layout. Try each method to see what works best for your slide.
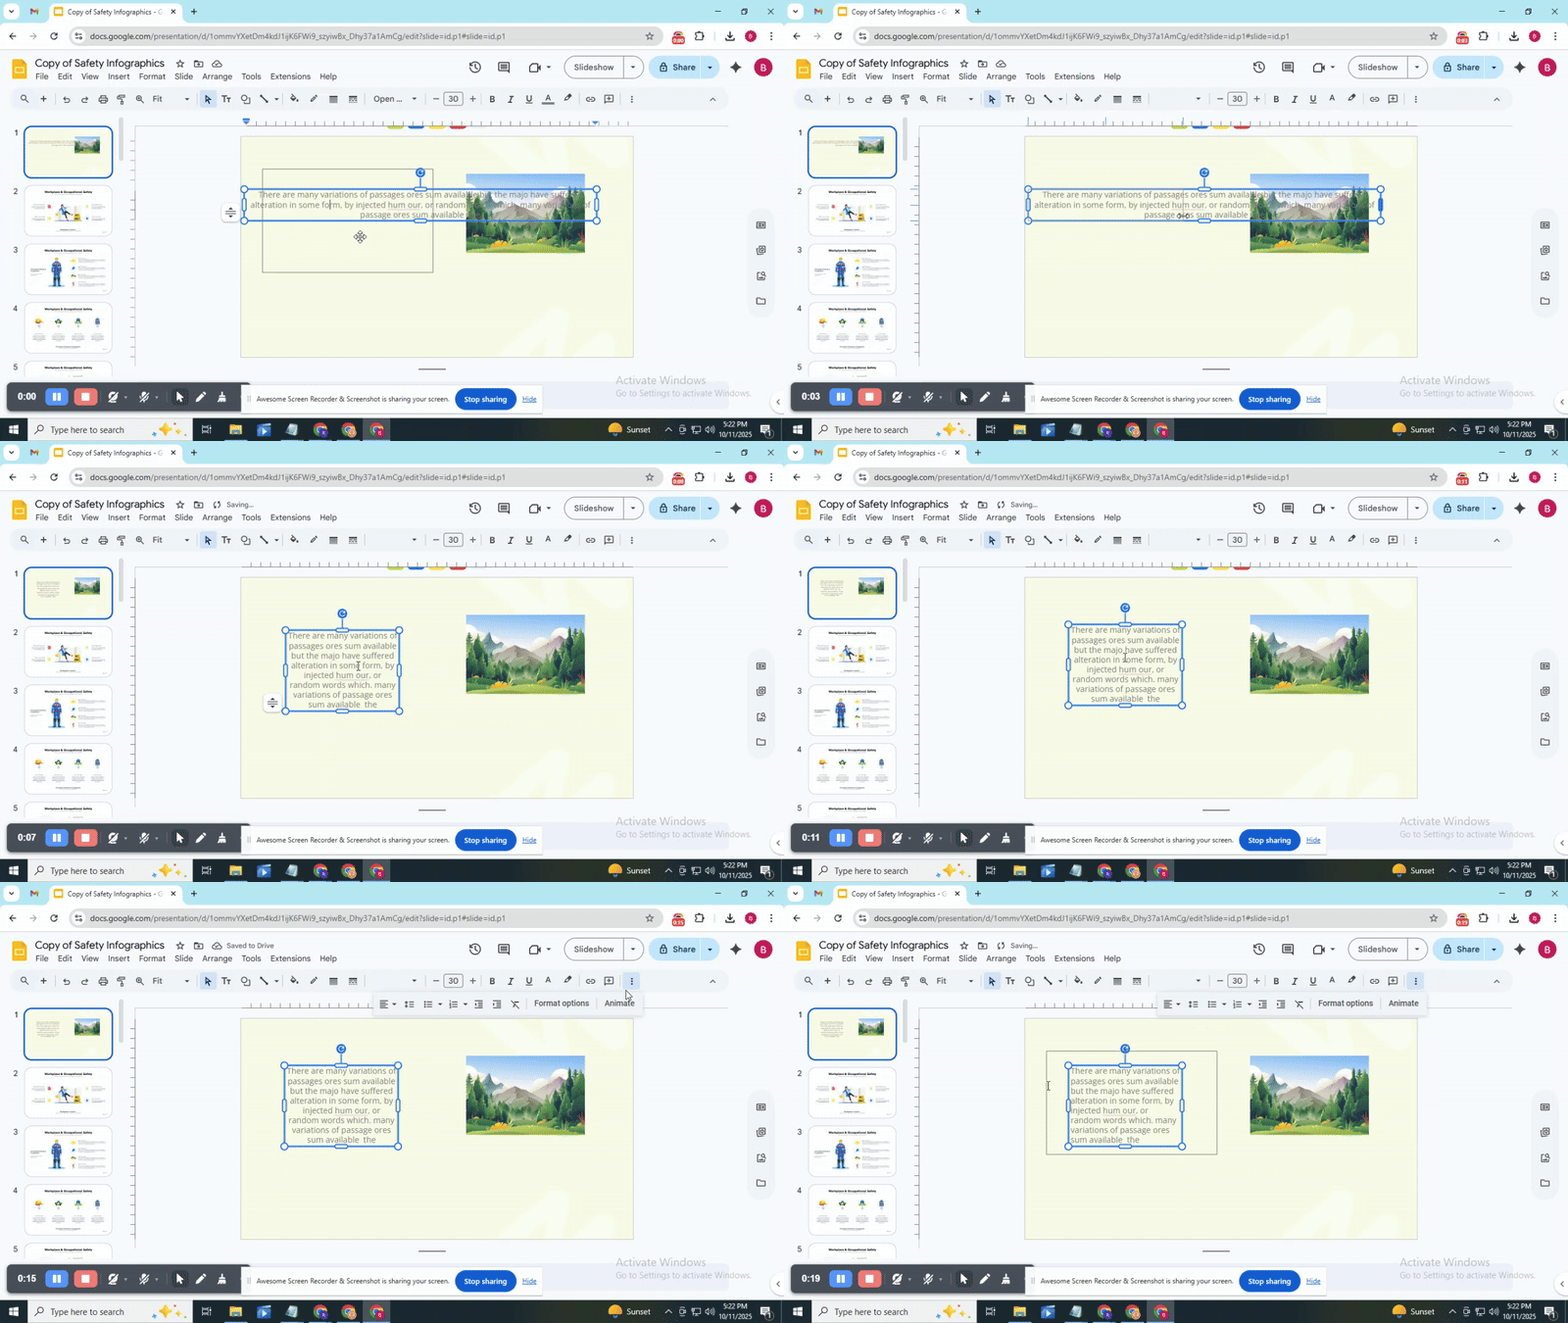
Method 1: Drag and Resize Text Box for a Clean Look
• Click the text box to select it.
• Move it close to your image.
• Drag the edges to resize it until the text fits neatly around the image.
• Adjust line breaks if needed to avoid awkward gaps.
Tip: Keep a little space between the image and text. This keeps the layout from looking crowded.
Method 2: Manual Spacing for Clear Text
• Place your text box where you want it.
• Use the space bar or enter key to move text away from the image.
• Check the alignment and adjust spacing line by line.
• Make small changes until the text looks balanced.
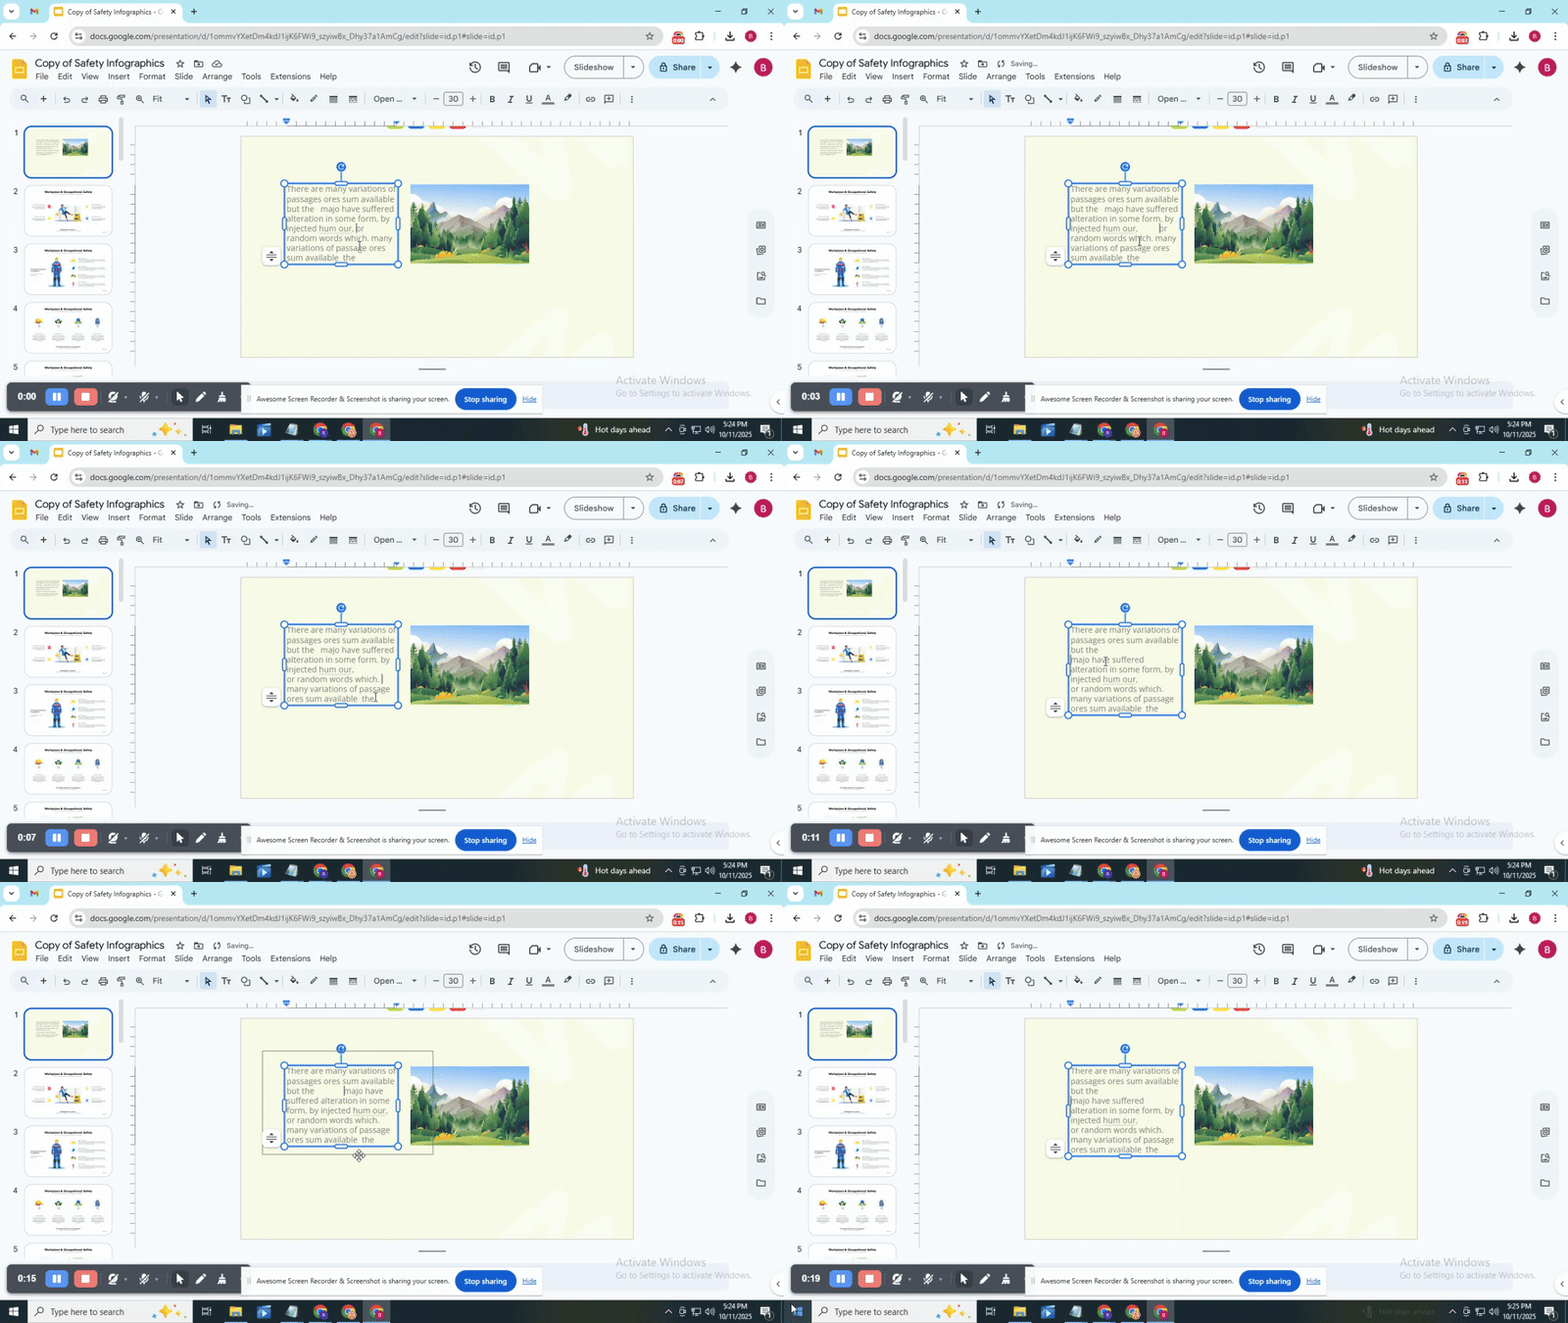
Caution: Too much space can make your text feel disconnected from the image. Keep it close, but readable.
Method 3: Multiple Text Boxes for Flexibility
• Split your text into sections.
• Create a separate text box for each section.
• Move each box around the image to wrap text in unique ways.
• Adjust each box individually for perfect alignment.
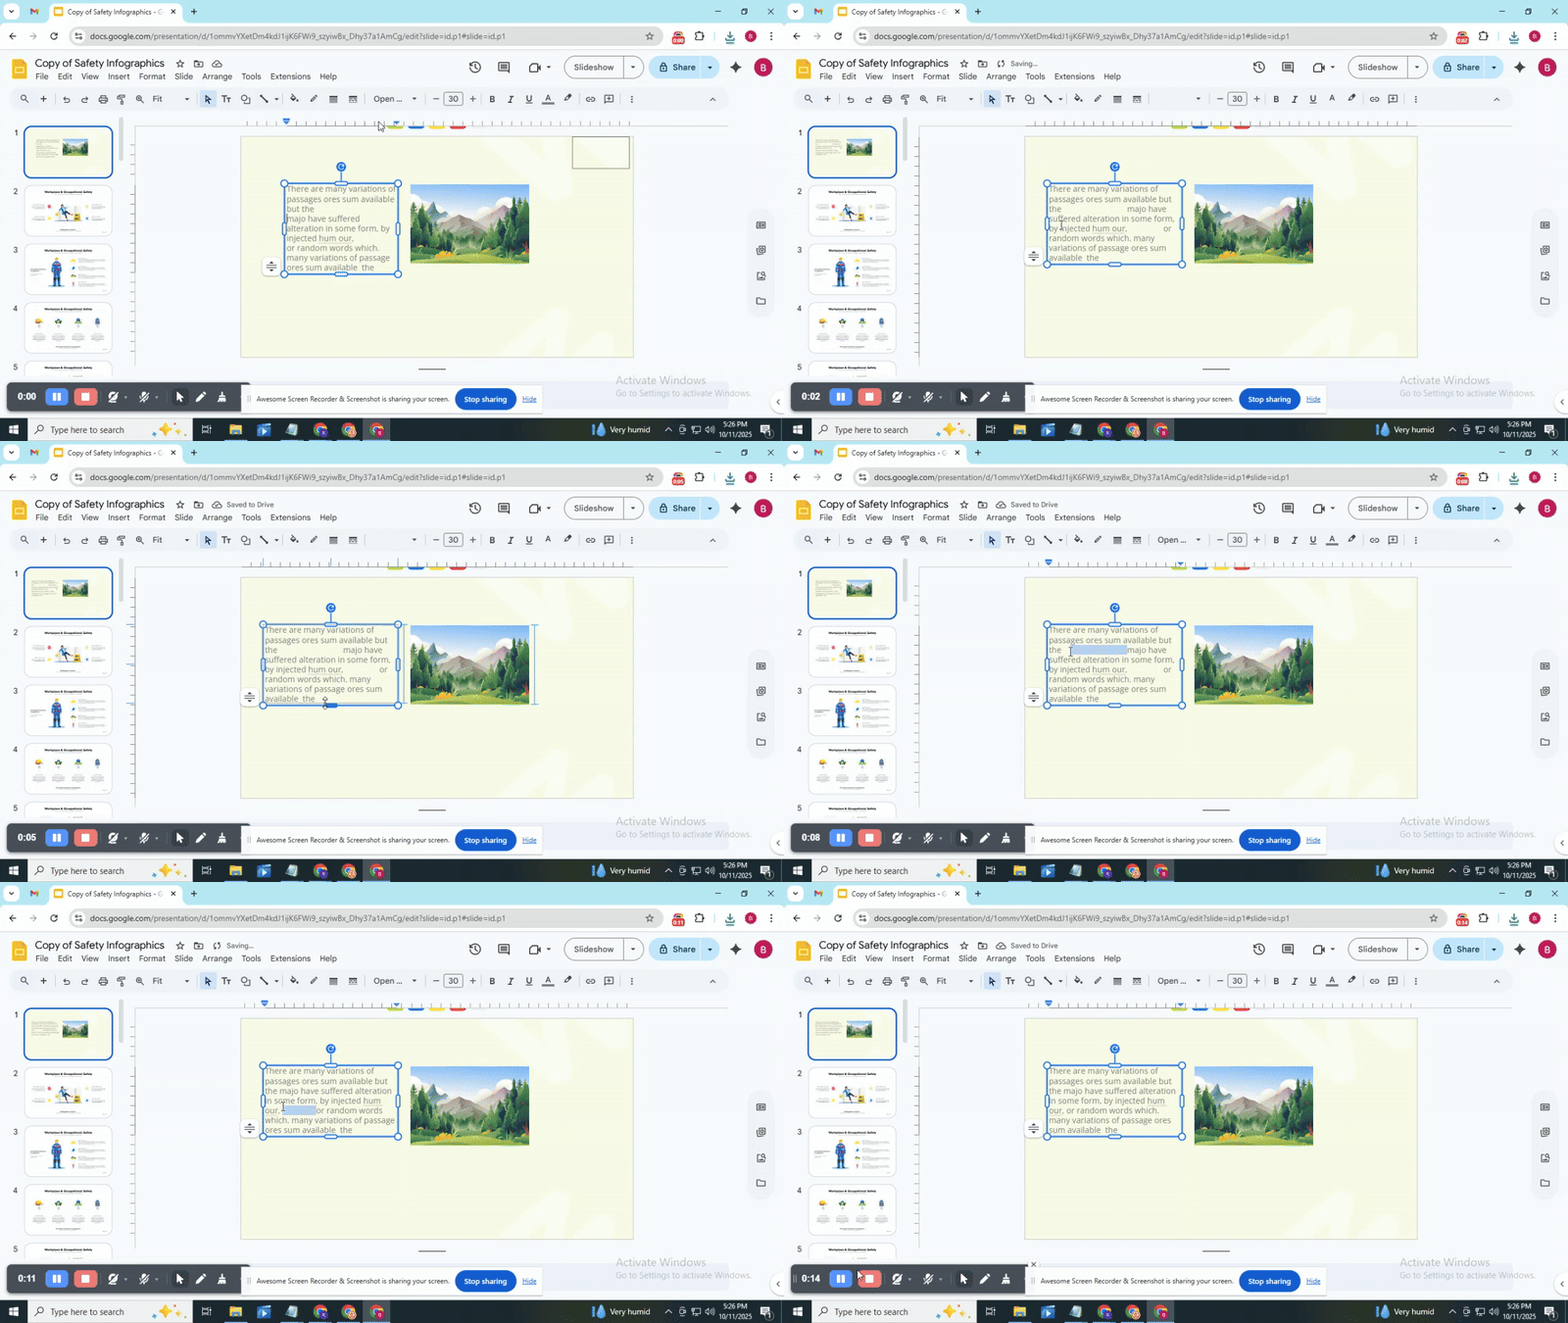
Tip: This method works well for slides with larger images or unusual shapes. It gives you more control over placement.
Bonus Tip
Use guides and rulers in Google Slides or PowerPoint to line up text and images. They help maintain consistency across slides.
Once you experiment with these methods, your text and images will look polished and professional. You can combine them to match your design style.
Read Also: How to Arrange and Align Objects in Google Slides: Tips and Tricks
4 Tips to Refine Text Wrapping in Google Slides
Refining text wrapping in Google Slides helps your slides look polished and easy to read. The following tips show simple adjustments you can make to improve alignment, spacing, and overall appearance.
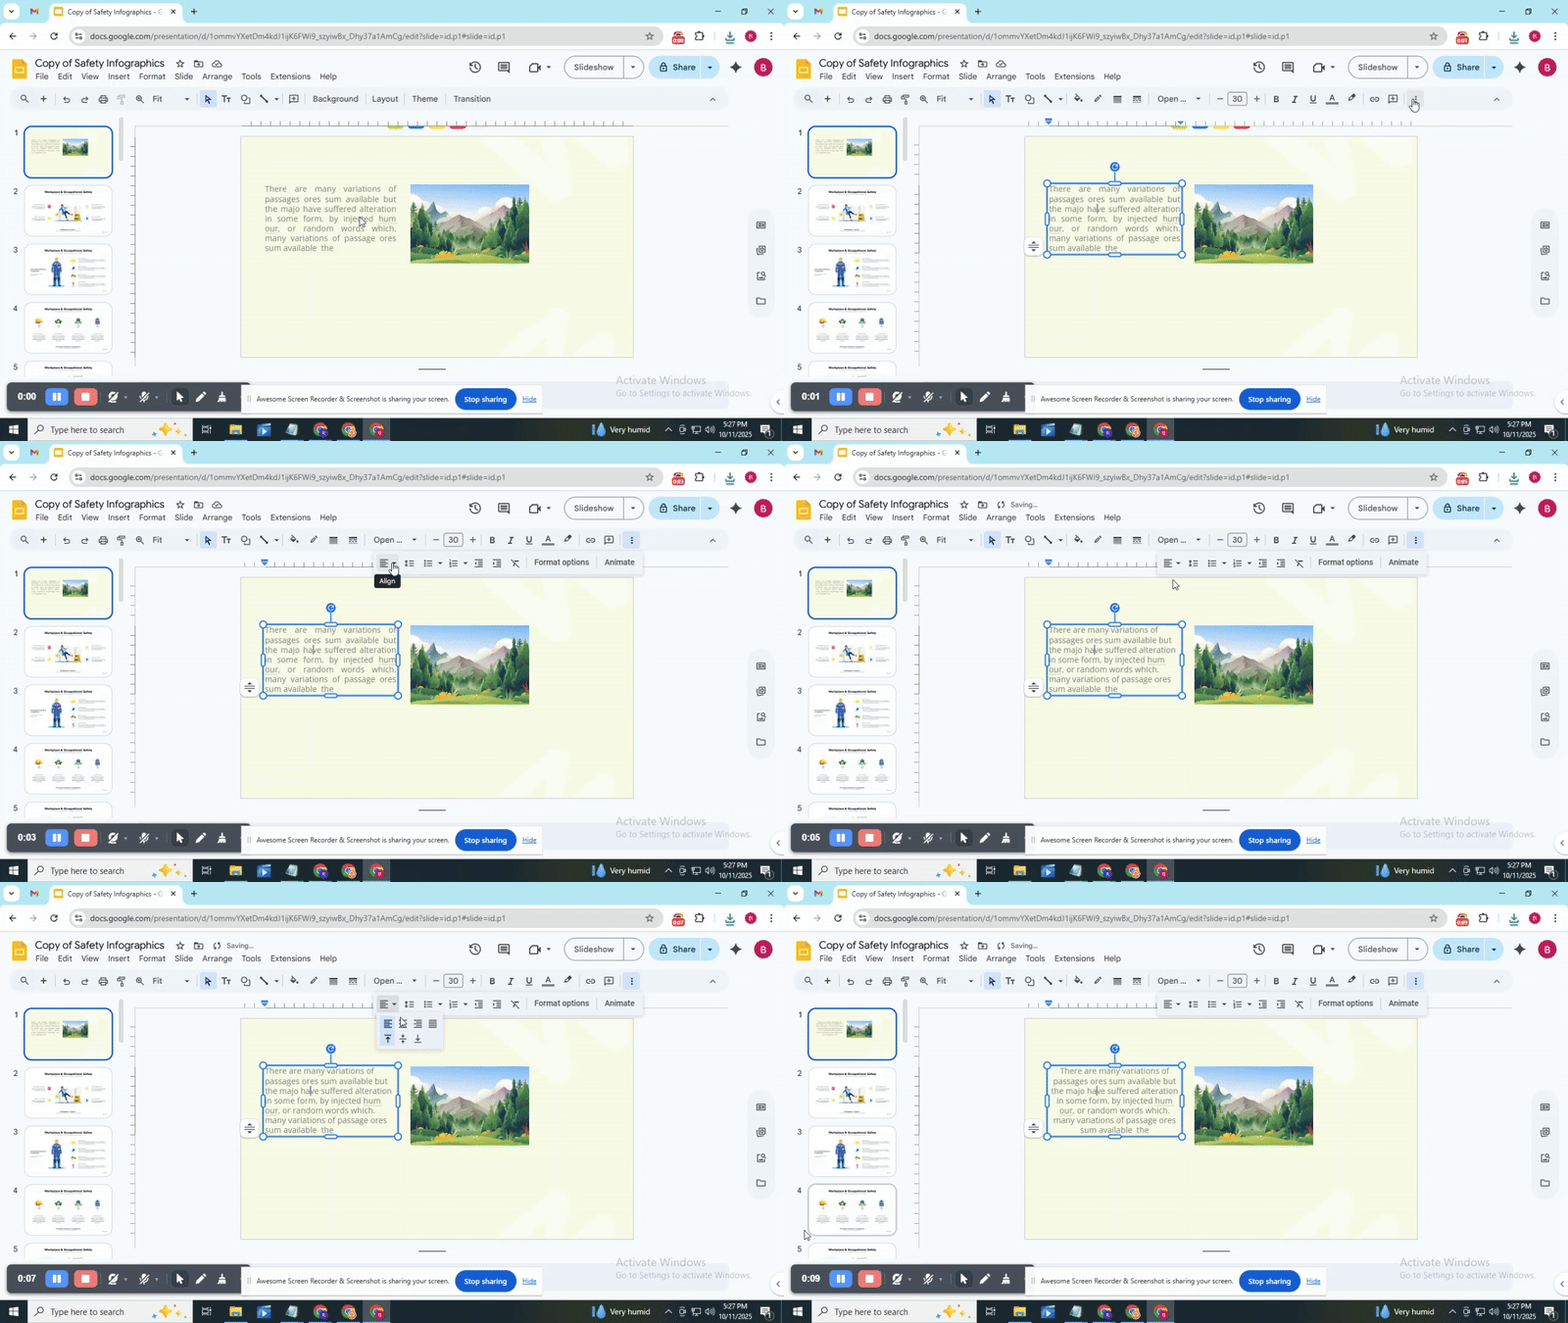
Justify Text:
• Select the text box you want to adjust.
• Go to the Format menu.
• Choose Align & indent, then select Justified.
• This aligns your text evenly on both sides. The result looks cleaner and more professional.
Adjust Text Box Size:
• Click the text box and drag its edges to resize.
• Make the box wider or narrower to control how text wraps around images or shapes.
• Experiment until the text looks balanced and easy to read.
Play with Line Spacing:
• Select your text.
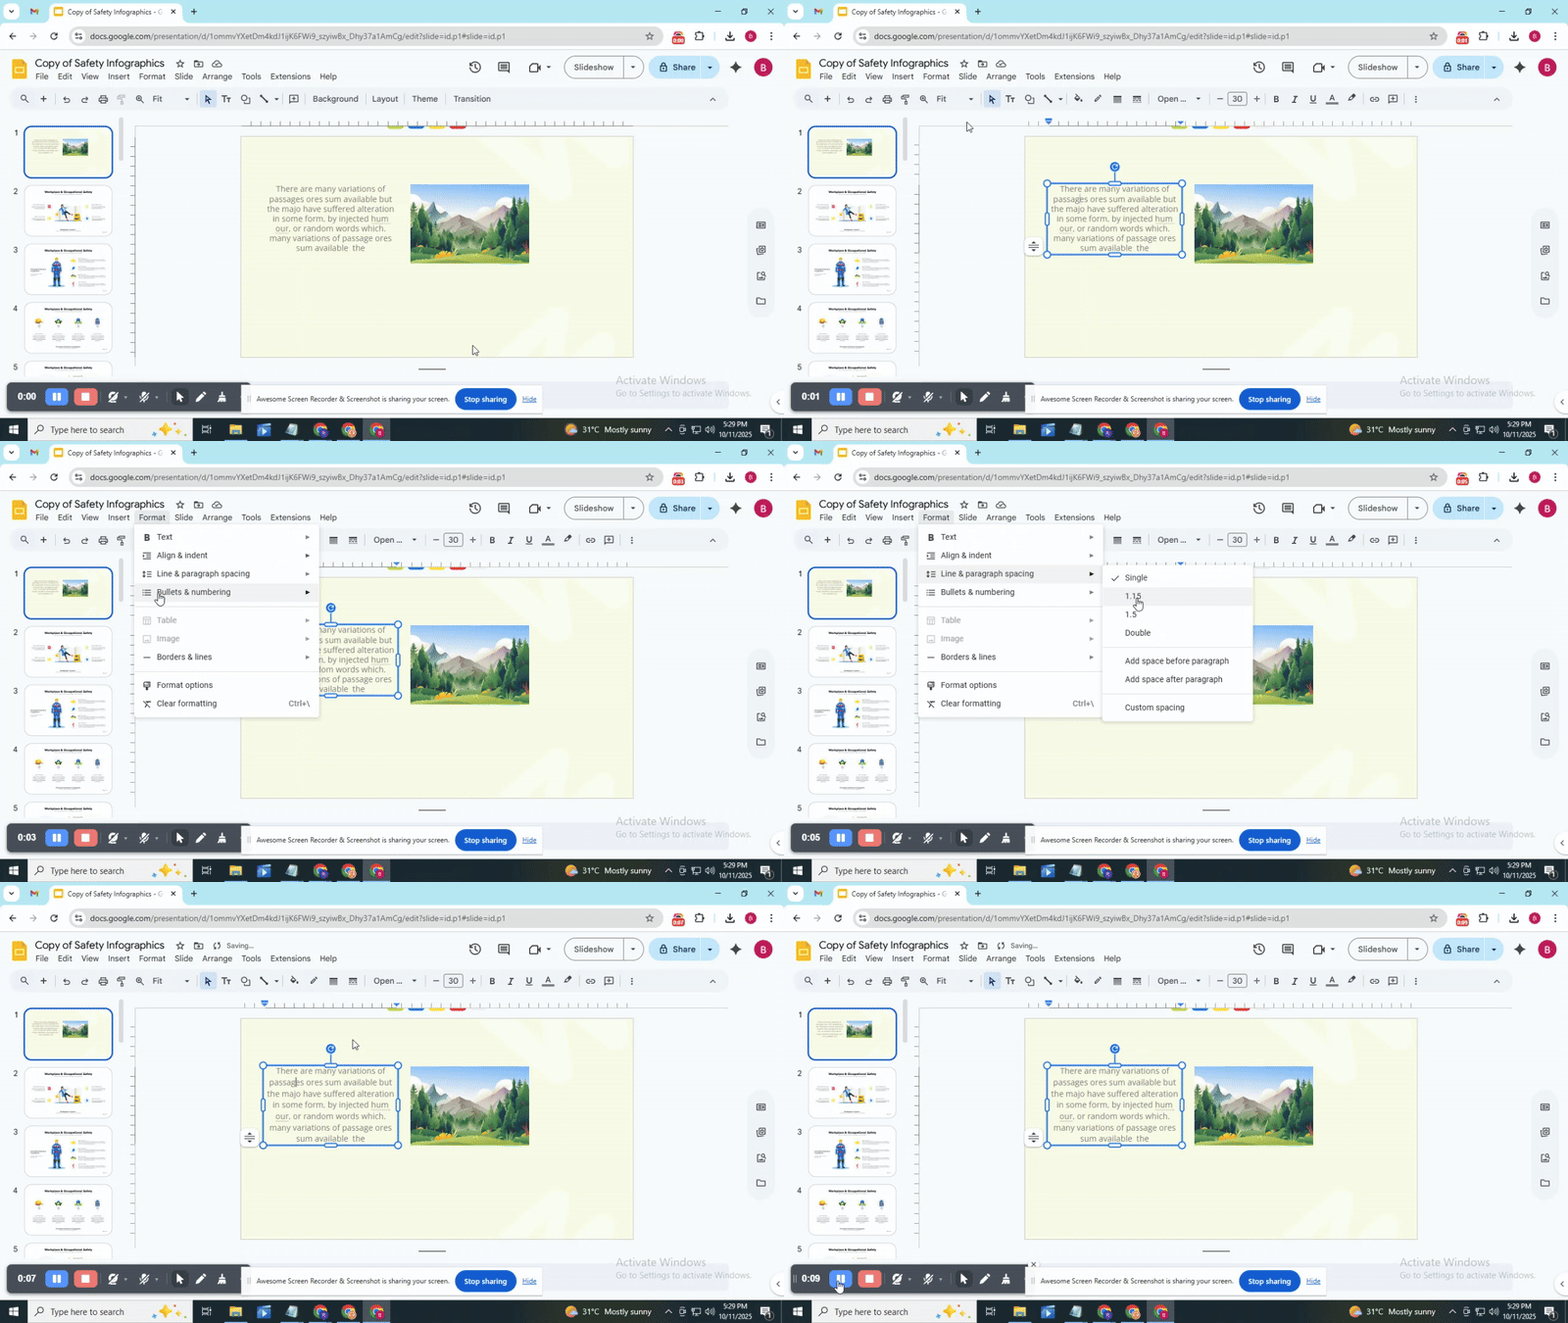
• Go to Format, then Line spacing.
• Choose a spacing option or enter a custom value.
• Increasing spacing can make dense text more readable, while reducing it can save space.
Utilize Text Formatting:
• Highlight the text you want to change.
• Apply bold, italics, or color to emphasize key points.
• Adjust font size to fit the layout better.
• These tweaks help the text stand out and keep your slide visually organized.
Benefits of Wrapping Text in Google Slides
Wrapping text in Google Slides makes your slides easier to read. It also helps your text fit neatly around images for a cleaner look.
Improved Visual Presentation
Wrapping text around images creates a cleaner, more organized layout. It allows slides to combine visuals and words in a balanced way, making the content more engaging.
Better Readability
Text wrapping prevents words from being blocked by images or graphics. Viewers can follow the content without distraction, which helps them understand the message faster.
Professional Appearance
Slides with neatly wrapped text look polished and well-structured. This small adjustment can make presentations appear more refined and credible.
Read Also: How to Curve Text in Google Slides? Quick and Simple Steps
Conclusion
Mastering text wrapping in Google Slides may seem tricky at first, but with the right approach, it’s simple to achieve a clean, professional look. By carefully inserting and aligning text boxes, experimenting with spacing, and refining your layout using the tips provided, you can create slides where text and images coexist harmoniously. Proper text wrapping not only improves readability but also enhances the visual appeal of your presentation, making your content more engaging and easier for your audience to follow. With these techniques, your slides will look polished, organized, and ready to impress.
FAQs:
What is text wrapping?
Text wrapping is when text flows around an image or object instead of staying in a straight line. It helps make slides look organized and easier to read.
Why can’t I wrap text in Google Slides?
Google Slides does not have an automatic text wrapping feature like some other programs. You can work around this by resizing text boxes and placing them carefully around images.
How do I curve text in Google Slides?
To curve text, use the “Word Art” tool. Insert your text as Word Art, then click “Format options” and choose “Transform” to pick a curve shape.
Can I wrap text around multiple images?
Not automatically. You need to create separate text boxes and place them around each image manually to make it look like the text wraps.
How do I put an image behind the text?
Right-click the image and select “Order,” then choose “Send to back.” This places the image behind your text so the words appear on top.
You may also be interested in ...
How To Create An Eye-Catching Portfolio
If you’re looking to create an eye-catching portfolio, this post will come in handy. In this article, you can find the easies...
23 Jun, 2024
How To Easily Create An Infographic
Infographics are the perfect way to make a presentation that will impact an audience, but their design and composition might...
08 Jun, 2024
PowerPoint Template Tips & Tricks You Ne...
PowerPoint seems to be an unknown world for many people, especially those who have been assigned to create a presentation out...
08 Jun, 2024
