How to Add and Customize Text Effects in Canva
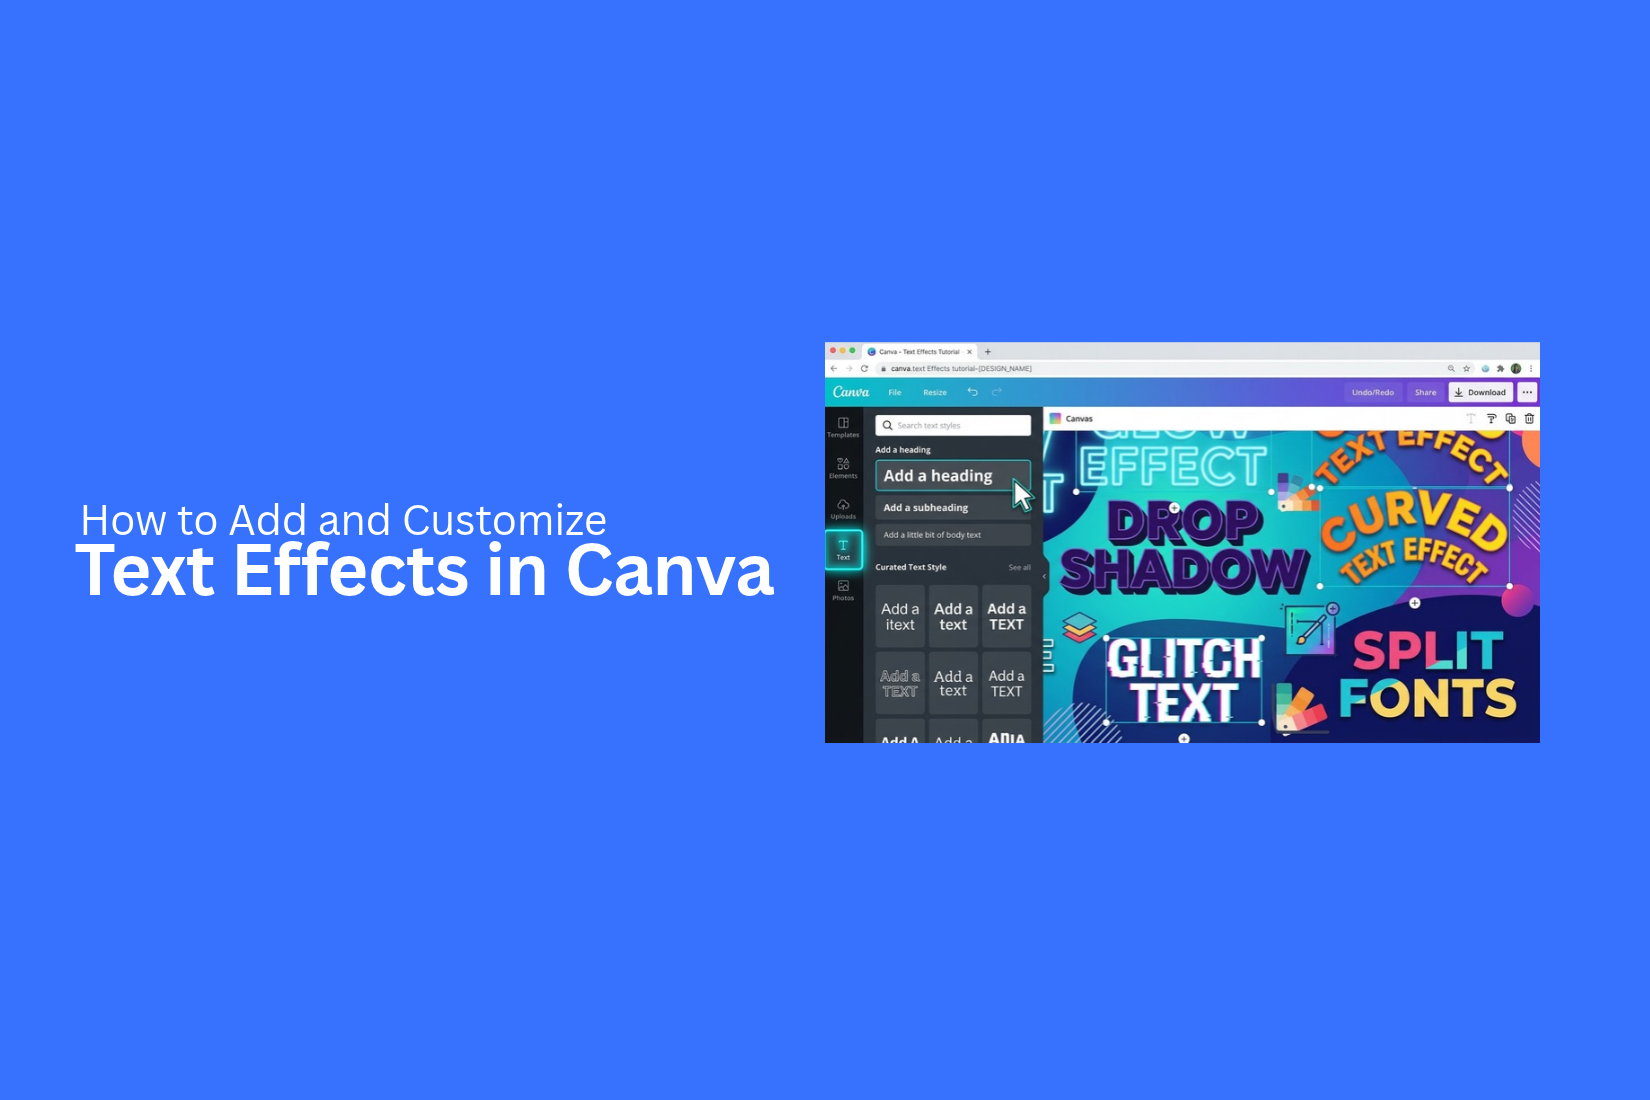
Plain text can make your Canva designs look simple. It may also make important words less noticeable. This can affect the look of your social media graphics, posters, banners, and presentations. Your message may not get the attention it deserves.
Text effects can help solve this problem. Canva offers several options, such as Shadow, Outline, Neon, Glitch, and Curve. Each effect can change how your text looks. However, using the wrong effect or too many styles can make your design hard to read.
This guide explains how to add and customize text effects in Canva. You'll learn about the available effects, how to adjust their settings, and how to use them in different designs.
What Are Text Effects in Canva?
Text effects in Canva are tools that change the look of your text. They help you style words and make them stand out in a design. You can add effects to headings, titles, short phrases, or other text elements.
Canva offers several text effects to choose from. Each one creates a different look. Some add depth or shadows, while others change the shape or style of letters. You can also adjust the effect settings to match your design. These tools give you more control over how text looks. They also help create clear visual differences between headings and body text.
Why Use Text Effects in Canva?
Text effects help make your text stand out in a design. They can add depth, change the look of letters, or make key words easier to notice. Canva offers several text effects that you can use to match your design style.
Here are a few reasons to use text effects in Canva:
- Highlight key messages: Add effects to headings, titles, or important words. This helps readers spot the main points quickly.
- Improve visual appeal: Effects can make plain text look more attractive. They also add more style to your design.
- Create visual depth: Some effects add shadows or a raised look to letters. This can make text stand out from the background.
- Build a clear text layout: Use different effects to separate headings from body text. This helps readers follow the content.
- Match your design style: Choose effects that fit your theme, colors, and overall layout. This keeps your design consistent.
A good text effect should make your message easier to read. Avoid using too many effects in one design. Simple choices often work best.
Types of Text Effects Available in Canva
Canva offers several text effects to change the look of your text. Each effect has a different style. Some add depth, while others change the shape, color, or position of letters. You can use these effects to make headings, titles, and key messages stand out.
Here are some text effects you can use in Canva.
Shadow
The Shadow effect adds a shadow behind your text. It creates a sense of depth and helps letters stand out from the background. You can adjust the shadow's direction, color, blur, and transparency. This effect works well for titles and headings.
Lift
The Lift effect makes text look like it is slightly raised above the page. It adds a soft shadow around the letters. This gives your text a simple 3D look. Use it for short headings or titles that need more depth.
Hollow
The Hollow effect removes the fill color from your letters. It leaves only the outer edges visible. This creates an open text style that works well with large headings. Use a clear background color to keep the letters easy to read.
Splice
The Splice effect creates two layers of text with a slight offset. One layer appears behind the other. You can change the offset, direction, and color to create different looks. It works well for bold titles and creative poster designs.
Outline
The Outline effect adds a border around each letter. The inside of the text stays clear or shows the background, depending on the effect settings. You can change the outline color and thickness to match your design. It is useful for large titles placed over images or colored backgrounds.
Echo
The Echo effect creates repeated text layers behind the main letters. These layers give the text a shadow-like trail. You can adjust the direction, offset, and color to change the look. Use this effect for event posters, social media graphics, and creative headings.
Glitch
The Glitch effect gives text a digital distortion style. It uses shifted layers and color changes to create a broken screen look. This effect fits gaming graphics, tech-themed designs, and modern posters. Keep it for short text so the message stays clear.
Neon
The Neon effect makes text look like glowing light. It adds a bright glow around the letters. You can adjust the color and intensity to change the look. It works well on dark backgrounds, event graphics, and music posters.
Background
The Background effect adds a colored shape behind your text. This helps separate the words from the rest of the design. You can adjust the background color, shape, roundness, and spread. It is useful for labels, headings, and short text that needs extra focus.
Curve
The Curve effect bends your text along a curved path. You can adjust the curve to create an upward or downward shape. This effect works well for logos, badges, circular designs, and decorative headings. It can also help text fit around other design elements.
How to Add Text Effects in Canva
Adding text effects in Canva takes only a few steps. You can start with a new text box or use text that is already part of your design. Canva provides an Effects panel with different options to change how your text looks.
Follow these steps to add a text effect to your design.
Open Your Design in Canva
Start by opening Canva and signing in to your account. Go to the homepage and find the design you want to edit. You can also create a new design by choosing a template or setting custom dimensions.
Once your design opens, go to the page where you want to add the text effect.
Add or Select a Text Box
Your design needs a text box before you can apply an effect. Click Text in the left sidebar to add a heading, subheading, or body text. You can also select an existing text box on your page. Type your text or edit the existing words. Adjust the font, size, and alignment to match your design.
Open the Effects Panel
Click the text box to select it. A toolbar will appear above the editor. Find and click the Effects option to open the text effects panel. The panel displays the available effects. You can use these options to change the appearance of your text.
Choose a Text Effect
Browse the available effects in the panel. Canva offers several styles, such as Shadow, Lift, Hollow, Splice, and Outline. Each option gives your text a different look. Click an effect to see how it changes your selected text. Try a few styles to find one that fits your design.
Apply the Effect
After choosing an effect, adjust its settings if available. Some effects let you change details such as direction, size, intensity, color, or offset. Check how the text looks on the page. Make small changes until the effect matches your design. You can also select another effect or remove the current one from the Effects panel. Repeat these steps for other text boxes in your design. This helps you create a consistent look across your slides or pages.
How to Customize Text Effects in Canva
Canva lets you adjust text effects to match your design. You can change colors, adjust settings, control blur, and change the shape of your text. These options help you create a style that fits your design without making the text hard to read.
Adjust Effect Settings
Each text effect has its own settings. Select your text box and open the Effects panel. Click the applied effect to view its available controls.
For example, you can adjust the direction and intensity of a Shadow effect. You can also change the thickness of an Outline effect. Move the sliders until the text looks right.
Change Effect Colors
Color plays a key role in text design. Canva lets you change the colors of several text effects. Select the text box and open the Effects panel. Click the color option to view the available colors.
You can choose a color from the palette or enter a custom HEX code. Use colors that stand out from the background. Keep enough contrast so readers can read the text with ease.
Control Blur and Transparency
Blur and transparency help control the look of some text effects. These settings are useful for creating soft shadows, glowing text, or subtle background effects.
Select the effect and adjust its Blur or Transparency slider. A higher blur value creates a softer look. Lower transparency makes the effect more visible. Small changes can help keep the text clear.
Adjust Text Curve and Spacing
Canva lets you curve text to create a rounded layout. This works well for logos, badges, posters, and social media graphics. Select your text box and open the Effects panel. Choose the Curve option. Use the slider to change the curve direction and strength.
You can also adjust letter spacing to control the gaps between characters. Open the Spacing settings in the top toolbar. Move the Letter spacing slider to make the text tighter or wider. Adjust the line spacing to control the gap between text lines.
Combine Text Effects
You can use different text styles in one design to create more visual interest. For example, add a Shadow effect to a heading and use a curved text layout for a smaller label.
Keep the design simple. Too many effects can make text hard to read. Use one main effect for the heading and a lighter style for supporting text. This helps readers focus on the main message.
Creative Ways to Use Text Effects in Canva
Text effects can make your designs more interesting and easier to read. They also help important words stand out. Canva offers several effects that you can use across different types of designs. Here are some practical ways to use them.
Create Eye-Catching Headlines
Headlines often need more attention than other text. Canva text effects can help make them stand out. Use Shadow or Lift to add depth to your headline. Try Hollow or Splice for a different look. Keep the font size large and choose colors that match your design. A clear headline helps readers understand the main message at a glance.
Design Social Media Graphics
Social media graphics need clear text that people can read at a glance. Text effects can help highlight key messages in posts, stories, and cover images. Use Neon for event announcements or Shadow for short quotes. The Background effect can also make text easier to read over photos. Keep the effect simple so the main message stays clear.
Make Promotional Banners
Promotional banners often include offers, product names, and short calls to action. Text effects can help these details stand out. Use Splice or Shadow for offer headings. Add the Background effect to highlight discount codes or sale dates. Choose colors that match your brand. Keep the text short so people can read the offer quickly.
Create Posters and Invitations
Posters and invitations often use large text to share key details. Canva text effects can give these designs a distinct look. Use Curve to create rounded text around a photo or graphic. Try Echo or Hollow for event titles. You can also use Shadow to separate text from a busy background. Keep the date, time, and location easy to read.
Highlight Text in Presentations
Text effects can help key points stand out in presentation slides. Use Shadow to highlight headings or important terms. The Background effect can draw attention to short phrases. You can also use Splice to give section titles a different style. Apply effects to only a few text elements on each slide. This keeps the slides neat and makes the main points easier to follow.
Best Practices for Using Text Effects in Canva
Text effects can make your Canva design look more attractive. However, the right effect depends on your design style and purpose. A few simple rules can help you create clean and easy-to-read text.
Choose Effects That Match Your Design
Choose text effects that fit the style of your design. For example, a shadow effect works well for simple and professional layouts. A neon effect may suit event posters or music graphics. Match the effect to your message and the overall look of your design.
Maintain Text Readability
Your text should be easy to read. Some effects can make letters look unclear or crowded. Use clear fonts and proper text sizes. Keep enough space between letters and lines. Make sure the text stands out from the background.
Use Consistent Colors and Styles
Use colors and text styles that work well together. Too many different colors can make your design look messy. Pick a small color palette and use it across your design. Apply similar effects to headings and other text elements to keep the layout consistent.
Avoid Too Many Effects
Adding several effects to one text box can make the design look crowded. It can also make your message harder to read. Stick to one or two effects for each text element. Let the main message stand out without adding extra details.
Keep Text Effects Balanced
Text effects should support your design, not take attention away from the main message. Use stronger effects for headings or key phrases. Keep body text simple. Adjust the effect settings, such as blur, offset, transparency, and intensity, to get the right look. A balanced design keeps the reader's focus on the message.
Common Text Effect Problems in Canva and How to Fix Them
Text effects in Canva are easy to apply, but some issues can affect the final design. Text may look blurry, effects may not appear as expected, or letters may become hard to read. Here are some common problems and simple ways to fix them.
1. Text Effects Make Text Hard to Read
Strong shadows, thick outlines, and bright colors can make text difficult to read.
How to fix it: Reduce the effect intensity. Choose colors with good contrast against the background. Keep the text size large enough to read.
2. Text Effects Do Not Appear
Sometimes, a text effect may not show up after you select it. This can happen due to a design issue or an effect setting.
How to fix it: Select the text box again and open the Effects panel. Choose the effect you want. Check its settings and adjust them as needed.
3. Text Looks Blurry After Downloading
Text may look clear in the Canva editor but appear blurry in the downloaded file. This can happen due to low image quality or the wrong file format. How to fix it: Download your design in PNG or PDF format. Choose a higher export quality for images. Check the downloaded file before sharing or printing it.
4. Text Effects: Change the Letter Spacing
Some effects can make letters look too close together or too far apart. This can affect the layout and make words harder to read. How to fix it: Select the text box and adjust the letter spacing. You can also change the font size or text box width to improve the layout.
5. Text Effects Do Not Look Good on Small Text
Effects like Shadow, Splice, and Neon may look messy on small text. Thin letters can also lose their shape after an effect is applied. How to fix it: Use simple fonts with clear letter shapes. Increase the font size or choose a lighter effect. Keep detailed effects for headings and short text. A few small changes can help your text look cleaner and easier to read. Always check your design at full size before downloading it.
Final Notes
Canva text effects give you simple ways to change the look of your text. You can add shadows, outlines, glow, curves, and other styles to suit your design. These tools work well for social media graphics, posters, banners, and presentation slides.
The key is to use each effect with a clear purpose. Choose styles that match your design. Keep text readable and use consistent colors. Avoid adding too many effects to one text box.
With the right settings, you can create clean and attractive designs that help your message stand out.
Frequently Asked Questions
1. How do I add text effects in Canva?
Open your design and select a text box. Click the Effects option in the top toolbar. Choose an effect from the panel. Adjust its settings to match your design.
2. Are Canva text effects free to use?
Canva offers several text effects that are available with a free account. Some design features may require a Canva Pro subscription. Check your account to see which options are available.
3. Can I change the color of text effects in Canva?
Yes. Select your text box and open the Effects panel. Choose an effect and click its color option. Pick a color from the palette or enter a custom HEX code.
4. How do I remove a text effect in Canva?
Select the text box with the applied effect. Open the Effects panel and choose None to remove the effect. Your text will return to its normal style.
5. Can I use more than one text effect in Canva?
You can use different text styles across your design. However, Canva's Effects panel may not allow multiple effects on the same text box. You can use separate text boxes to create layered styles.
6. Which Canva text effect is best for headings?
Shadow, Lift, Outline, and Splice work well for headings. The best choice depends on your design style and background. Use an effect that makes the heading easy to read.
7. How do I make curved text in Canva?
Select your text box and open the Effects panel. Choose Curve and adjust the slider to change the shape. You can create an upward or downward curve based on your design needs.
8. Why are my Canva text effects not showing?
The effect may not be applied to the selected text box. Select the text again and open the Effects panel. Choose an effect and check its settings. Also, refresh the editor if the issue continues.
9. Can I use Canva text effects in presentations?
Yes. You can use text effects in presentation slides. Apply them to headings, titles, and key phrases. Keep body text simple so the slides remain easy to read.
10. Can I download Canva designs with text effects?
Yes. Canva keeps applied text effects in downloaded designs. You can export your work as PNG, JPG, PDF, or other supported formats. Check the downloaded file to make sure everything looks right.



You may also be interested in ...

How To Create An Eye-Catching Portfolio
If you’re looking to create an eye-catching portfolio, this post will come in handy. In this article, you can find the easies...
23 Jun, 2024

How To Easily Create An Infographic
Infographics are the perfect way to make a presentation that will impact an audience, but their design and composition might...
08 Jun, 2024

PowerPoint Template Tips & Tricks You Ne...
PowerPoint seems to be an unknown world for many people, especially those who have been assigned to create a presentation out...
08 Jun, 2024