How to Easily Add Sound Effects to Google Slides
Adding sound effects to Google Slides can instantly transform a static presentation into an engaging, memorable experience. Instead of plain visuals, audio helps you guide attention, emphasize key points, and improve audience retention.
This guide shows you exactly how to add sound effects to Google Slides, plus advanced methods, troubleshooting tips, and professional best practices most tutorials skip.
Why Add Sound Effects to Google Slides?
Most presentations fail not because of design, but because they lack engagement.
Sound effects help you:
• Highlight key transitions
• Improve storytelling impact
• Keep audience attention focused
• Create professional multimedia slides
• Make training or educational slides easier to follow
Steps to Add Sound When Slides Transition in Google Slides
Adding sound to your slides can make your presentation more engaging. The process is simple once you know the steps. Keep reading to follow the points below and learn how to add sound when slides transition in Google Slides.
Step 1: Prepare the Sound File
Choose the audio file you want to use. Make sure it is in a supported format, such as MP3 or WAV. Store it in an easily accessible folder on your computer. Check the file for clarity and length. Rename it if needed to keep it organized.
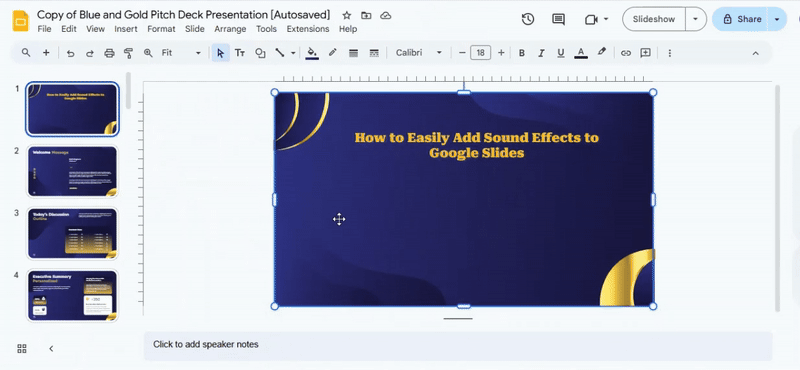
Step 2: Open Your Google Slides Presentation
Log in to your Google account. Go to Google Slides and open the presentation where you want to add audio. Confirm that you are on the correct slide deck. Navigate to the slide where the sound will play.

Step 3: Insert the Audio File
Click on the slide where you want the sound. Go to the menu and select Insert > Audio. Browse your computer or Google Drive for the prepared file. Click Select to insert it into the slide. A small audio icon will appear on the slide.
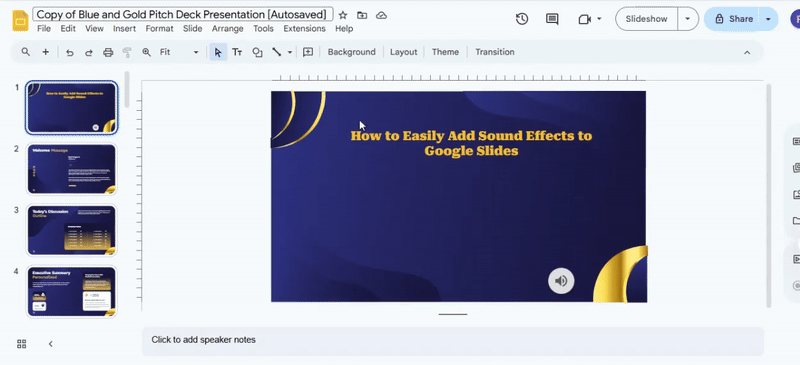
Step 4: Position the Audio Icon
Click the audio icon to move it. Drag it to a spot that will not cover important content. Resize it if necessary using the corner handles. Ensure it is visible but unobtrusive.

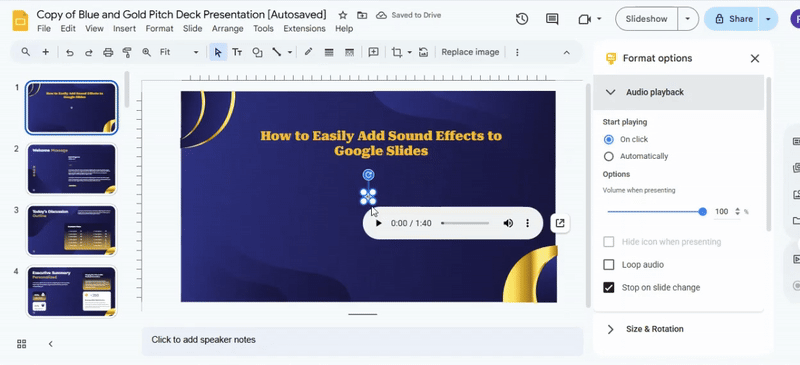
Step 5: Adjust Playback Settings
Select the audio icon. Open Format options from the menu. Choose whether the audio should play automatically or on click. Set the volume and decide if it should stop on slide change. Review other playback options for customization.
Step 6: Test the Presentation
Click Present to start the slideshow. Test the audio on the slide to confirm it plays correctly. Check the volume and timing with other slides. Adjust settings if the sound does not play as expected. Explore additional features like looping or hiding the icon for smoother playback.
Advanced Methods (Pro-Level Usage)
If you want more control over sound effects, use these techniques:
Method 1: Background Sound Effect
Use this for ambient music or mood setting:
• Set audio to auto-play
• Enable loop
• Hide icon
Best for:
• Storytelling slides
• Marketing decks
• Educational backgrounds
Method 2: Click-Based Sound Effects
Use sound only when clicking:
• Set audio to “On click.”
• Trigger manually during presentation
Best for:
• Button-like interactions
• Game-style presentations
Method 3: Slide Transition Sound Strategy
Assign different sounds per slide:
• Soft “whoosh” for transitions
• Click sound for bullet reveal
• Alert sound for important points
This creates a cinematic flow.
Common Problems & Fixes
Audio not playing?
Fix:
• Check Google Drive permission → set to “Anyone with the link.”
• Reload Slides
• Reinsert audio
Audio not visible?
Fix:
• It may be hidden → enable “Hide icon in presentation.”
Audio starts at the wrong time?
Fix:
• Change playback from “On click” to “Automatic.”
File not supported?
Fix:
• Convert to MP3 or WAV using any converter tool
Best Practices (Professional Tips)
To make your presentation feel premium:
• Keep sound effects under 3–5 seconds
• Avoid loud or distracting audio
• Use consistent sound style across slides
• Match sound with visual meaning (don’t overuse)
• Test before presenting
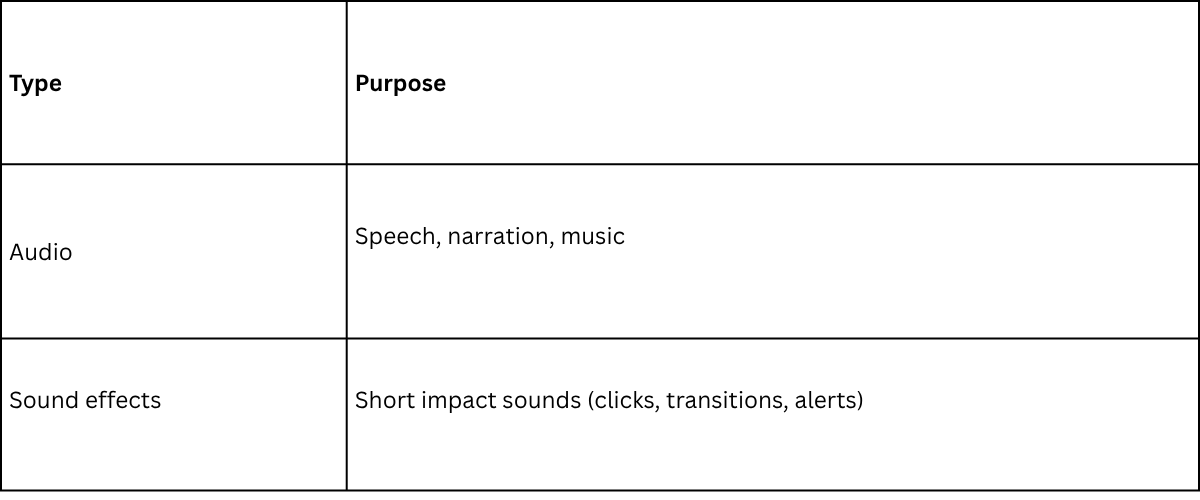
Audio vs Sound Effects: What’s the Difference?
FAQs
Can I directly record audio in Google Slides?
No. You must upload audio via Google Drive.
Can sound play across all slides?
Yes, using loop and playback settings.
Can I use YouTube audio?
Not directly, you must convert it to an audio file first.
Why is my audio delayed?
It depends on file size and loading speed from Google Drive.
Final Thoughts
Adding sound effects to Google Slides is not just a feature; it’s a presentation upgrade strategy.
If done correctly, it can:
• Increase engagement instantly
• Improve storytelling clarity
• Make your slides feel professional and dynamic
The key is not just adding audio, but using it strategically.


You may also be interested in ...

How To Create An Eye-Catching Portfolio
If you’re looking to create an eye-catching portfolio, this post will come in handy. In this article, you can find the easies...
23 Jun, 2024

How To Easily Create An Infographic
Infographics are the perfect way to make a presentation that will impact an audience, but their design and composition might...
08 Jun, 2024

PowerPoint Template Tips & Tricks You Ne...
PowerPoint seems to be an unknown world for many people, especially those who have been assigned to create a presentation out...
08 Jun, 2024