How to Time Slides on Google Slides in 2 Easy Steps
Some presentations move too slowly or too quickly, making it hard for the audience to follow. Even clear content can feel confusing when slides do not match the pace of the talk. This can distract viewers and reduce the overall impact of your message.
Timing slides in Google Slides provides a simple solution. With just two easy steps, each slide can advance automatically without manual clicks.
Once your slides are timed correctly, the presentation flows smoothly. You look organized and professional, and your audience can focus entirely on your ideas instead of the pace of your slides.
Add Time Slides on Google Slides in 2 Easy Steps
Adding time to your slides can make your presentation more polished and organized. In the next section, you will learn how to do this in just two simple steps. Keep reading to see the clear, easy instructions that follow.
Method 1: By Publishing on the Web
Step 1 lets you share your Google Slides online quickly. You can set slide timing and optional features before publishing.
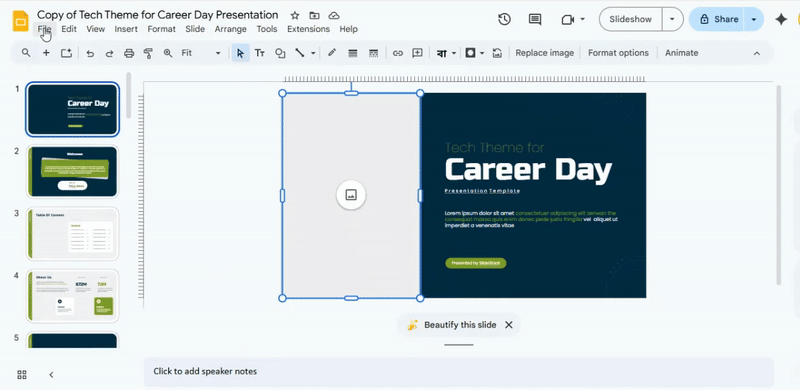
1. Accessing the Timing Controls
Open your Google Slides presentation. Go to the top menu bar and click File. Hover over Share, then select Publish to the web. A window will appear with publishing options.
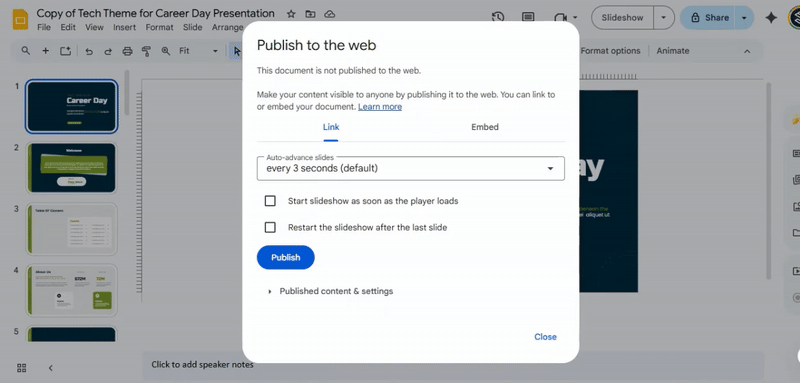
2. Setting the Auto-Advance Interval
In the “Publish to the web” window, go to the Link tab. Find the Auto-advance slides section. Use the dropdown menu to choose how quickly slides change. Options range from immediate transitions to longer intervals in seconds or minutes.
3. Choosing Your Ideal Pace
Pick a timing that matches your content and audience. Short intervals, like every 5 seconds, work for quick points. Longer intervals, like every minute, give viewers more time to read detailed slides.
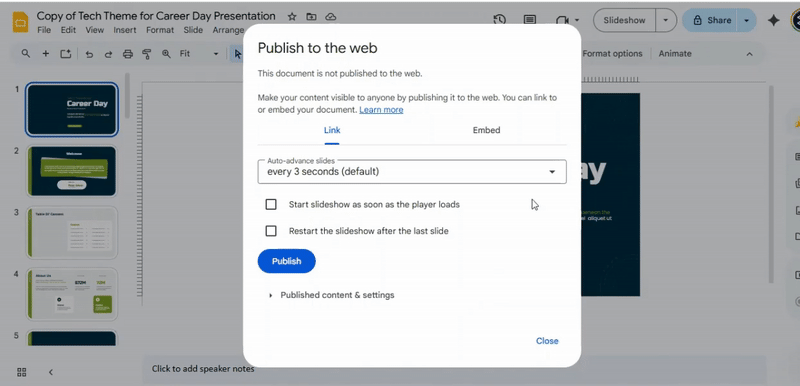
4. Additional Options (Optional)
You can customize your presentation further:
- Start slideshow automatically: Begin the slideshow when someone opens the link, without clicking.
- Enable looping: Have the presentation restart automatically after the last slide. This is useful for kiosks or informational displays.
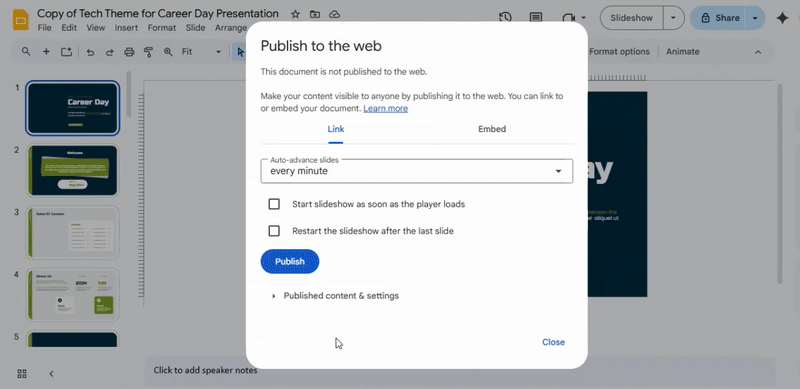
5. Publish and Present
When your settings are ready, click Publish and then OK. You will get a link to share with your audience or use for online presentations.
Here’s the step-by-step version in the style you want:
Method 2: Enable Autoplay During a Live Presentation
Step 1: Begin your presentation by clicking the Slideshow button.
Step 2: Move your cursor to the bottom-left corner of the screen to show the navigation toolbar.
Step 3: Click the three-dot (⋮) More menu icon.
Step 4: Hover over Autoplay and select your desired timing interval.
Step 5: To repeat the slides, enable the Loop option.
Step 6: Click Play to start the presentation with automatic slide transitions.
Conclusion:
Timing your slides makes a big difference in how your presentation is received. Using these two simple steps, your slides can move on their own, keeping the audience engaged and focused. Whether you share your slides online or present live, setting the right pace ensures your message is clear and easy to follow. Once your slides run smoothly, you can focus on delivering your ideas confidently, knowing the timing is handled.
FAQs:
Why should I time my Google Slides?
Timing your slides helps your presentation flow smoothly. It keeps your audience engaged and ensures you cover all points without rushing. It’s especially useful for self-running presentations or automated demos.
What if I want my published slides to advance at specific intervals automatically?
Google Slides lets you set each slide to move forward after a set time. You can choose seconds for each slide so your presentation plays on its own. This is great for kiosks, online demos, or sharing a hands-free slideshow.
Can I set a specific time for each slide?
Yes. You can assign different times to each slide based on how long you want it displayed. This allows slower slides for detailed info and faster slides for simple points.
Can I still edit my presentation after publishing it to the web?
Yes. Publishing a presentation doesn’t lock it. Any changes you make will automatically update the published version.


You may also be interested in ...

How To Create An Eye-Catching Portfolio
If you’re looking to create an eye-catching portfolio, this post will come in handy. In this article, you can find the easies...
23 Jun, 2024

How To Easily Create An Infographic
Infographics are the perfect way to make a presentation that will impact an audience, but their design and composition might...
08 Jun, 2024

PowerPoint Template Tips & Tricks You Ne...
PowerPoint seems to be an unknown world for many people, especially those who have been assigned to create a presentation out...
08 Jun, 2024