How to Share Your Google Slides Presentation Easily
You’ve made a Google Slides presentation and now need to share it. But the steps aren’t always clear. Maybe the link doesn’t work, or the person can’t open it. It can feel frustrating.
Now picture this: you click a few buttons, set the right options, and your presentation is ready to go. Anyone you choose can view, edit, or present it without a problem.
This guide walks you through every simple way to share your Google Slides. Whether you want to send a link, publish it online, or download it as a file, the steps are all here — and easy to follow.
How to Share Google Slides Presentations with People and Groups
Sharing a Google Slides presentation is simple and flexible. Whether you want to show your work to a few friends or a large team, Google Slides makes it easy to control who sees your slides.
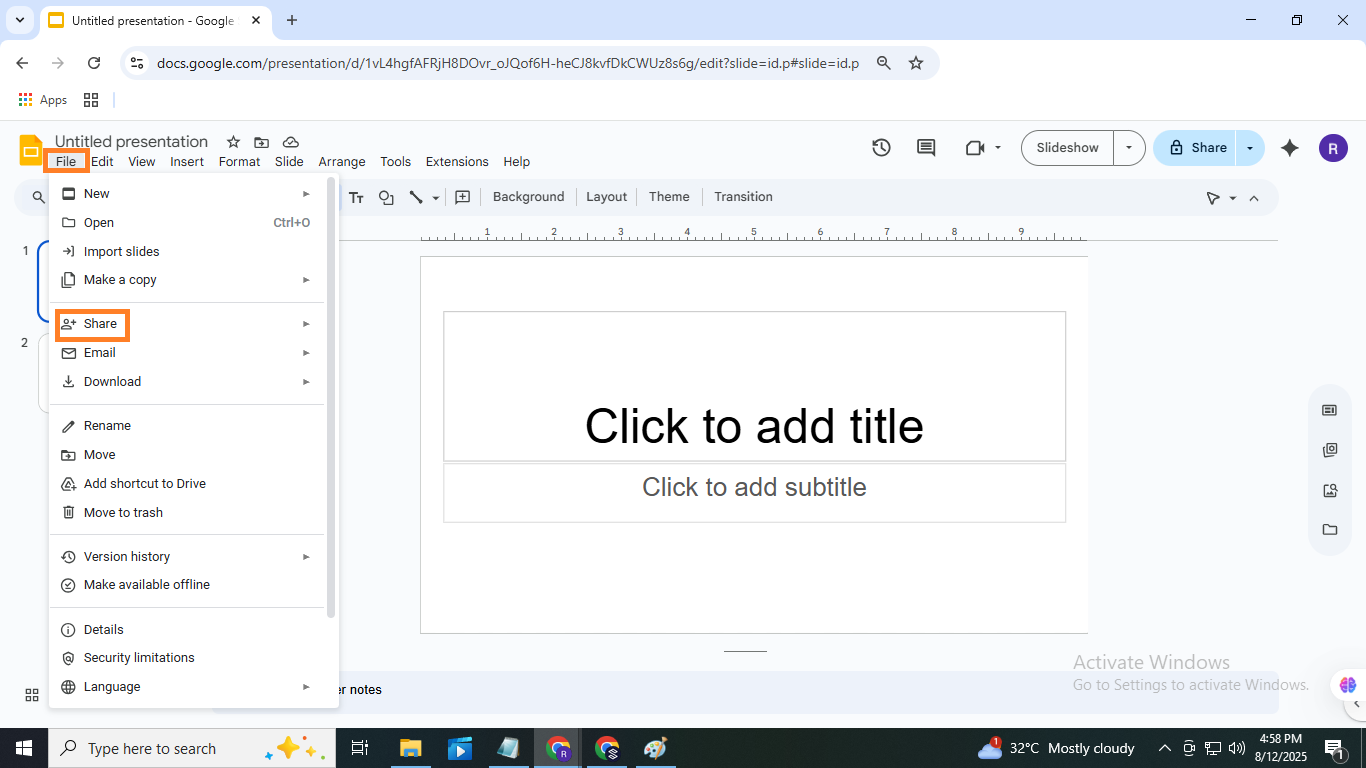
Before we go through every sharing method, let’s start with the basics. In Google Slides, click File in the top bar, then select Share from the menu. That’s your starting point for every option we’ll cover next.
You can share with individual people, groups, or even the public. Different settings let you decide if others can view, comment, or edit your presentation. This helps keep your content safe while making collaboration easy.
Here are three common ways to share your slides:
• Share directly via email with specific people or a group
• Create a shareable link with set permissions
• Publish the presentation to the web for wider access
Using these options lets you pick the best way to share based on your needs. You can choose who gets access and what they can do with your slides.
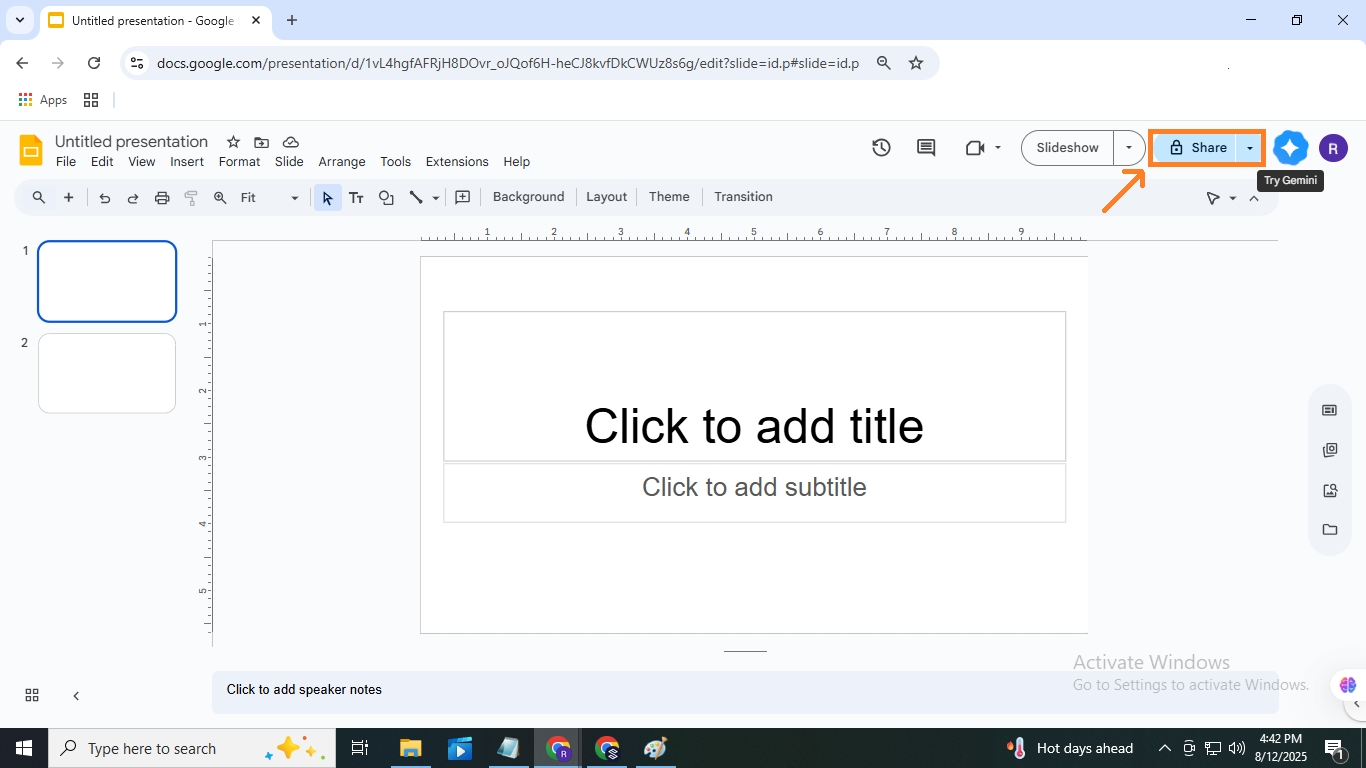
If you want to invite people by email, start by opening your presentation. Click the “Share” button in the upper-right corner. Then, enter the email addresses of those you want to invite. You can add a message to explain why you’re sharing the slides. Finally, set their permission level: Viewer, Commenter, or Editor.
Sharing via link is another quick option. Instead of typing emails, you get a link to send out. You can still control what others can do with your slides by setting the right permissions.
When you publish your slides to the web, anyone with the link can see them. This option is best if you want to share your work with a large audience and don’t need to limit access. Sharing your Google Slides gives you control over your presentation’s reach. You can update permissions anytime, which means you don’t have to worry about sharing the wrong version or giving too much access.
Here are some tips to keep in mind while sharing:
• Always check who has access before sending your presentation
• Use the Viewer permission when you want others to only see your slides
• Change permissions if someone needs to add comments or edit content
Remember that you can stop sharing at any time. Just go back to the Share settings and remove people or disable the link. This keeps your slides safe and private when you want. Now, let’s look at the step-by-step ways to share Google Slides easily.
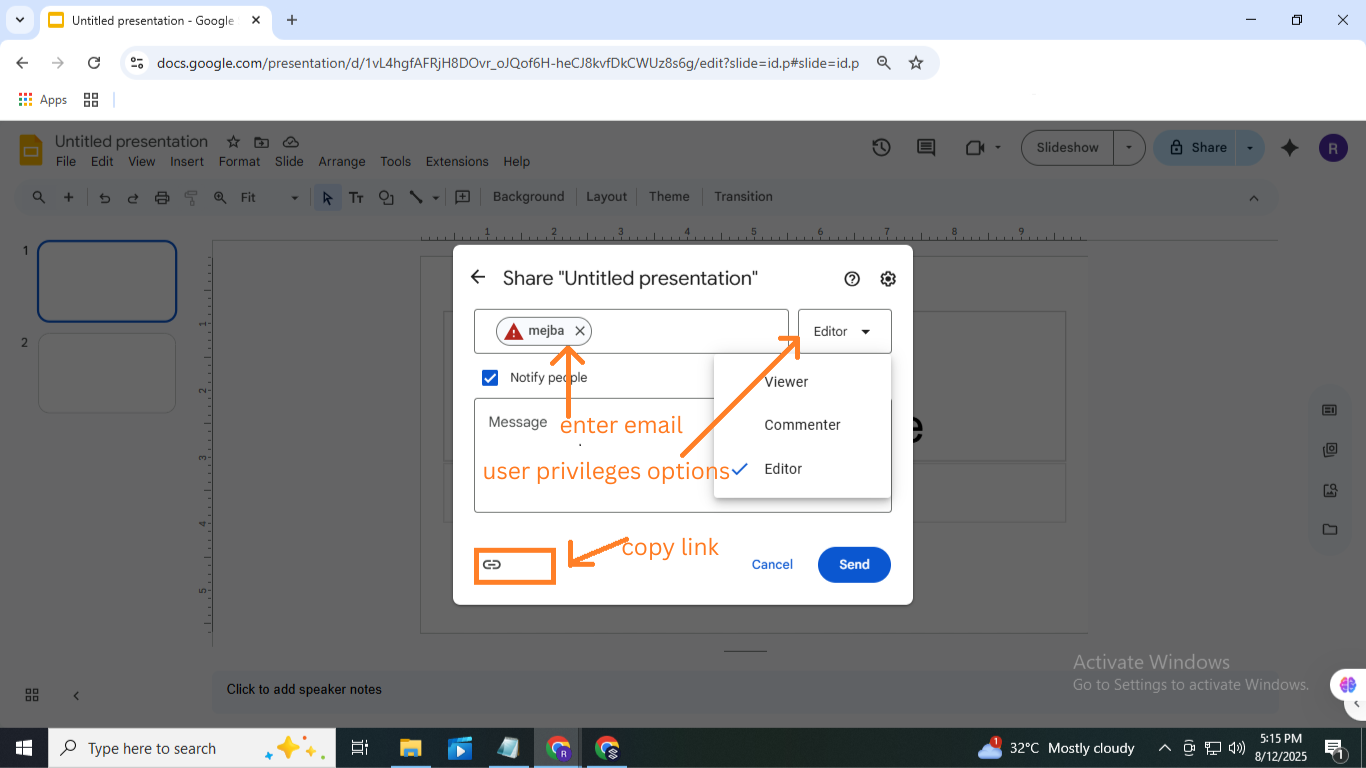
Open your Google Slides presentation. Click “Share” at the top right. Type the email addresses of the people or groups. Pick if they can view, comment, or edit. Click “Send.”
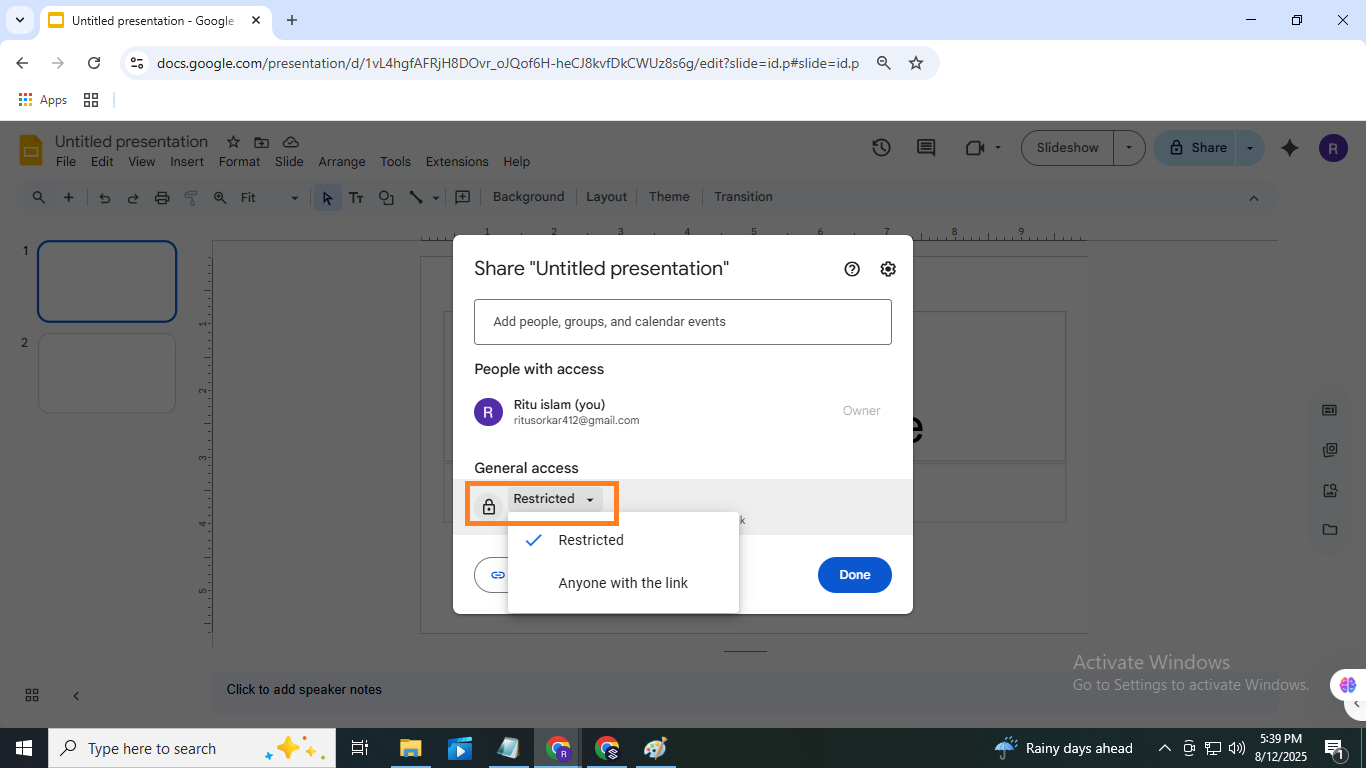
Click “Share” and then “Get link.” Choose who can use the link (restricted, anyone with link). Select permission level. Copy the link and send it to others.
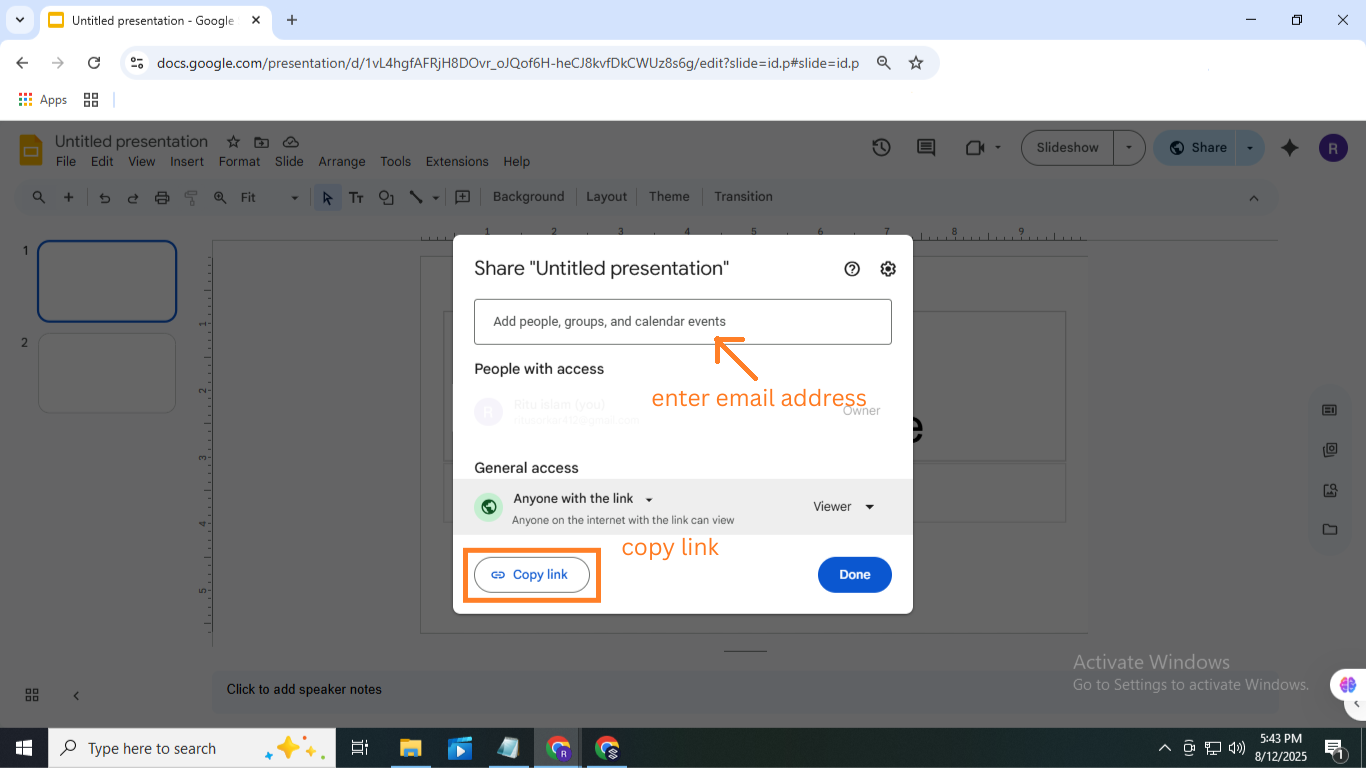
You can share this link freely by entering an email address or simply copying and sending the link directly to anyone you want.
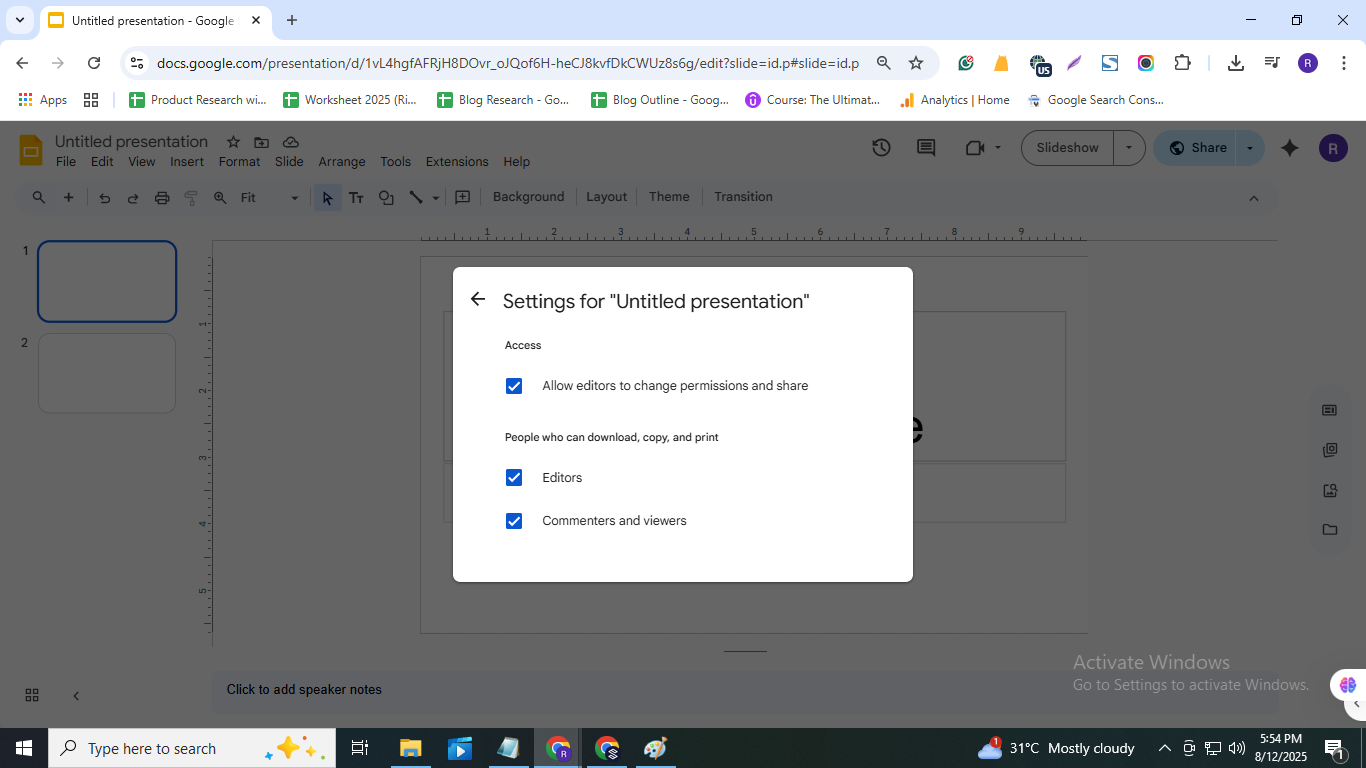
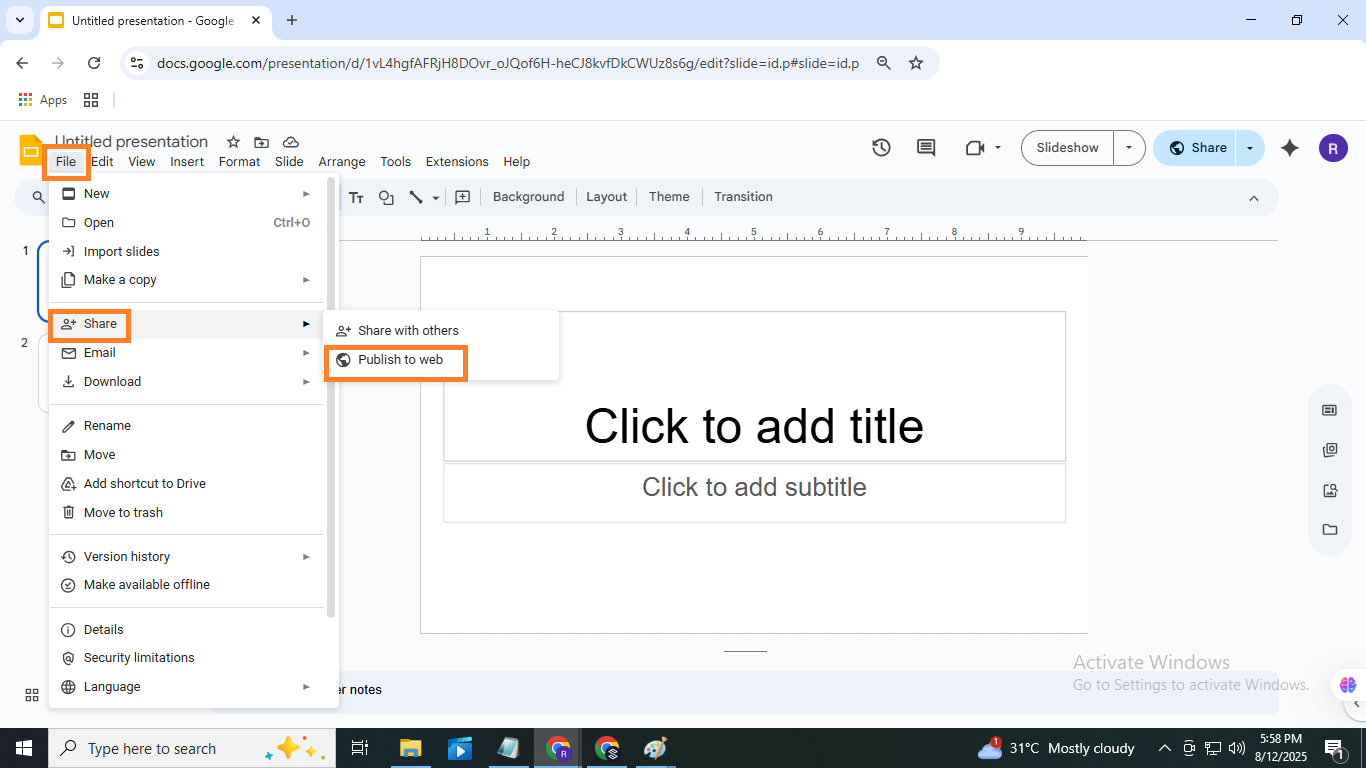
To adjust access, open the Share menu and click the cog icon (Settings). Here, you can stop editors from changing or sharing the file and prevent viewers from downloading, printing, or copying it. Go to “File” > “Publish to the web.” Choose how to publish (link or embed). Click “Publish.” Share the link with your audience. Sharing this way gives you options for many situations. Need to share with just your team? Use email invites. Want to post on a website or blog? Publishing to the web is best. Need quick sharing without emails? Send the link. Each way has its perks, so pick the one that fits your goal. Here are a few more tips to keep your sharing smooth:
• Use groups to save time when inviting many people
• Check notifications to see when others open or edit your slides
• Review access settings regularly to keep control
• Keeping your presentation secure is simple with these settings.
When you share with people or groups, it is easy to manage how they use your slides. Google Slides lets you:
• Limit access to view-only or allow editing
• Add or remove collaborators anytime
• See who has access and what they do
• Send invites with a custom message
There are three main permission levels you can give: Viewer, Commenter, and Editor. Viewers can only see the slides. Commenters can add notes, but can’t change the content. Editors can make changes to the slides and add or remove other people. Choosing the right level helps you control your presentation. For example, use the Viewer when sharing with a large audience to prevent changes. Use Editor when working closely with a team that needs to update the content.
Always double-check who has which permission to avoid mistakes. Instead of typing email addresses one by one, you can share your slides with groups. Groups are collections of people who share the same email group address. When you add a group, everyone in that group gets access. This method saves time when working with teams or classes. Just add the group email once, and everyone can view or edit depending on your settings. Groups also make it easier to update access later. Remove the group or change its permission to control everyone’s access at once.
Keep your slides safe by regularly checking who has access. Remove anyone who no longer needs to see or edit your presentation. Avoid sharing the link publicly unless you want everyone to see your slides. If you use link sharing, set the permission to Viewer to stop unwanted edits. You can also turn off link sharing anytime to cut off access quickly. Always use strong passwords on your Google account to protect your files. That wraps up how to share Google Slides presentations with people and groups. With these steps and tips, you can share your work easily and safely.
How to publish a Google Slides presentation to the web
Sharing a slideshow with many people is easy using the “publish to web” option in Google Slides. It turns your slides into a simple web link that anyone can open. You don’t need to worry about giving permission or access. Once published, the slides play like a video, one after another. It’s useful for display screens, websites, or sharing a view-only version. You can also control how fast the slides change and whether they loop. This helps you share your work without making others download or sign in.
Here’s how to publish your slides to the web:
• Open your Google Slides file.
• Click on File in the top menu.
• Select Share, then choose Publish to web.
• Pick how fast the slides should change.
• Choose if the slideshow should restart after the last slide.
• Click Publish, then copy and share the link.
How to download a Google Slides deck as a different file type
You can save your Google Slides in the format that works best for you.
• Use the menu bar at the top of your screen
• Click on File, then hover over Download
• Pick a format like PDF, PowerPoint, JPEG, or others
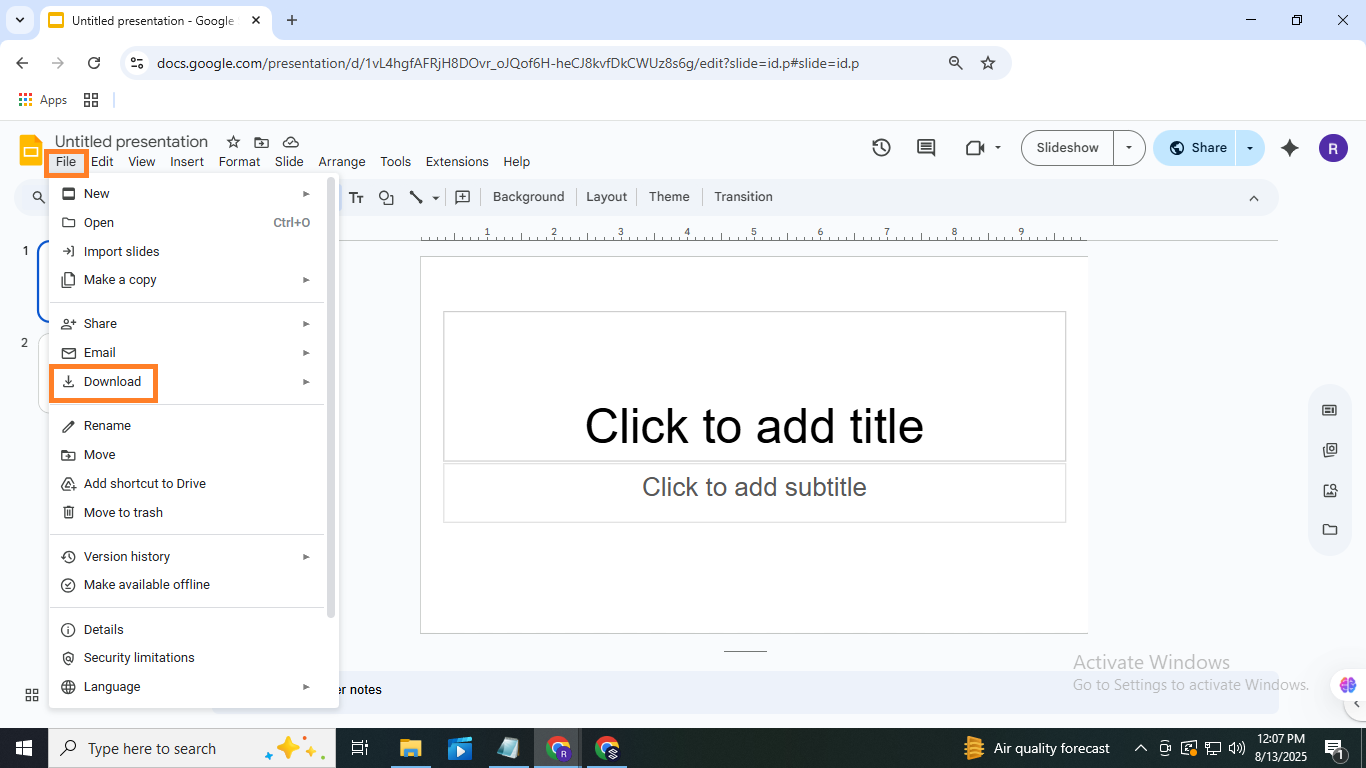
This option helps when you need to share your presentation with someone who doesn’t use Google Slides. It also comes in handy if you want to print slides or add them to another document. Each file type serves a different purpose, so it’s helpful to know which one fits your needs. For example, a PDF is good for fixed layouts, while a PowerPoint file lets you keep editing in other software. Image formats like JPEG or PNG are useful when you want to use a single slide in a blog or social post. Choosing the right one depends on how and where you plan to use your slides.
How to email your Google Slides presentations as an attachment

Sometimes, sharing your slides by email is the simplest option.
• Open your Google Slides presentation
• Click on File in the top menu
• Hover over Download
• Choose a file format like PDF or PowerPoint (.pptx)
• Attach the downloaded file to your email
This method works well when the person you're sending it to doesn’t use Google Slides. By sending a file, they can open it without a link. Just make sure the format you choose fits how they plan to view it.
Final Words
Sharing your Google Slides presentation can sometimes confuse users, especially when options seem limited. A common issue is not knowing how to share without losing control over your content. One workaround is to adjust the sharing settings carefully—choose “View only” if you don’t want others to edit your slides. Another option is downloading your presentation and sending it as an attachment. A good practice is to double-check permissions before sharing. This helps keep your work secure and ensures others see it the way you want.
FAQs
How do I turn PowerPoint into Google Slides?
Open Google Drive and upload your PowerPoint file. Once uploaded, right-click the file, choose “Open with,” and select Google Slides. Your presentation will open in Google Slides and stay editable.
How to make a PowerPoint into Google Slides on Android?
Install the Google Drive app on your Android device. Upload the PowerPoint file to Drive, then tap it and select “Open with Google Slides.” The file will convert and can be edited in the app.
How to save PowerPoint as Google Slides?
After opening your PowerPoint in Google Slides, click “File,” then “Save as Google Slides.” This creates a new version in your Drive that you can edit anytime.
How to copy slides from PowerPoint to Google Slides?
Open both the PowerPoint and a Google Slides presentation. Copy the slides from PowerPoint, then paste them into Google Slides. You may need to adjust formatting after pasting.


You may also be interested in ...

How To Create An Eye-Catching Portfolio
If you’re looking to create an eye-catching portfolio, this post will come in handy. In this article, you can find the easies...
23 Jun, 2024

How To Easily Create An Infographic
Infographics are the perfect way to make a presentation that will impact an audience, but their design and composition might...
08 Jun, 2024

PowerPoint Template Tips & Tricks You Ne...
PowerPoint seems to be an unknown world for many people, especially those who have been assigned to create a presentation out...
08 Jun, 2024