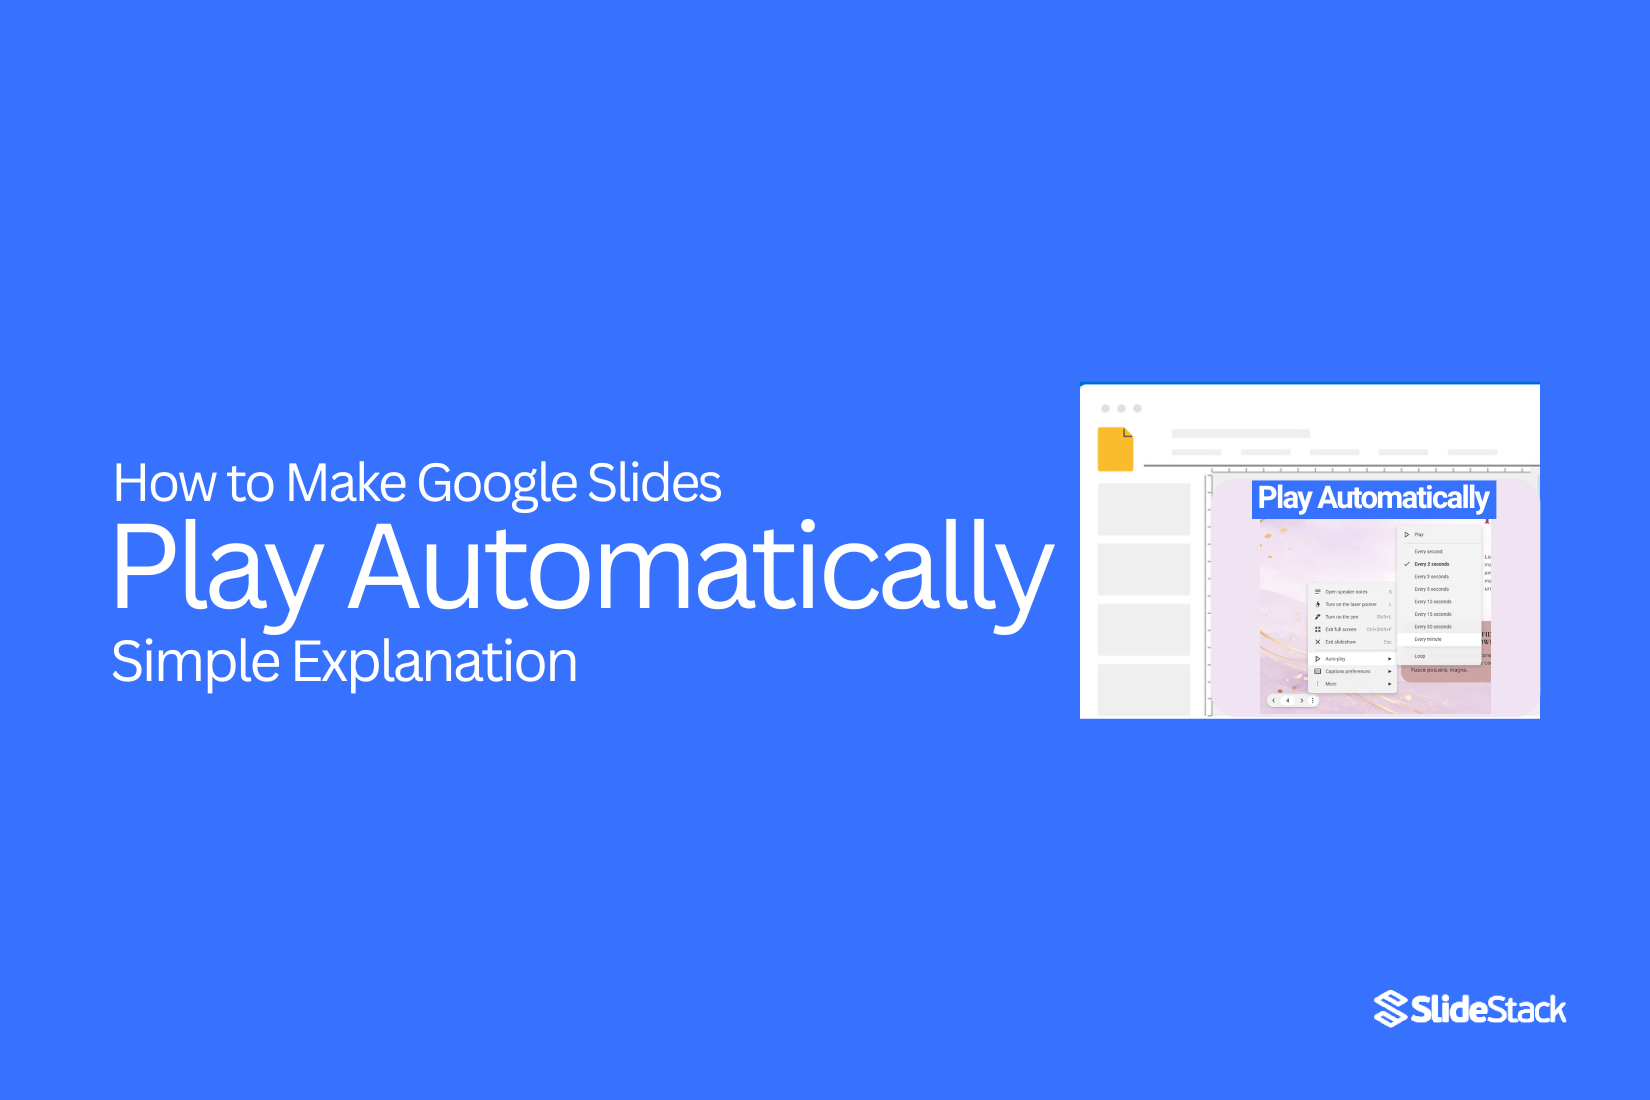
How to Make Google Slides Play Automatically – Simple Explanation
Many people create Google Slides presentations but struggle to keep them moving smoothly. Clicking through slides one by one can interrupt the flow and make the presentation feel slow or awkward.
Google Slides offers automatic playback, letting slides advance on their own. This feature keeps your presentation moving without constant manual clicks. It works for both simple slide decks and more detailed presentations with animations.
In this guide, you will learn how to set up auto-advance using different methods, adjust timing for the best flow, loop slides, and troubleshoot common issues. By the end, your slides can play automatically, creating a smooth, hands-free experience for your audience.
What Does Autoplay in Google Slides Mean?
Autoplay in Google Slides lets your presentation move on its own. Each slide changes automatically without you clicking. This makes the presentation flow smoothly and keeps the audience engaged.
With autoplay, you can set how long each slide shows. You can also choose if the slides repeat in a loop. This feature is helpful for displays, kiosks, or online sharing.
Autoplay saves time and makes your slides feel more professional. It ensures your message continues without interruptions.
Why Would You Require Google Slides to Play Automatically?
Google Slides can play automatically to keep presentations moving without manual clicks. Autoplay is useful in settings where constant attention or interaction from a presenter is not possible.
Shows and Exhibitions: At trade shows or galleries, slides can loop on screens. Visitors see content without waiting for someone to operate the presentation. This keeps information clear and accessible for everyone.
Institutions: In schools or libraries, educational slides can run in common areas. Students and staff can absorb key points without needing a teacher present. The content reaches a wider audience efficiently.
Event Announcements: Conferences, company events, or community centers can display schedules and updates automatically. Attendees stay informed even if no staff member is available to explain.
Training and Onboarding: New employees or volunteers can view step-by-step guides without needing a trainer. This allows them to learn at their own pace while ensuring that all instructions are consistently presented.
Autoplay helps presentations stay active, guides viewers through information naturally, and ensures important content is always visible. It reduces interruptions and keeps audiences engaged, even in unattended settings.
Why Would You Use a Laser Pointer in Google Slides?
Using a laser pointer in Google Slides helps highlight key information without distracting from your content. It keeps the audience focused and makes explanations clear during live or shared presentations.
• Presenting key points: Draw attention to important text or visuals.
• Explaining charts and graphs: Make numbers or trends easy to follow.
• Step-by-step demonstrations: Show a process or timeline clearly.
• Q&A sessions: Direct focus on relevant areas during discussions.
• Remote presentations: Keep your audience engaged when sharing your screen.
• Workshops or training: Guide participants through exercises smoothly.
• Event presentations: Highlight sponsor logos, schedules, or announcements.
• Classroom lessons: Help students follow along with diagrams or examples.
• Conferences: Ensure your message is clear on large screens or shared monitors.
Using a laser pointer improves clarity and ensures your audience knows exactly what you want them to focus on.
How to Makе Googlе Slidеs Play Automatically?
Google Slides can play automatically using three main methods. Users can choose the option that works best for their presentation:
• Slideshow option – Play slides in sequence without manual clicks.
• Auto-advance option – Set slides to move on a timed loop.
• Publish to Web – Share slides online with automatic playback.
Selecting one of these methods will enable the presentation to run on its own.
How to Autoplay Google Slides - Step by Step
Playing Google Slides automatically saves time and keeps your presentation smooth.
You can use built-in options to set slides to move on their own without manual clicks.
Using the “Slideshow” option to play Google Slides automatically
You can make your slides move on their own by using the Slideshow option. Follow these steps to set it up.
- Open your Google Slides presentation.
- Click on the Slideshow menu at the top of the screen.
- Select Start slideshow from the dropdown.
- In the slideshow view, click the Autoplay icon or option if available.
- Choose the time interval for each slide to advance automatically.
After completing these steps, your presentation will play automatically without needing to click each slide.
Using the “Auto-Advanced” option to play Google Slides on a loop
You can make your slides move automatically by using the Auto-Advanced feature. Follow these steps to set it up.

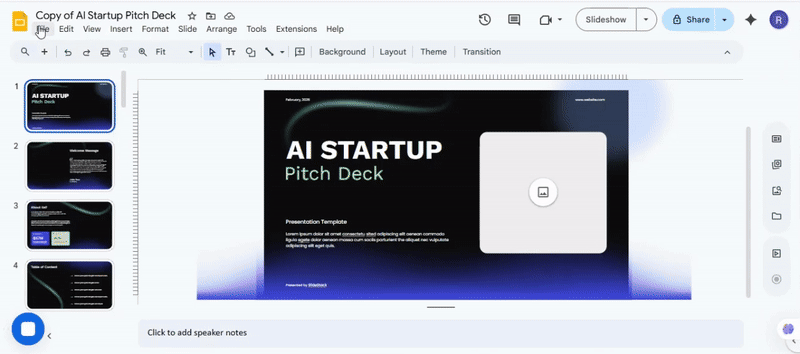
- Open your Google Slides presentation.
- Click on the File menu at the top left.
- Select Publish to the web from the dropdown.
- In the window that appears, click the Auto-advance slides dropdown.
- Choose how often you want each slide to change. Options include 1, 2, 3, 5, 10, 15, 30 seconds, or 1 minute.
- Check the box labeled Restart the slideshow after the last slide to make it loop.
- Click Publish to activate the settings.
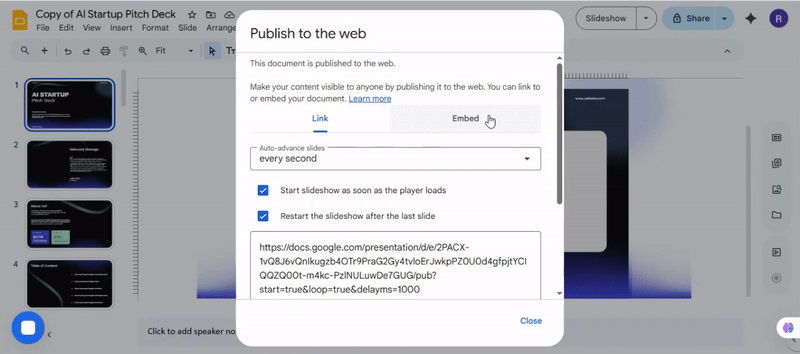
- Confirm by clicking OK when prompted.
- Your presentation will now start automatically and loop according to the timing you set. Open the presentation in a new tab to verify it runs as expected.
Using the “Publish to Web” Option to make Google Slides play automatically
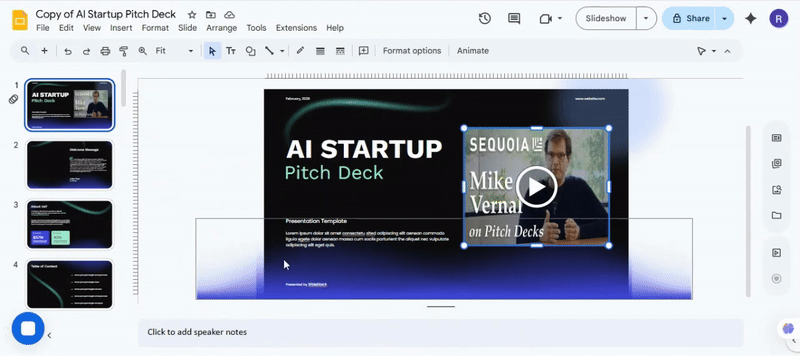
- Go to the slide that has your video
- Right-click on the video and choose Format Options.
- Click on Video Playback.
- Check Play automatically.
With this setting, your video starts as soon as the slide appears. You do not need to click anything.
Present Mode vs. Publish to the Web: Which Should You Choose?
Choosing how to share your presentation can affect how your audience experiences it. Present mode and Publish to the web offer different ways to deliver slides, each with distinct benefits. Understanding these differences helps you pick the right option for your context.
Quick Comparison
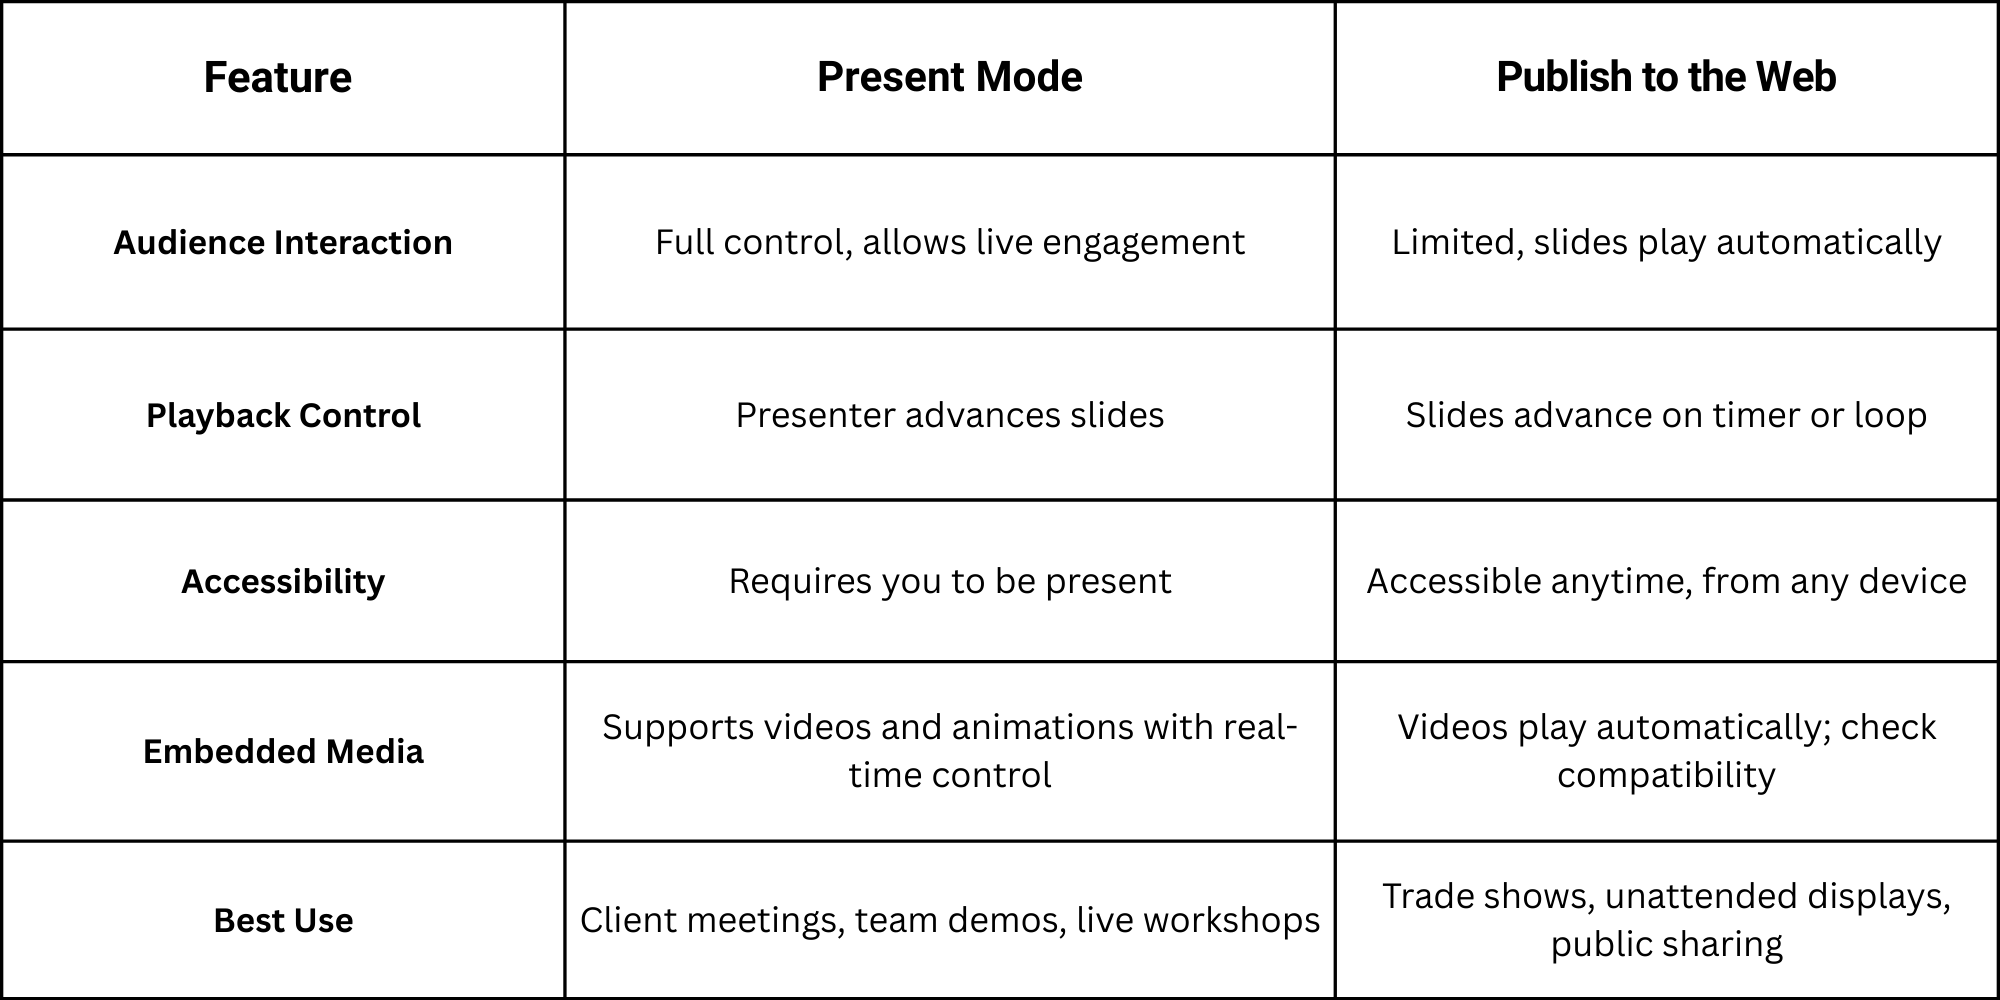
When to Use Present Mode
• You want to guide the audience through content in real time.
• Audience questions and reactions matter.
• You need to adjust pacing based on feedback.
• Your slides include interactive elements or embedded media that require precise timing.
• You prefer full control over transitions and annotations.
When to Use Publish to the Web
• Slides need to run automatically without a presenter.
• Content will be shared broadly, online or in unattended settings.
• You want looped playback for exhibitions or kiosks.
• Compatibility with multiple devices and browsers matters.
• You need to schedule slides for a timed or repeated display.
Quick Rules for Choosing
• If live guidance matters, choose Present mode.
• If unattended playback or wide access matters, choose Publish to the web.
• Check device and browser compatibility before finalizing.
• Review timing, transitions, and media playback to ensure a smooth experience.
Tips for Optimizing Playback
• Verify slide transitions match your intended timing.
• Test videos or animations in both modes before final use.
• Use simple, consistent media formats to avoid playback issues.
• For publishing to the web, ensure loops and timers are set correctly.
• Consider using lightweight files for smoother playback on various devices.
Benefits of Autoplay in Google Slides
Autoplay makes slides move on their own. This keeps the audience focused. They do not have to click through each slide.
It saves time during presentations. You can set slides to match the pace of your talk. This helps keep the flow steady.
Autoplay is useful for displays. At events or kiosks, slides can loop without needing anyone to control them. People can see all the content easily.
It also reduces mistakes. You do not have to worry about skipping slides or clicking too fast. Everything plays in order automatically.
Overall, autoplay makes presentations smoother and easier to follow. It works well for teaching, meetings, or public displays.
Common Mistakes to Avoid When Using Google Slides Auto Transition
Google Slides can move through slides automatically, but mistakes in setup can hurt your presentation. Here’s a guide to common errors and how to fix them.
1. Setting Transitions Too Fast
Slides that change too quickly make it hard for viewers to read content.
Fix: Adjust the timing to match your text and visuals. Give each slide enough time so people can follow along without rushing.
2. Ignoring Embedded Media
Videos or GIFs can stop or delay slides if the timing isn’t right.
Fix: Test each slide with media. Adjust the transition to finish after the video or animation ends.
3. Overloading Slides With Text
Dense slides can become unreadable at normal auto speeds.
Fix: Keep slides short and clear. Break long paragraphs into bullet points or separate slides.
4. Using the Same Transition for Every Slide
Repeating one effect can feel monotonous or distracting.
Fix: Mix subtle transitions. Choose ones that suit the content, not just for decoration.
5. Forgetting Mobile and Tablet Compatibility
Auto transitions may behave differently on smaller screens or devices.
Fix: Preview your presentation on different devices. Make sure text, images, and timing still work well.
6. Not Previewing the Full Presentation
Skipping a full run-through can hide errors like skipped slides or incorrect timing.
Fix: Play the presentation from start to finish before presenting. Check each slide and timing carefully.
7. Overcomplicating Slide Layouts
Busy backgrounds or too many elements can make auto transitions feel chaotic.
Fix: Simplify layouts. Keep text readable and visuals clear. Use white space to guide the eye.
Quick Tip
Always preview your slides, test media, and adjust timing. A smooth, readable flow makes auto transitions effective without confusing your audience.
Real-Life Applications of Looping Google Slides Presentations
Looping a Google Slides presentation means setting it to play continuously without stopping. Once it reaches the last slide, it starts again from the first. This setup keeps your content visible and engaging without manual intervention. Looping is useful in many situations where constant display or repeated messaging is needed.
1. Trade Shows and Exhibitions
• Highlight products or services on a continuous loop so visitors can see key points anytime.
• Rotate visuals and key statistics to attract attention without requiring a presenter.
• Include short animations or videos to make the display more dynamic.
2. Office Lobbies and Waiting Areas
• Show company updates, upcoming events, or employee achievements.
• Rotate welcome messages for clients or visitors.
• Combine visuals and text to maintain engagement over long periods.
3. Educational Settings
• Loop lecture slides for students reviewing concepts in a classroom or library.
• Display step-by-step instructions or important announcements.
• Include short quizzes or reminders to reinforce learning in repeated cycles.
4. Conferences and Meetings
• Share agenda items or speaker information on large screens.
• Rotate highlights of past sessions or project updates while attendees enter or exit.
• Use timed loops to ensure every slide is visible for the intended period.
5. Digital Signage and Online Displays
• Embed slides on websites or kiosks for continuous brand messaging.
• Rotate promotions, special offers, or news items for online or in-person audiences.
• Adjust timing so each slide has enough exposure without overwhelming viewers.
Closing Tip
Set slide timings carefully to match the content. Keep visuals clear and text concise. Check transitions, video playback, and device compatibility before presenting. This ensures a smooth and professional loop that works across laptops, projectors, and monitors.
Save Time with SlideStack
SlideStack offers ready-to-use Google Slides templates that already include autoplay and video-ready slides. Their team can customize presentations to match your style, saving you hours of setup. You get polished, professional slides without the hassle.
Ready to upgrade your slides? Schedule a call with SlideStack or hire their team for end-to-end presentation design support. Your next presentation can look professional and run smoothly with just a few clicks.
Final Words
With Google Slides set to play automatically, your presentations run smoothly without constant clicks. This keeps the audience focused and makes your message clear. You can use autoplay for classrooms, meetings, events, or display screens, saving time and reducing mistakes.
By following the steps in this guide, you can choose the method that works best for you, adjust slide timing, loop your slides, and handle common issues. Automatic playback ensures your slides move in order, letting you focus on speaking or interacting with your audience.
Autoplay transforms your slide deck into a hands-free, professional presentation that flows naturally and keeps viewers engaged from start to finish.
FAQs:
1. What does automatic playback do in Google Slides?
It lets slides move on their own without clicking. You set a timer for each slide, and the presentation runs automatically.
2. How do I set slides to advance automatically?
You can use either the “Publish to the web” option or the slide transition settings. Both let you pick the time for each slide and start auto-play.
3. Can I loop my slides so they play continuously?
Yes. You can enable looping in the publishing settings or presentation options. The slides will repeat until you stop them manually.
4. Do all slides need the same timing?
No. You can set different times for each slide. Longer slides with more text may need extra seconds, while simple slides can move faster.
5. What if my slides don’t advance automatically?
Check your transition settings. Make sure each slide is set to advance after a time, not “On Click.” Also, animations or copied slides may override timing.
6. Can automatic playback work with videos or animations?
Yes, but some devices may not support all media types. Test your presentation and use common formats for videos and audio.
7. Who benefits from automatic slideshows?
They work well for kiosks, trade shows, online presentations, and events where you want slides to play without a live speaker.


You may also be interested in ...

How To Create An Eye-Catching Portfolio
If you’re looking to create an eye-catching portfolio, this post will come in handy. In this article, you can find the easies...
23 Jun, 2024

How To Easily Create An Infographic
Infographics are the perfect way to make a presentation that will impact an audience, but their design and composition might...
08 Jun, 2024

PowerPoint Template Tips & Tricks You Ne...
PowerPoint seems to be an unknown world for many people, especially those who have been assigned to create a presentation out...
08 Jun, 2024