How to Add Header and Footer in Google Slides Step by Step
Making your Google Slides presentation look polished can feel tricky, especially when small details like headers and footers are missing. These elements may seem minor, but they can change how your slides are perceived. Headers and footers help organize content, give context, and show branding consistently across your presentation. They guide your audience and make navigation easier while keeping your slides professional. If you’ve ever wondered how to add these features without messing up your slides, you’re in the right place. In this step-by-step guide, you’ll learn how to insert headers and footers in single or multiple slides, making your presentations cleaner and more organized in just a few clicks.
What are Header and Footer?
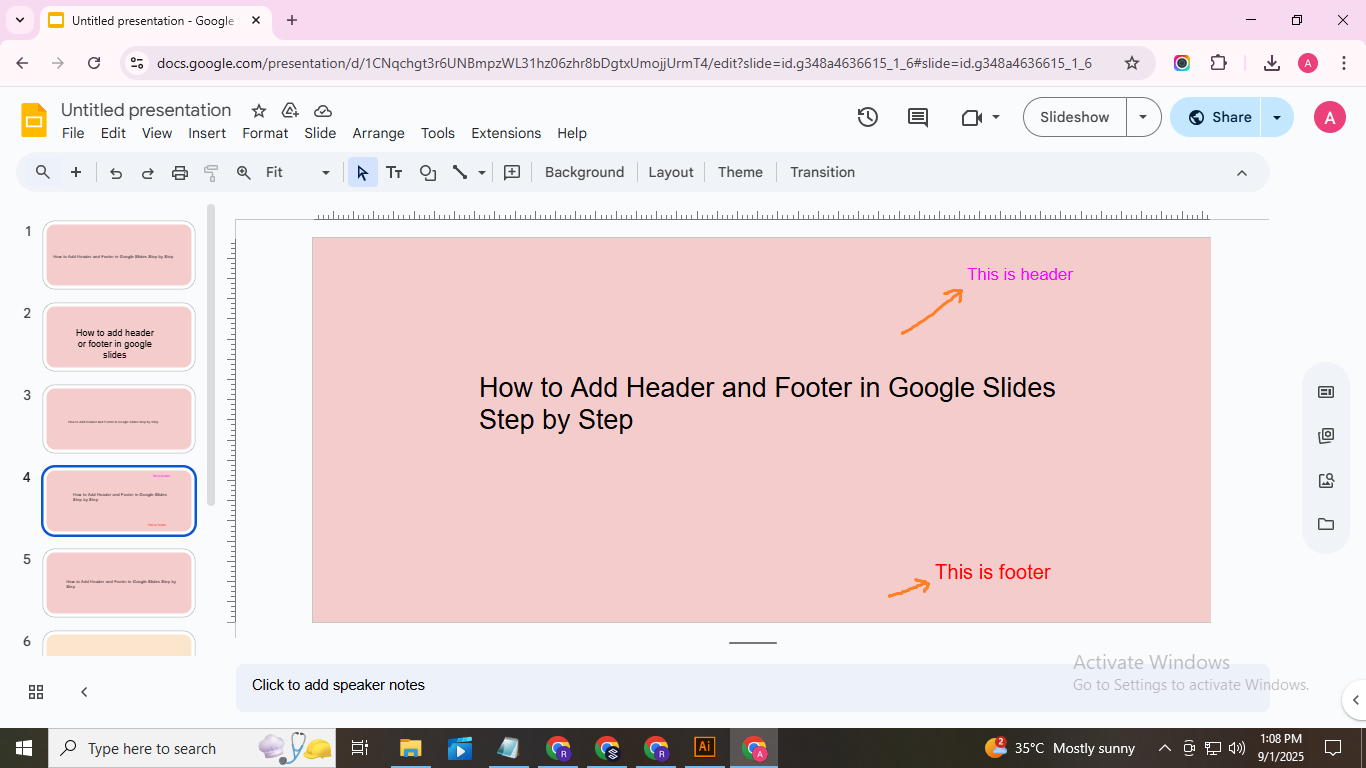
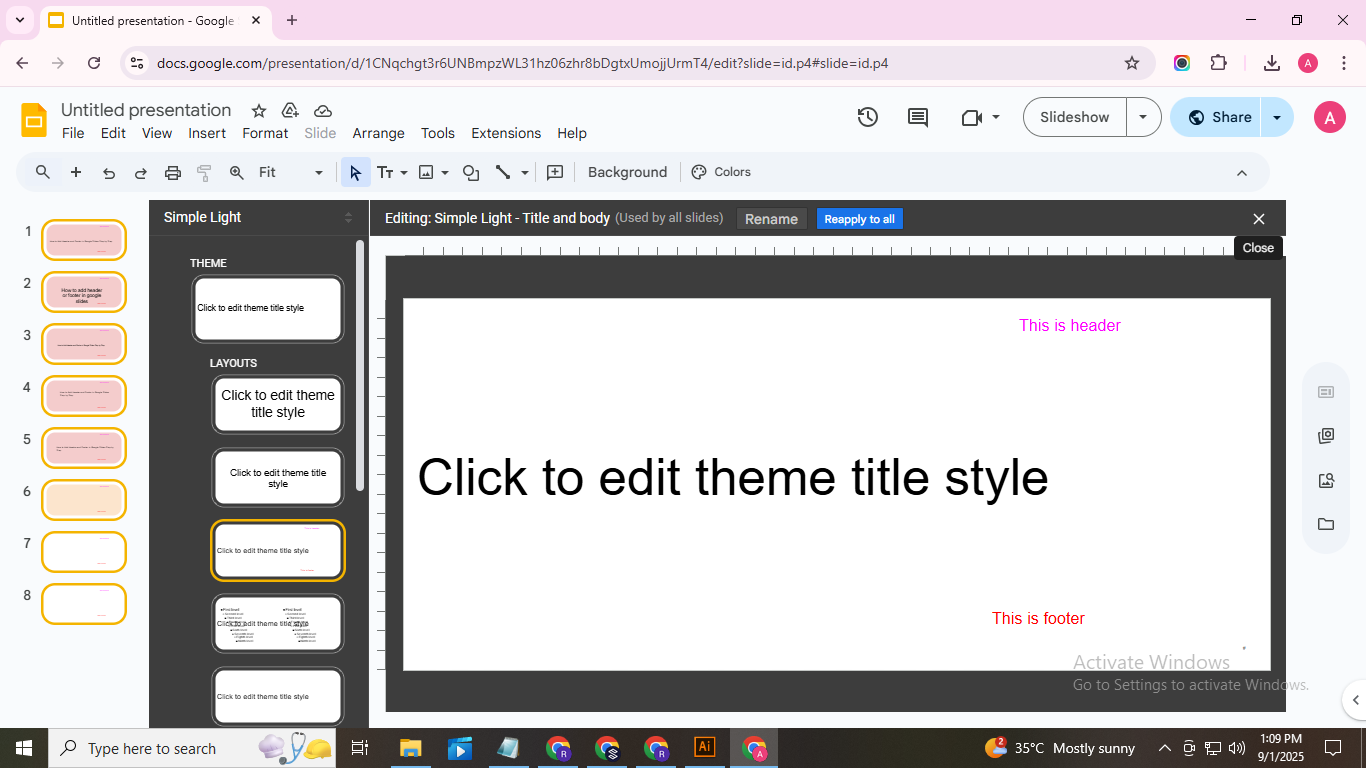
A header is the top section of a slide or document. It often shows titles, page numbers, or dates. This helps the reader quickly know what the content is about.
A footer is the bottom section. It usually contains notes, copyright information, or slide numbers. Footers keep important details visible without crowding the main content.
Both headers and footers stay consistent across slides. They make presentations look organized. Readers can easily follow along without losing context.
Using headers and footers correctly saves time. You don’t need to add repeated information on every slide. They also make documents and slides appear professional and polished.
Why is it useful to add a header and a footer in presentations?
Adding a header and footer in presentations keeps your slides organized and easy to follow. They help show key details like titles, dates, or page numbers. Keep reading to see the main reasons why including them makes your slides more effective.
Professionalism
Headers and footers make your slides look professional. Adding your company logo, presentation title, and other key details creates a polished, cohesive look. They also keep branding consistent by using the same logo, colors, and fonts on every slide, making your presentation feel unified and organized from start to finish.
Context and branding
Headers and footers give your presentation context and branding by including logos, company info, or relevant details. Using them consistently also sets a tone and style, making your slides look cohesive, polished, and easy to follow from start to finish.
Navigation
Footers with page numbers improve navigation in your presentation. They help the audience follow along and allow you to reference specific slides easily. Footers also provide quick access to important slides, so you can point to key content without scrolling through the entire presentation.
Printing and sharing
Headers and footers are useful when printing or sharing slides with others. They provide important context and support branding for a wider audience. Using them also keeps a consistent design across all slides, making presentations look more professional and polished.
Customization
Headers and footers in Google Slides can be fully customized. You can choose what information to include and how it looks, giving your presentation a clean, organized appearance. You can apply these settings to all slides at once or adjust them for individual slides, giving you flexibility and control over every part of your presentation.
How to Add a Header and Footer in an individual slide in Google Slides?
Adding a header and footer in Google Slides helps keep your presentation organized. Unlike PowerPoint,
Google Slides does not automatically update these across all slides. You can add them manually, giving you control over text, style, and placement.
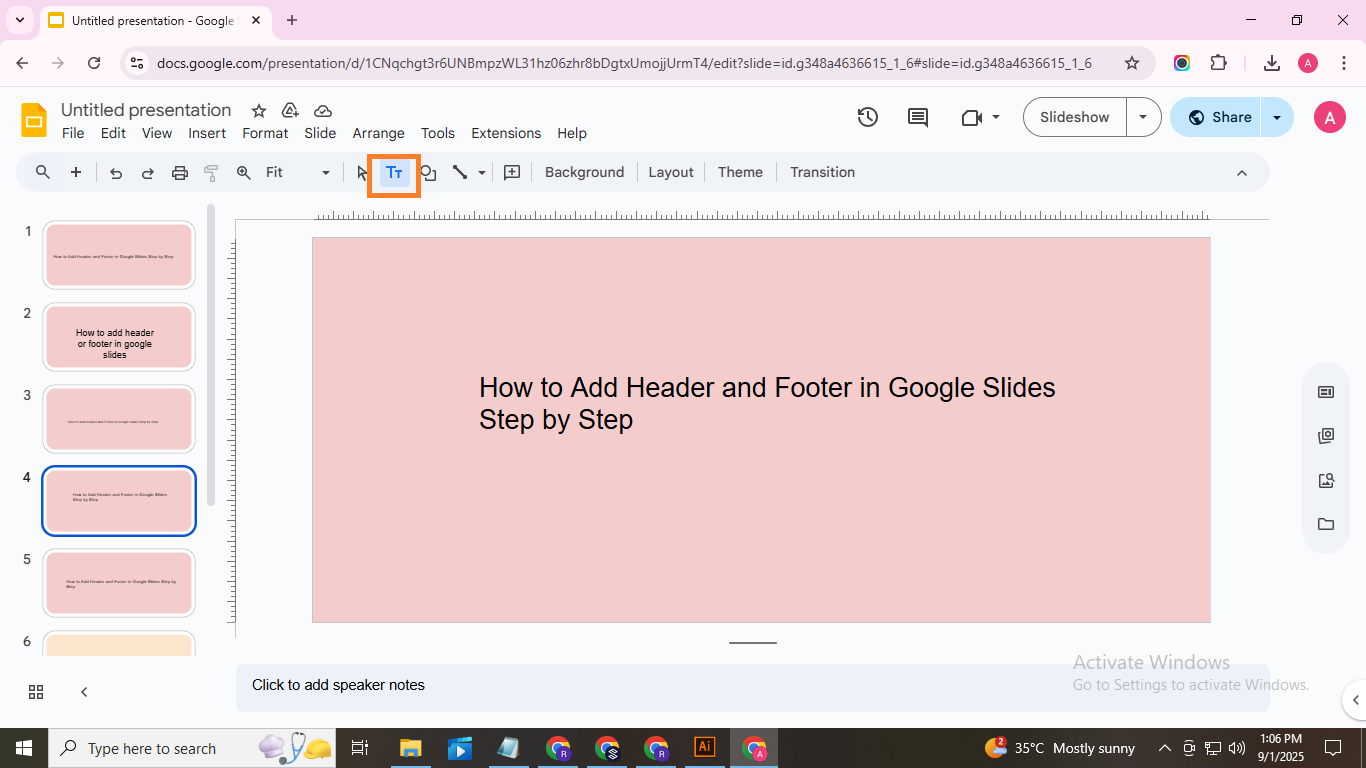
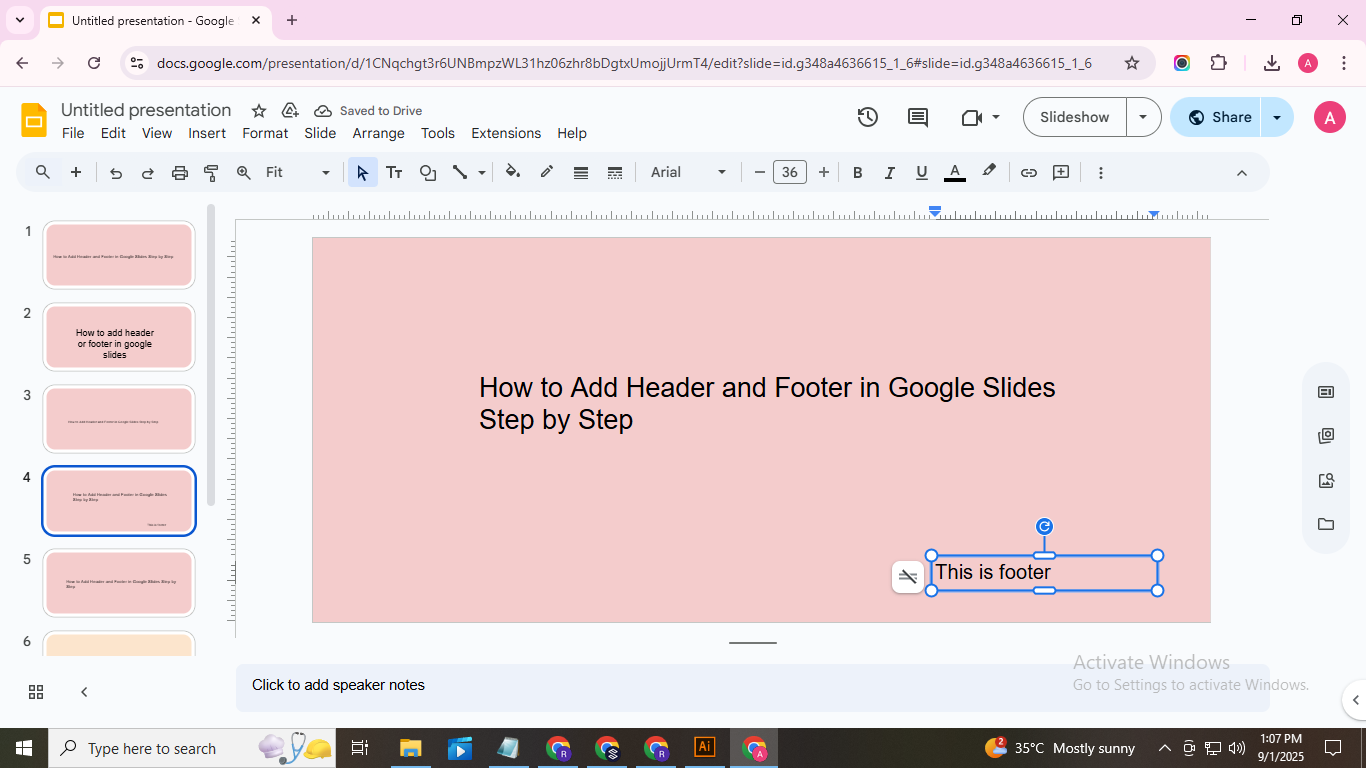
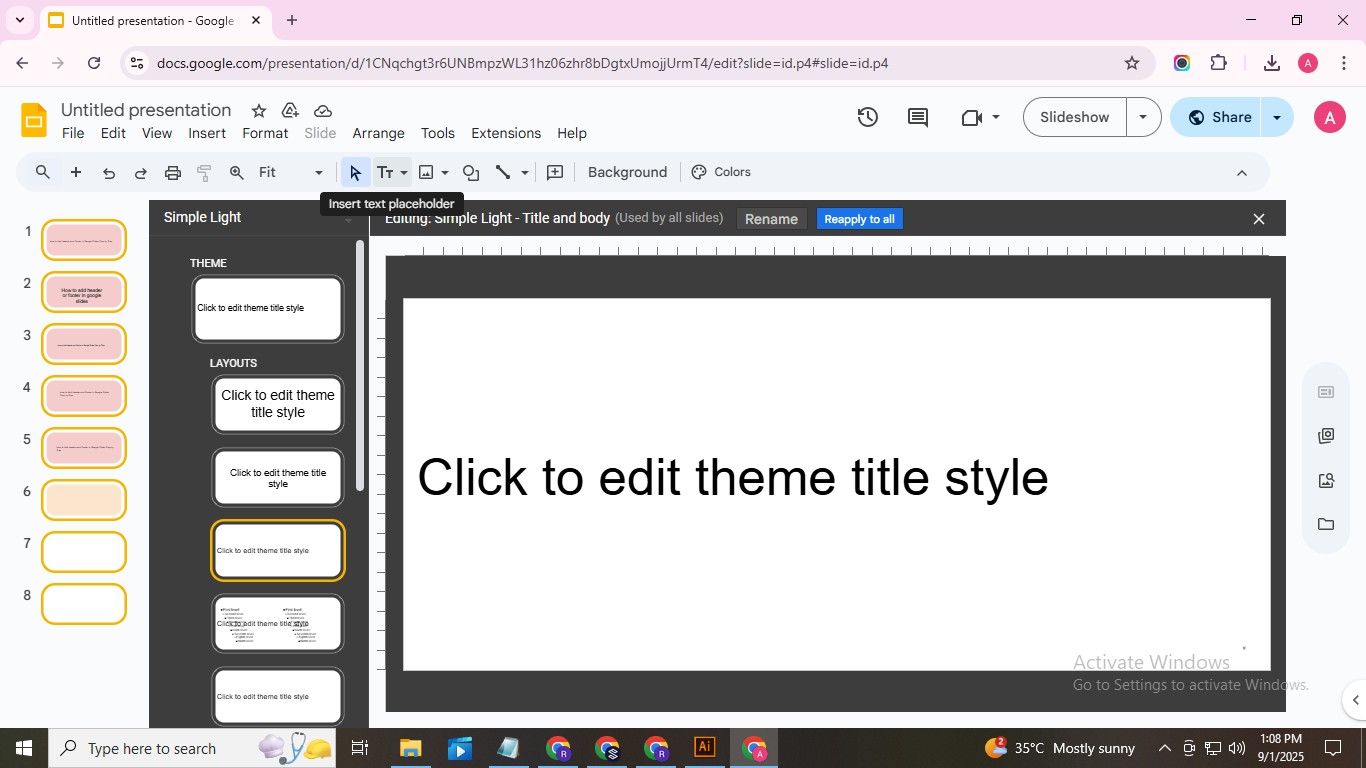
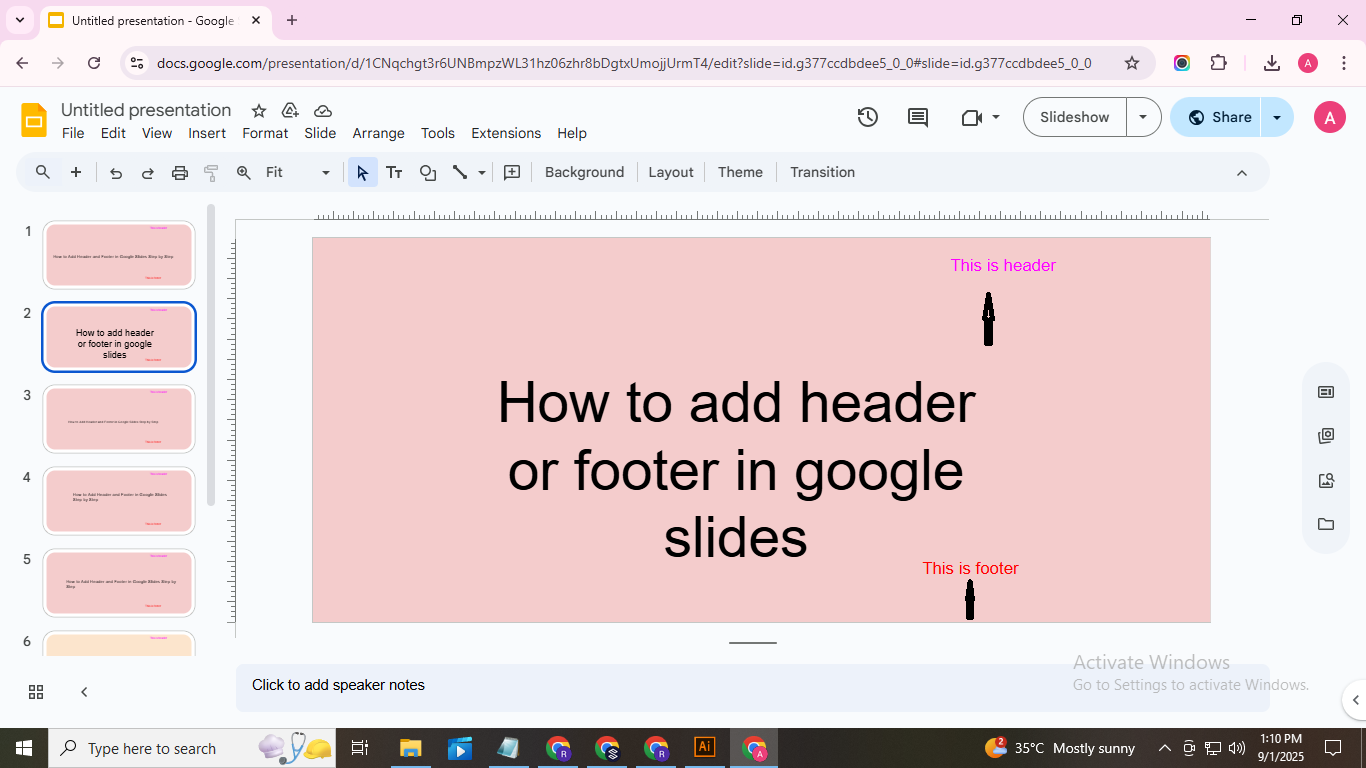
Step 1: Open your Google Slides presentation. Click “Insert” in the top menu to add text boxes.
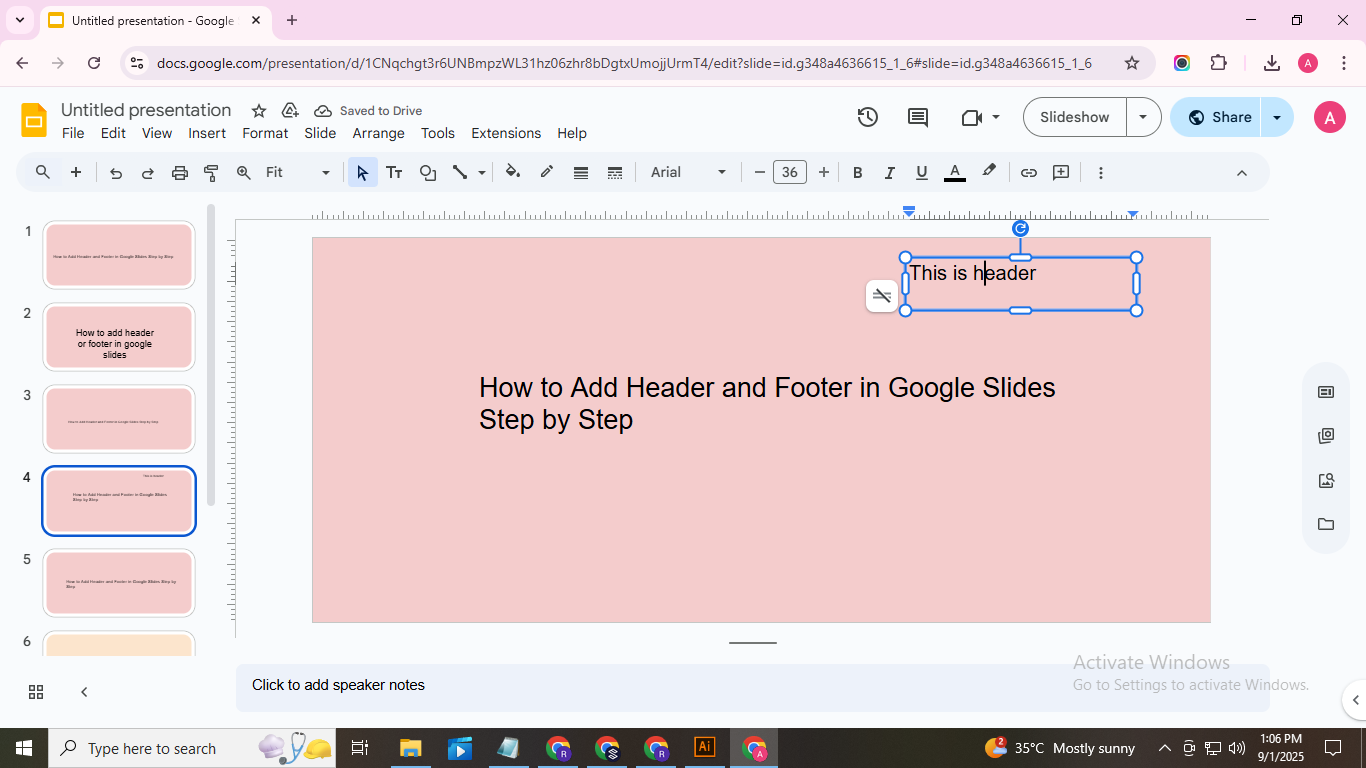
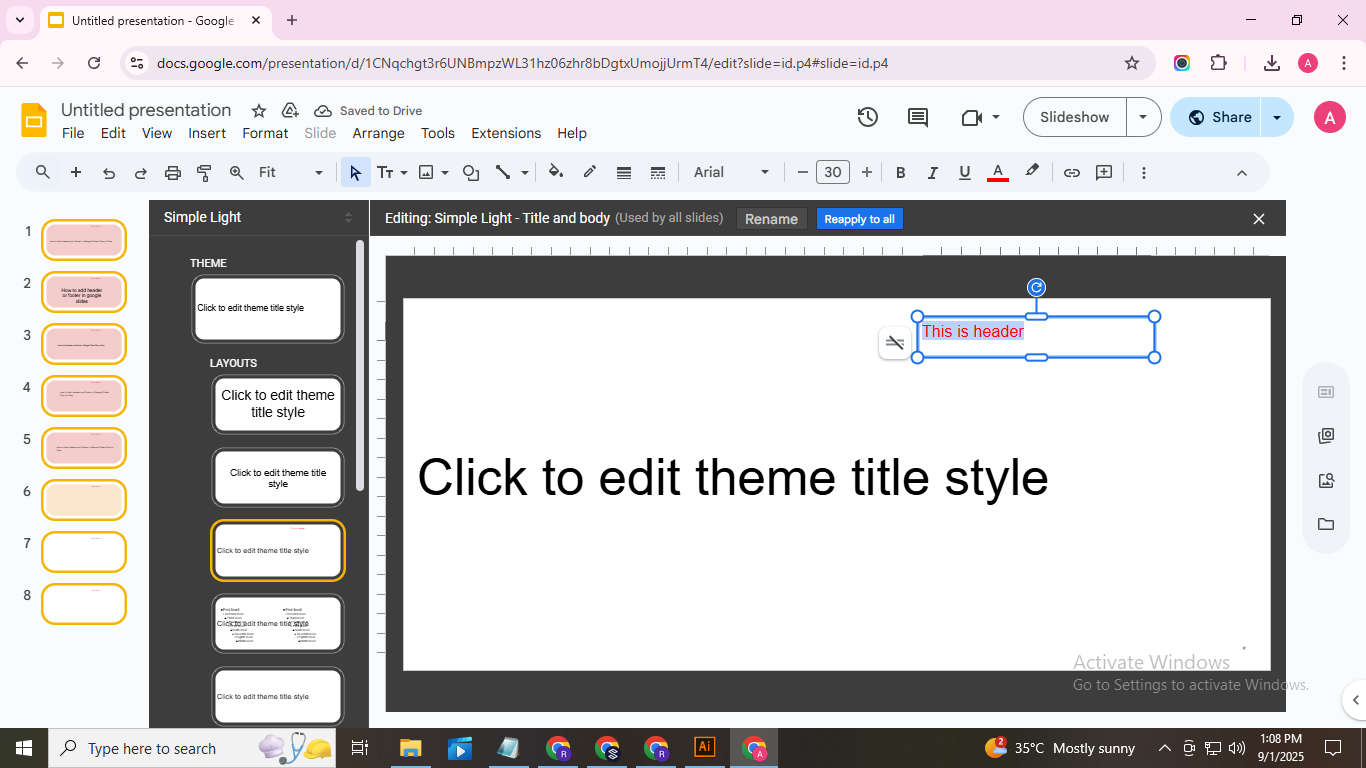
Step 2: Type your header or footer text in the box. Repeat on each slide as needed for consistency.

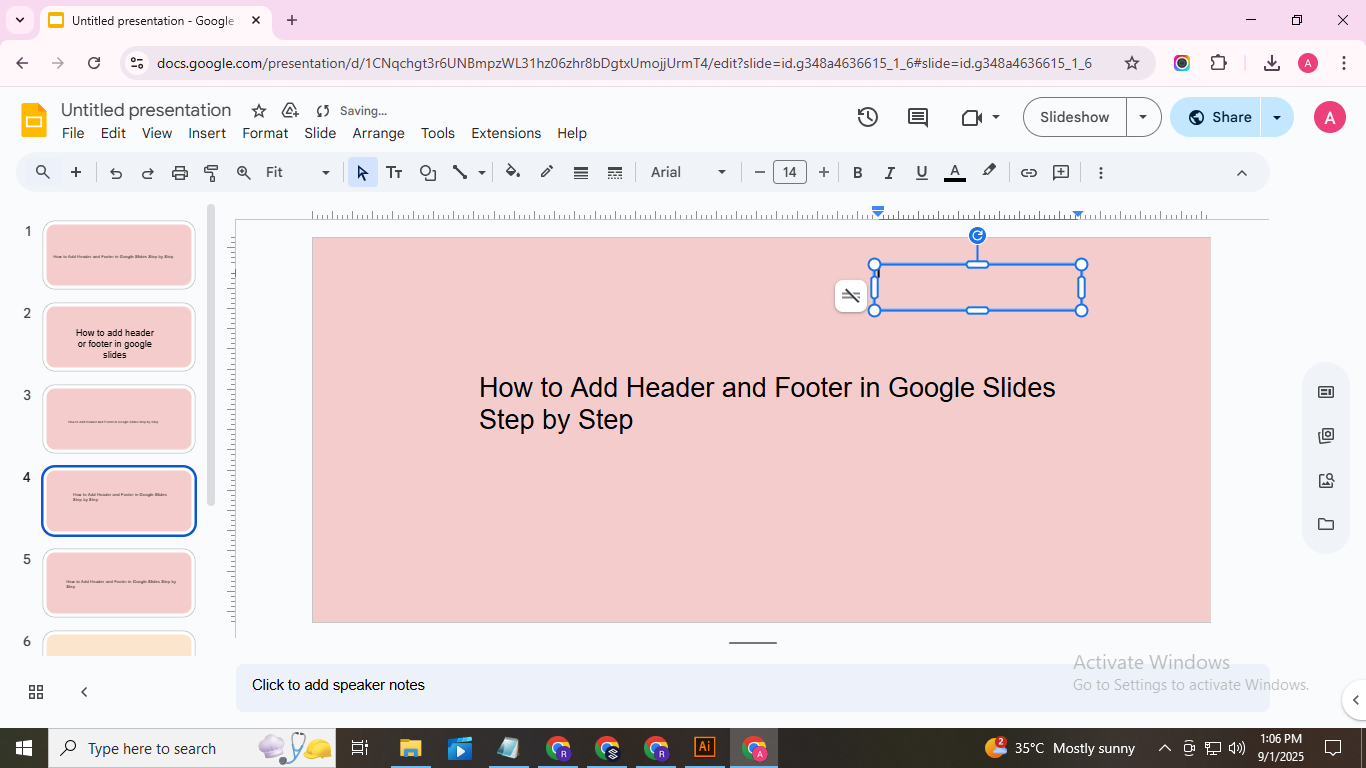
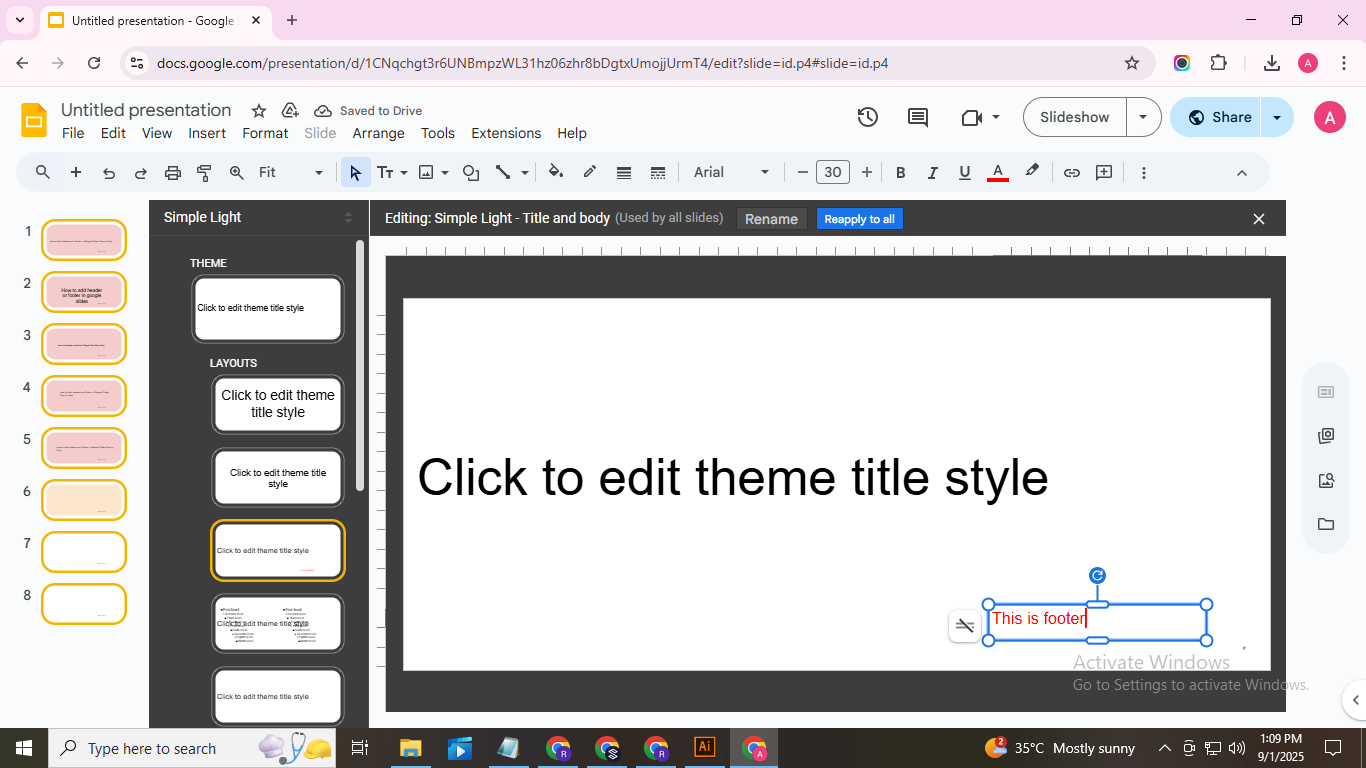
Step 3: Adjust placement so text appears correctly on all slides.
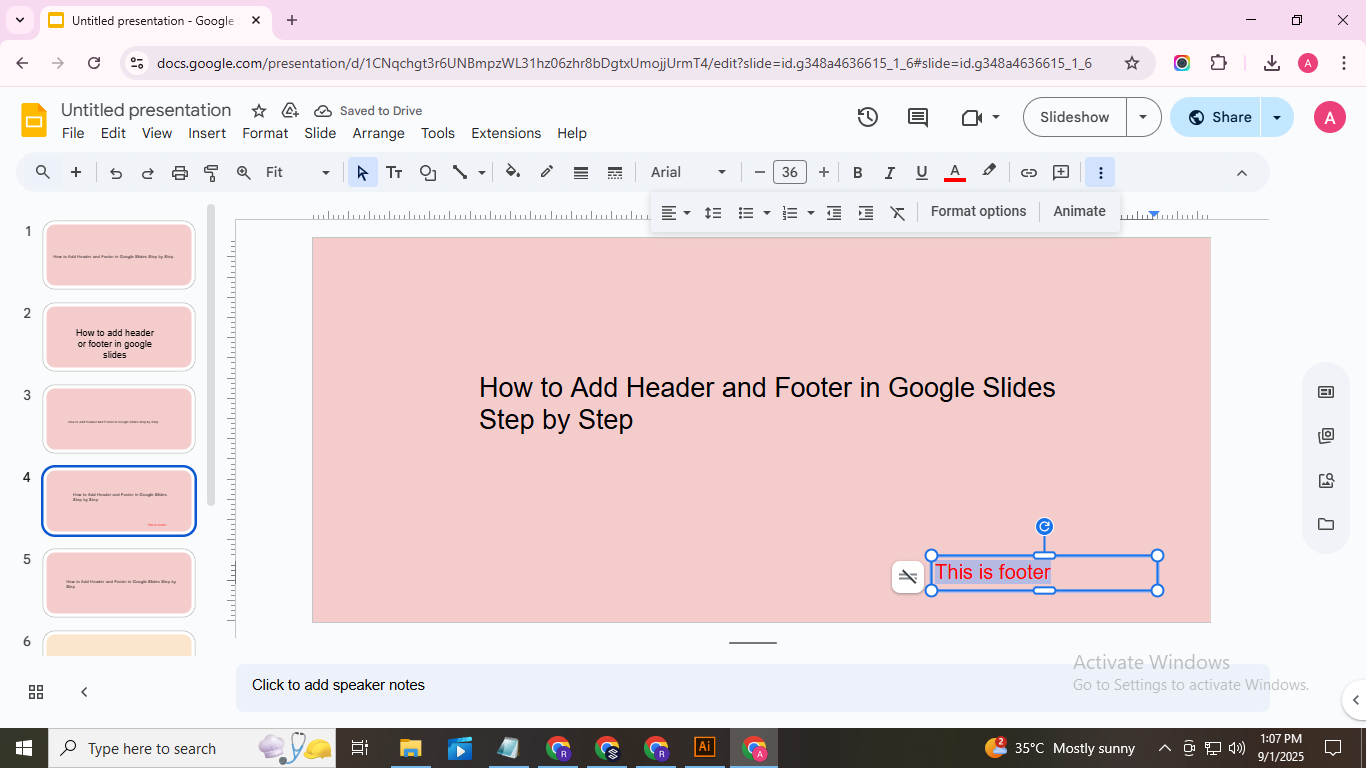
Step 4: Customize font, size, color, and alignment to match your presentation style.
How to Add a Header and Footer in Multiple Slides in Google Slides?
Adding headers and footers to your slides helps keep your presentation organized and consistent. You can display information like slide numbers, dates, or titles across multiple slides. For this to work, all slides should share the same layout master.
Step 1: Open your Google Slides presentation. Select the slide where you want to start adding headers and footers.
Step 2: Click on the “Insert” menu at the top of the screen. Choose “Header & Footer” from the dropdown.
Step 3: In the pop-up window, select the elements you want to include, such as “Date and time,” “Slide number,” or “Footer.”
Step 4: Enter your footer text in the provided box. This could be your presentation title or company name.
Step 5: Check the box that says “Apply to all” if you want these elements on every slide.
Step 6: Click “Apply” to add the header and footer to the selected slide, or “Apply to all” to add them to all slides at once.
Step 7: Review your slides to make sure the header and footer appear correctly. Adjust text if needed.
Step 8: Once finished, all selected slides will display the header and footer consistently, helping your presentation look organized.
Conclusion:
Adding a header and footer in Google Slides is a simple step that makes your presentation look organized and professional. By including titles, dates, or page numbers, your audience can follow your content more easily. These small details also help maintain consistency across all slides. Take a few minutes to add headers and footers, and your presentations will feel clearer, more structured, and easier to navigate.
FAQs:
How can I remove page numbers from my presentation in Google Slides?
Go to the Insert menu and select Slide numbers. Uncheck the box next to Apply to all slides or the individual slides you want to remove numbers from. Click Apply, and the page numbers will be gone.
Can I customize my header in Google Slides?
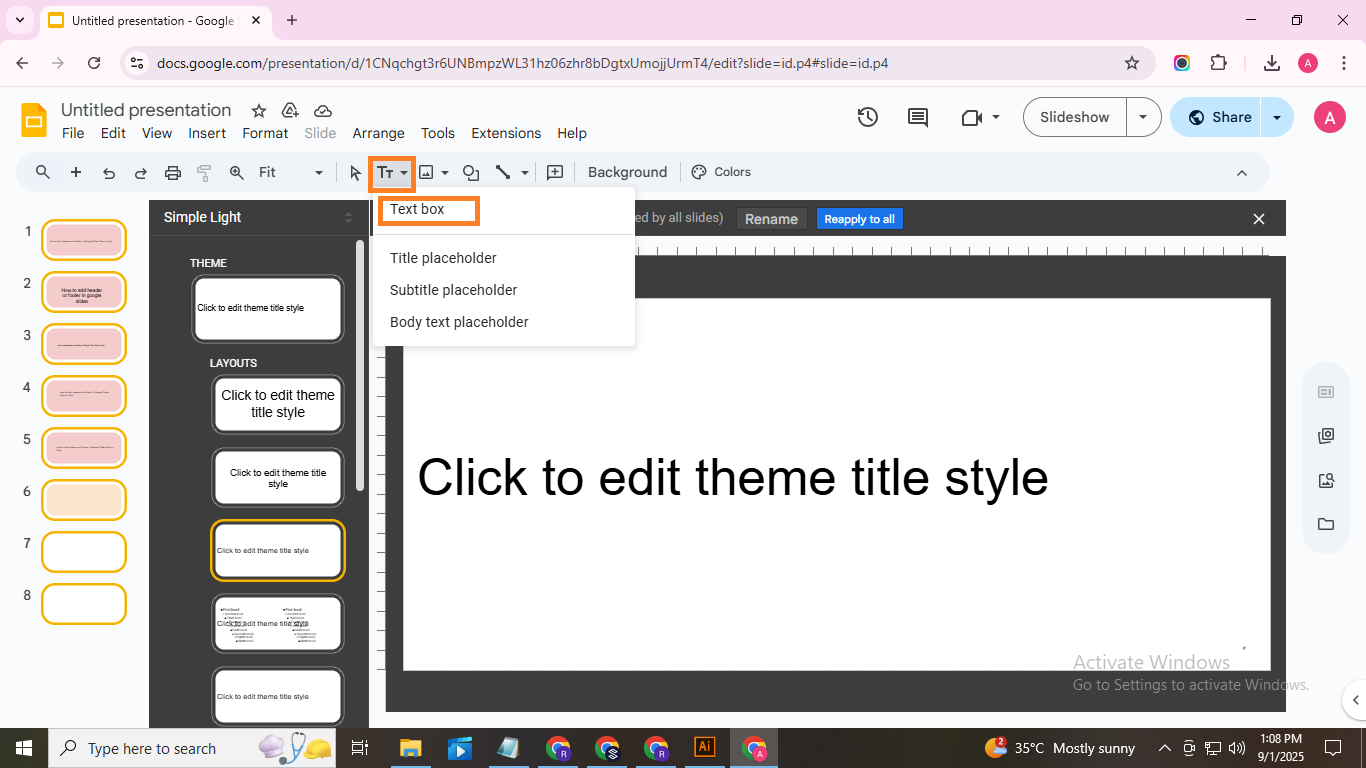
Yes, you can. Use Insert → Text box to add your own header text on any slide. You can change the font, size, color, and position to match your style.
Can I insert a company logo as my header in Google Slides?
Yes. Go to Insert → Image → Upload from computer (or other options) to add your logo. Place it where a header would go, and resize it so it fits nicely on each slide.


You may also be interested in ...

How To Create An Eye-Catching Portfolio
If you’re looking to create an eye-catching portfolio, this post will come in handy. In this article, you can find the easies...
23 Jun, 2024

How To Easily Create An Infographic
Infographics are the perfect way to make a presentation that will impact an audience, but their design and composition might...
08 Jun, 2024

PowerPoint Template Tips & Tricks You Ne...
PowerPoint seems to be an unknown world for many people, especially those who have been assigned to create a presentation out...
08 Jun, 2024